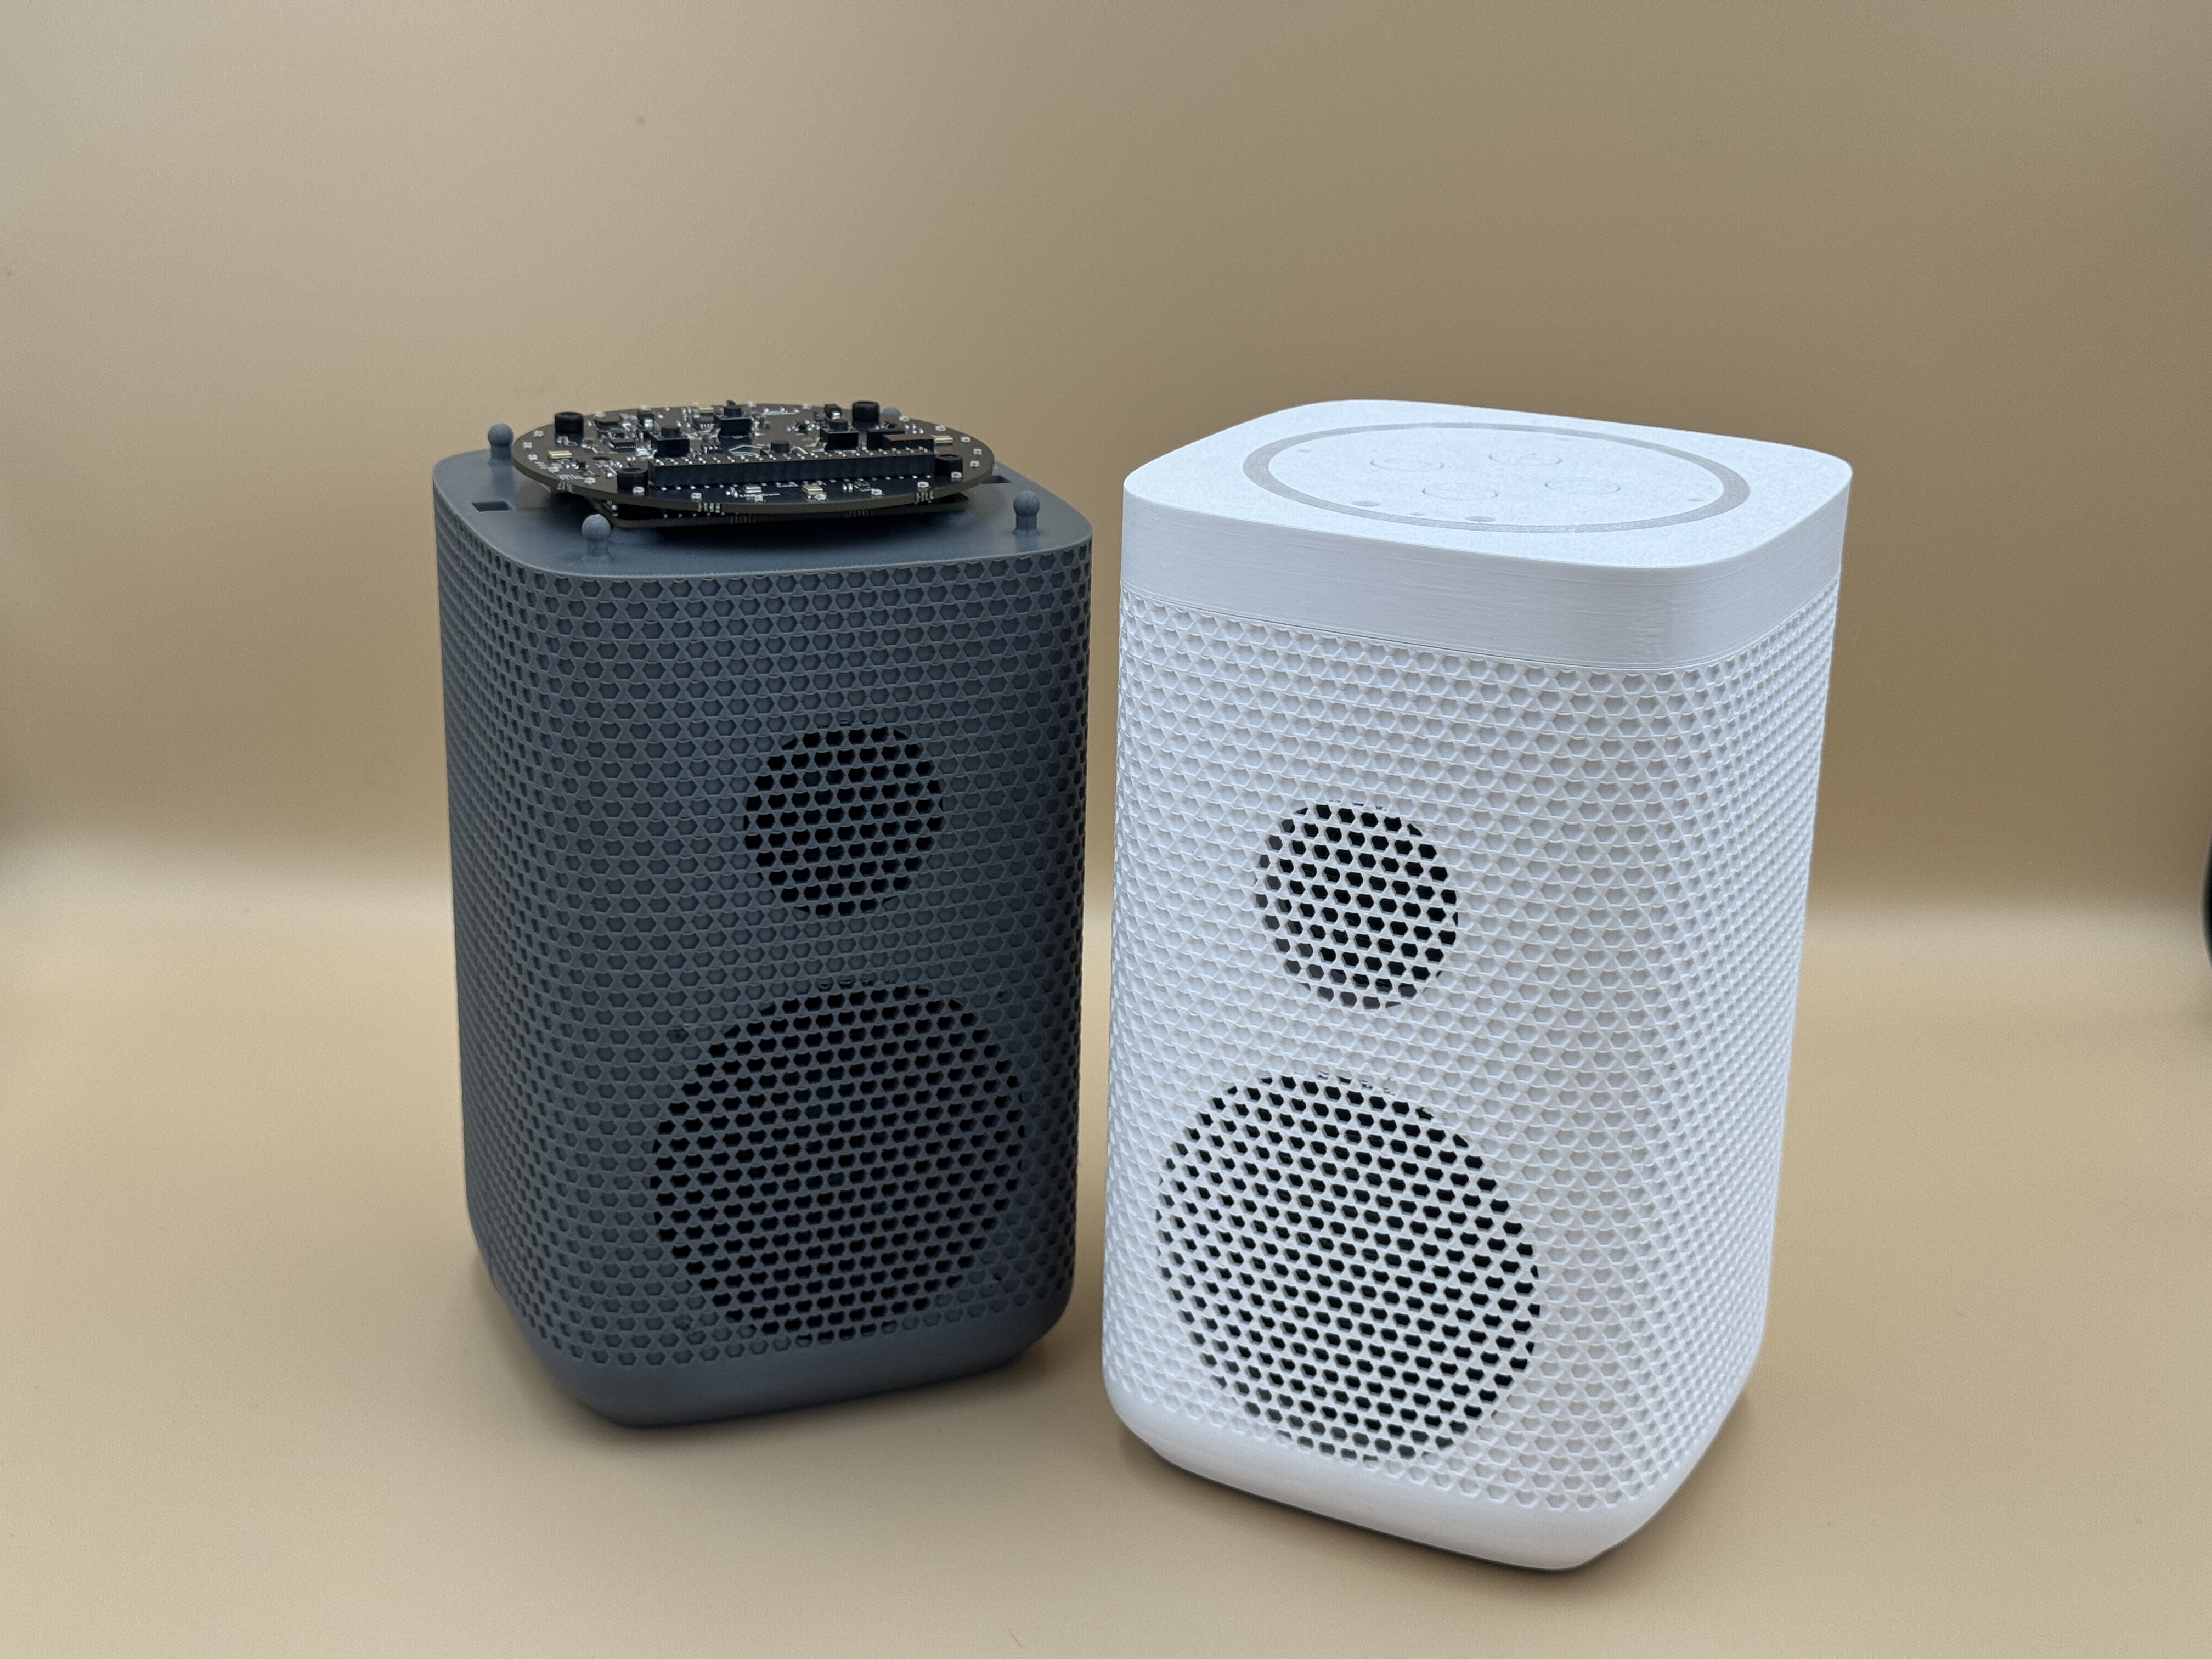
Smart Speaker Enclosure Kit
The Satellite1 Smart Speaker Enclosure Kit is a complete kit that includes all the parts necessary to upgrade your existing Satellite1 Dev Kit into a two-way smart speaker. This guide explains how to assemble the kit and even print the enclosure at home.
Parts Included in Kit
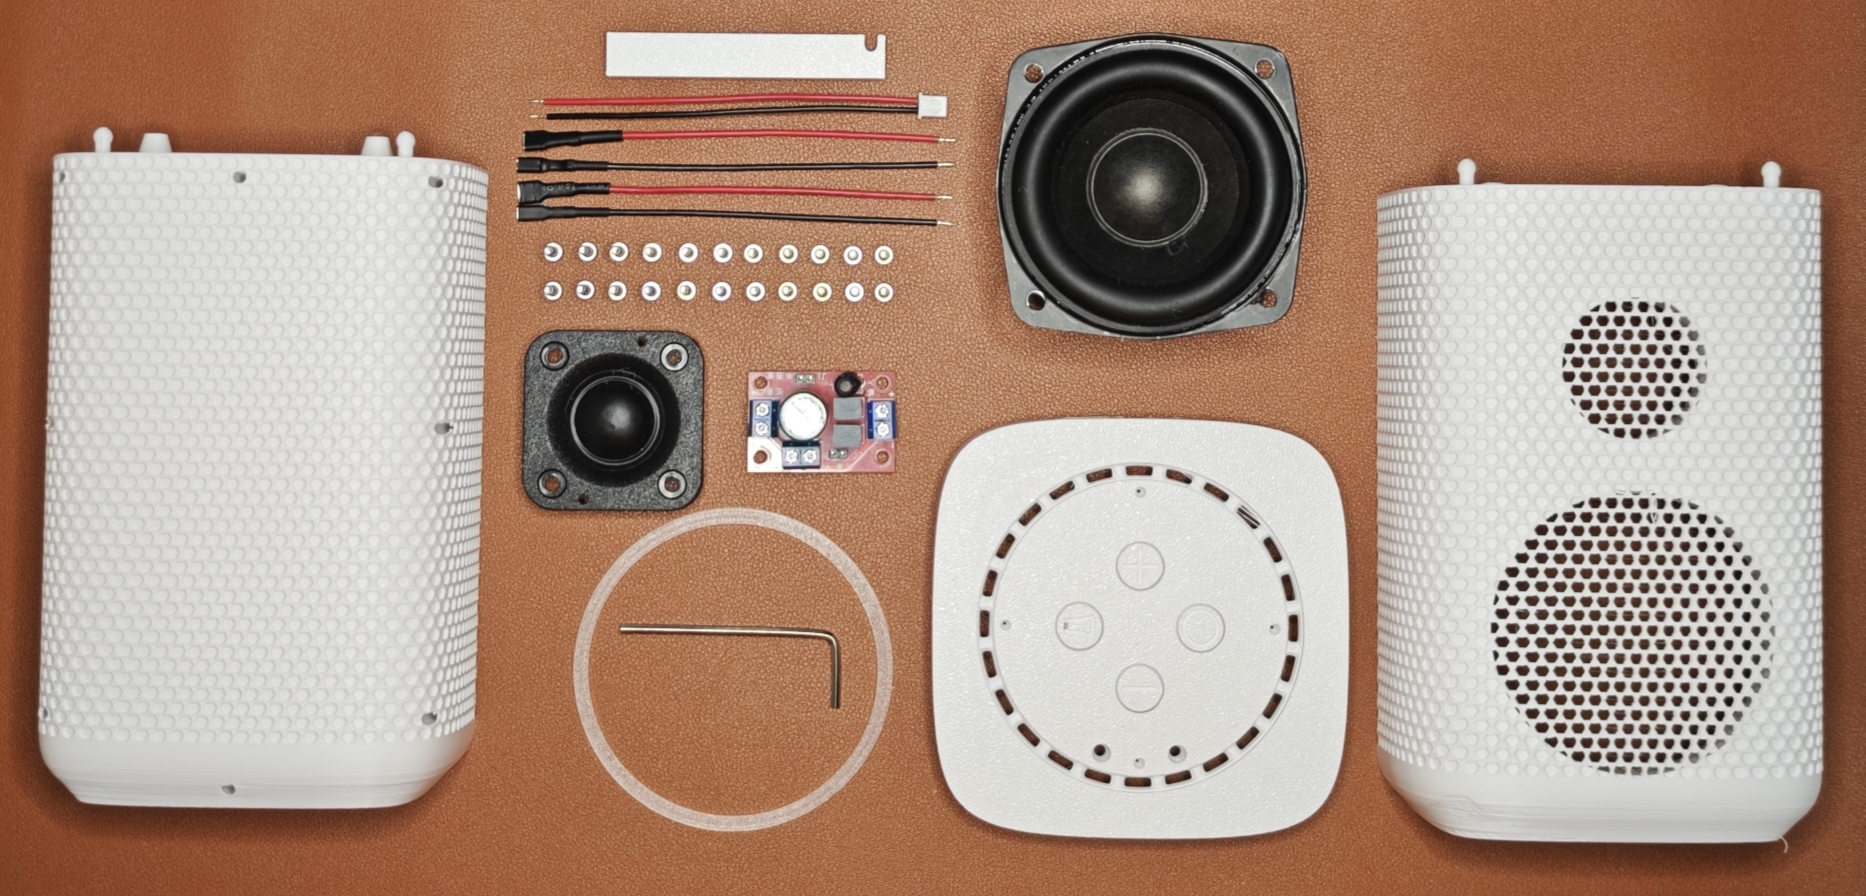
- 3D printed speaker enclosure
- Front & back chamber piece (PETG 30% infill)
- Top plate, LED diffuser & screw-guide tool (PETG 15% infill)
- 3" Full-range, bass heavy woofer (15W RMS, 20W Peak @ 4Ω)
- 1.2" Neodymium dome tweeter (15W RMS, 20W Peak @ 4Ω)
- 2-Way passive crossover
- JST-XH cable
- 2 pcs red 5.3mm speaker cables
- 2 pcs black 2.8mm speaker cables
- 1.3M Adhesive sealing foam
- 24 pcs M3 x 10mm mounting screws
- Long-handle Hex wrench
Household Tools Required
- Scissors
- Small phillips head screwdriver
- Needle nose pliers
Dev Kit + Enclosure Limitations
Dev Kits are designed for use on your electronics bench, but this enclosure kit pushes the dev kit to its full potential, though a few limitations apply.
- Use the firmware’s temperature & humidity offsets for the most accurate sensor readings.
- The enclosure does not yet support top-mounted mmWave connectors or the luminosity sensor.
- At full volume, the wake word may not be heard perfectly. Still the wake word should respond if the enclosure is airtight and not on a vibrating structure.
- Future expansion boards connecting to the hat's FX23L connectors aren’t supported with this enclosure design.
Watch the Instructional Video
Important Correction to Video Tutorial
The crossover is incorrectly oriented in the video. Rotate it 180° before installing. Follow photos and documentation below.
Assemble the Kit
-
Remove Speaker Hole Tab
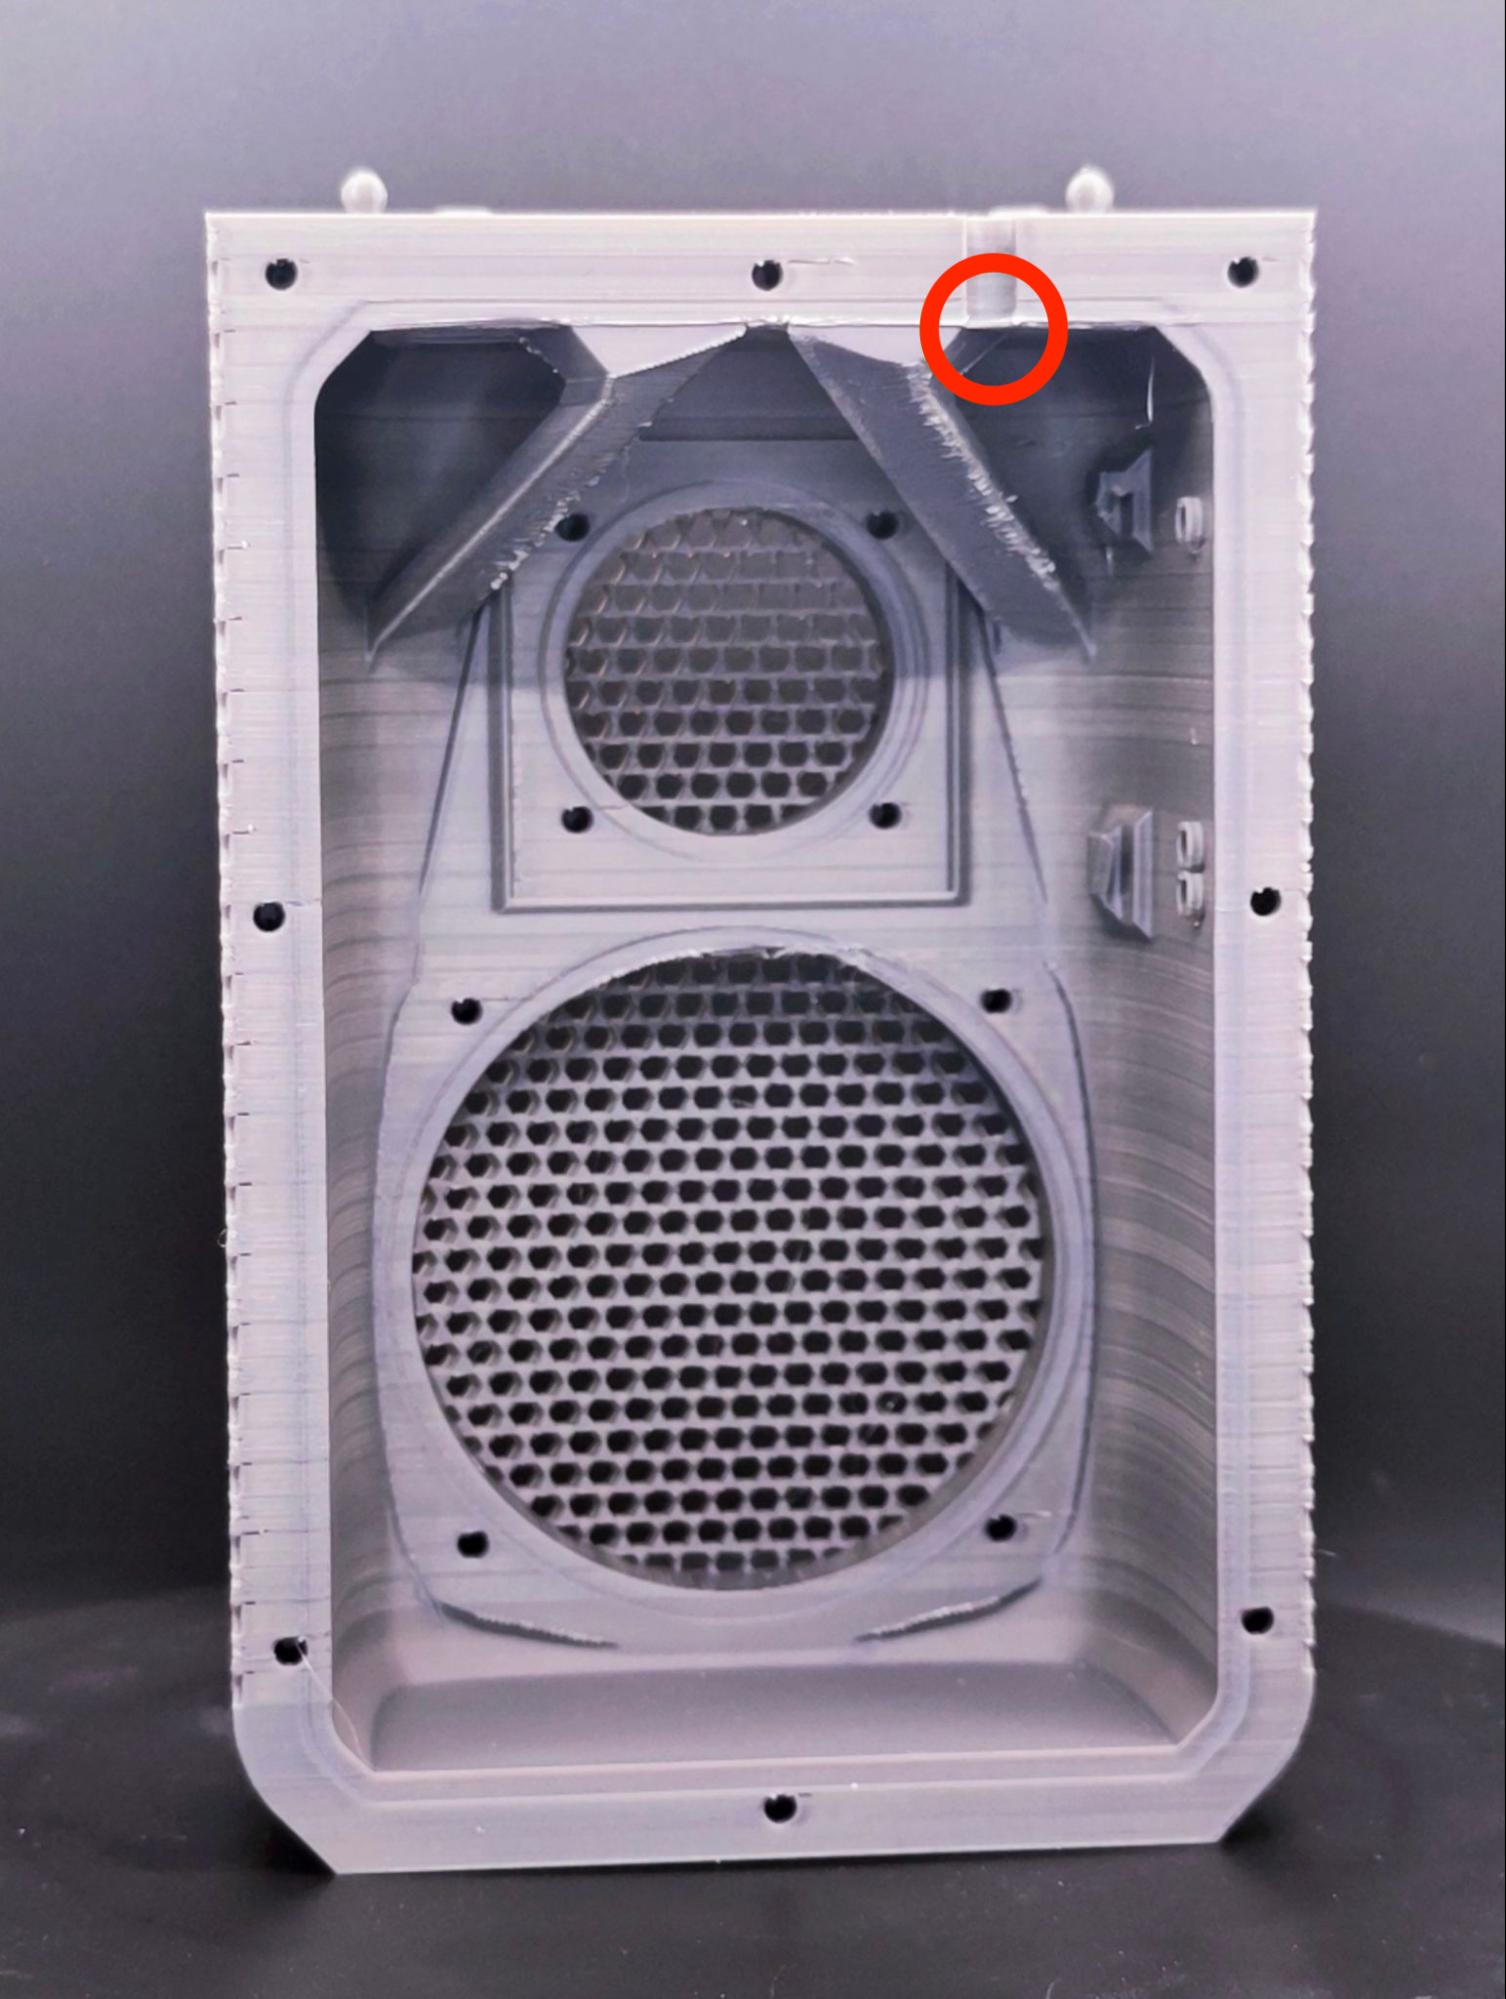 Remove the speaker hole tab with a pair of pliers.
 -
Apply Sealing Foam
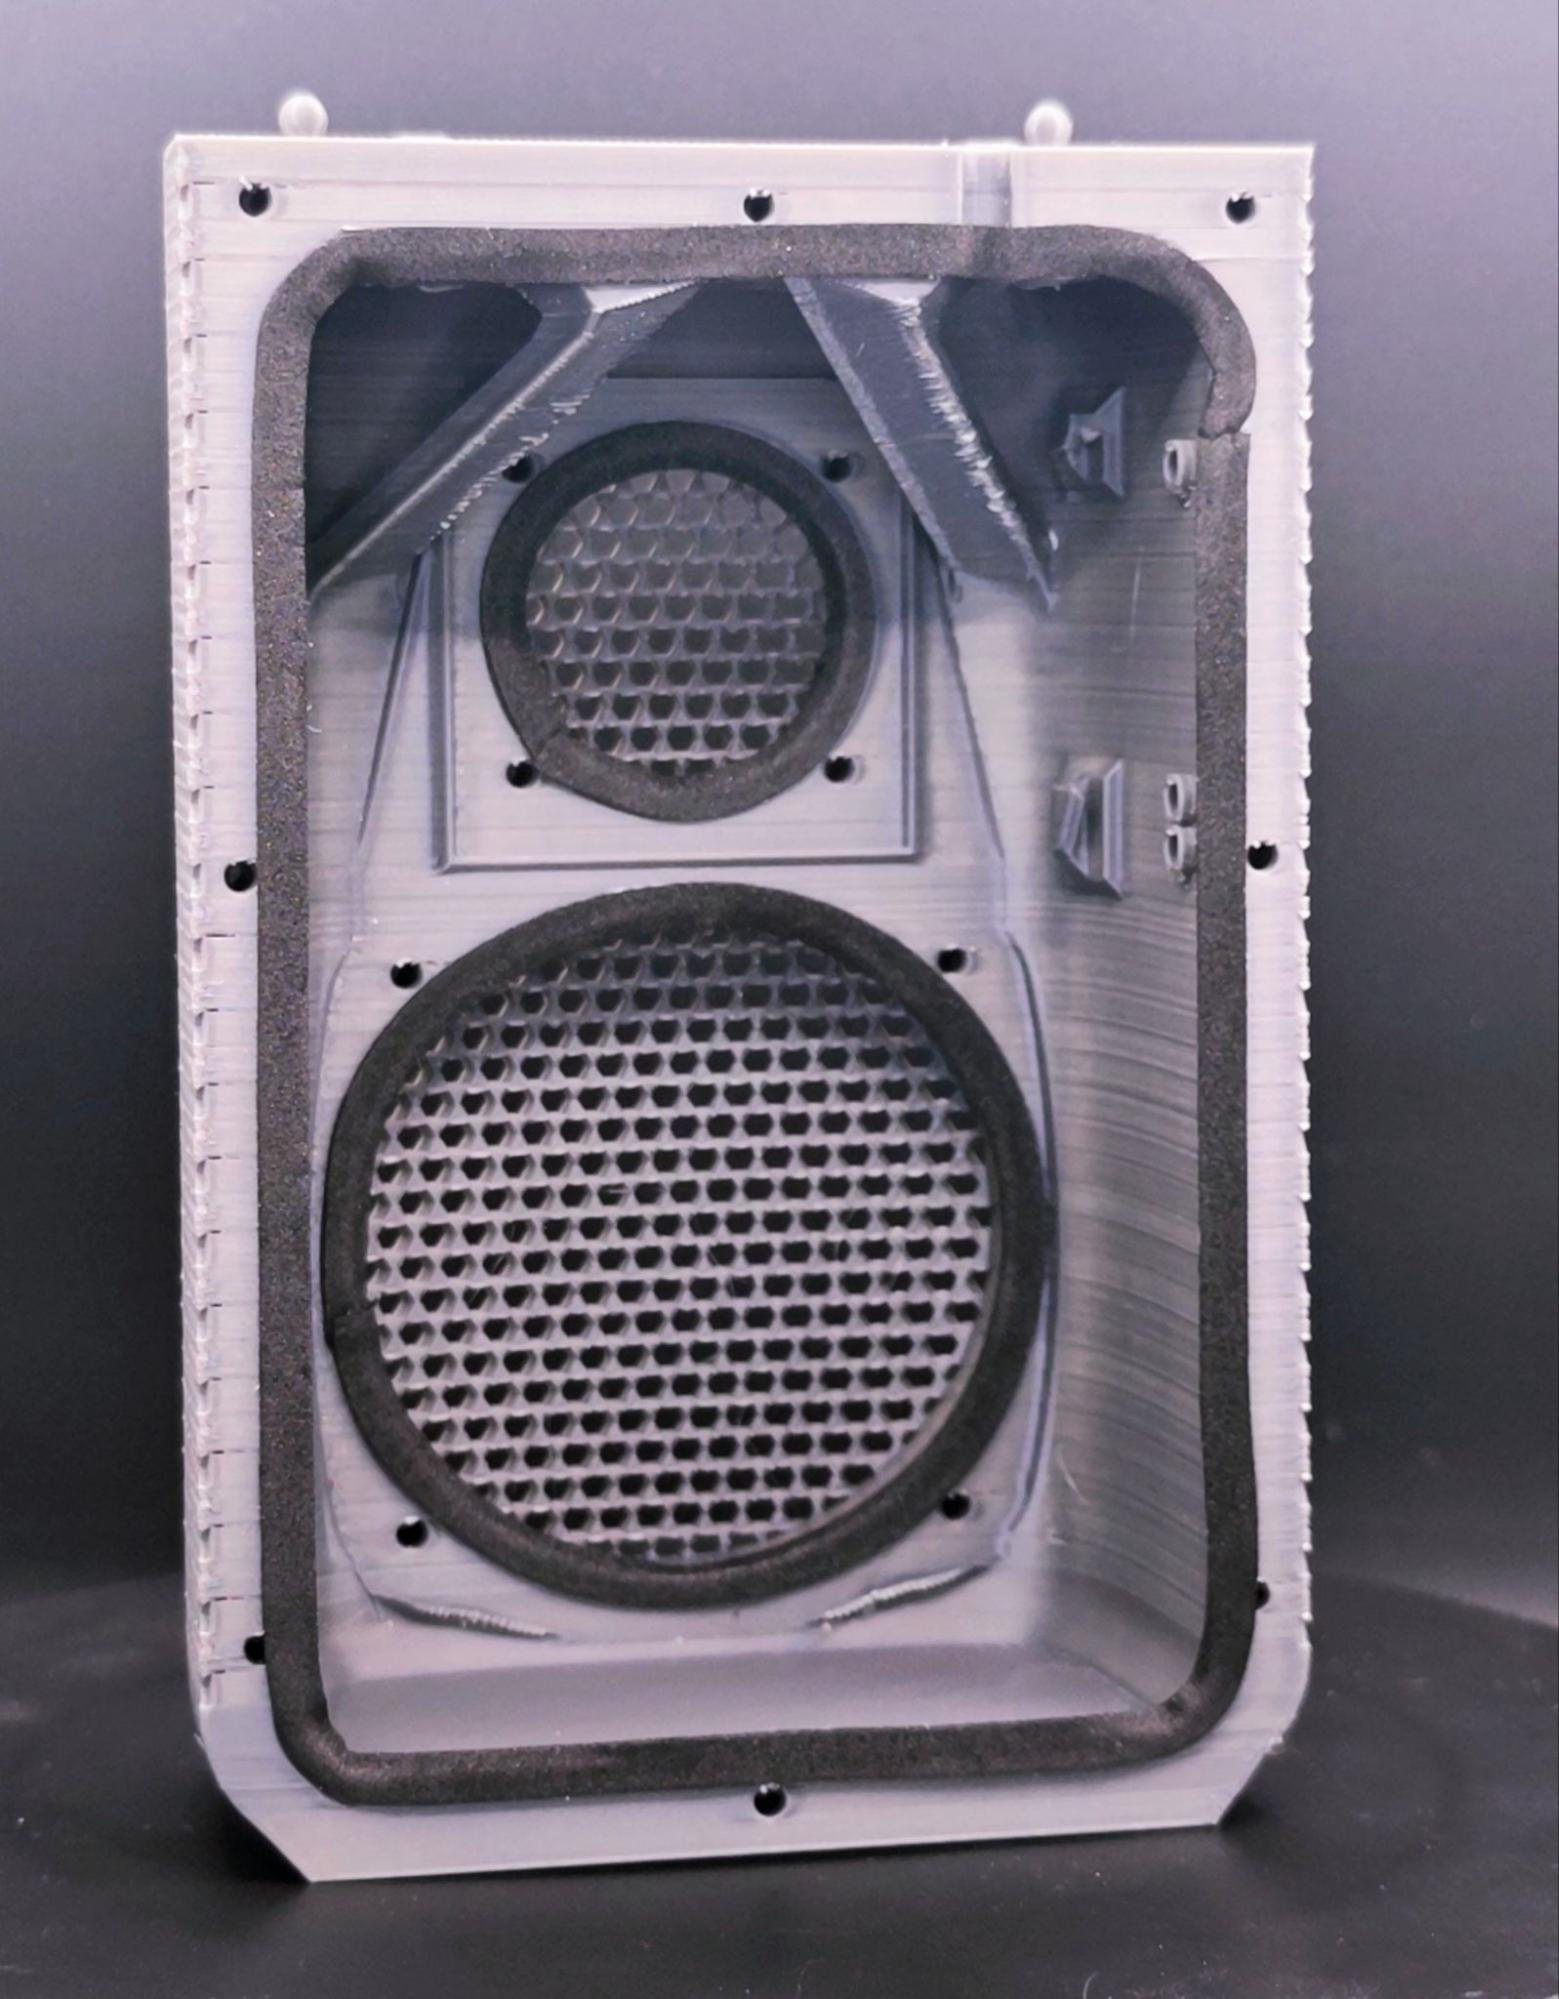 Adhere the sealing foam around the perimeter of the front enclosure piece, tweeter and woofer. Cut any excess foam with scissors and keep for later.
 -
Install Speaker Drivers
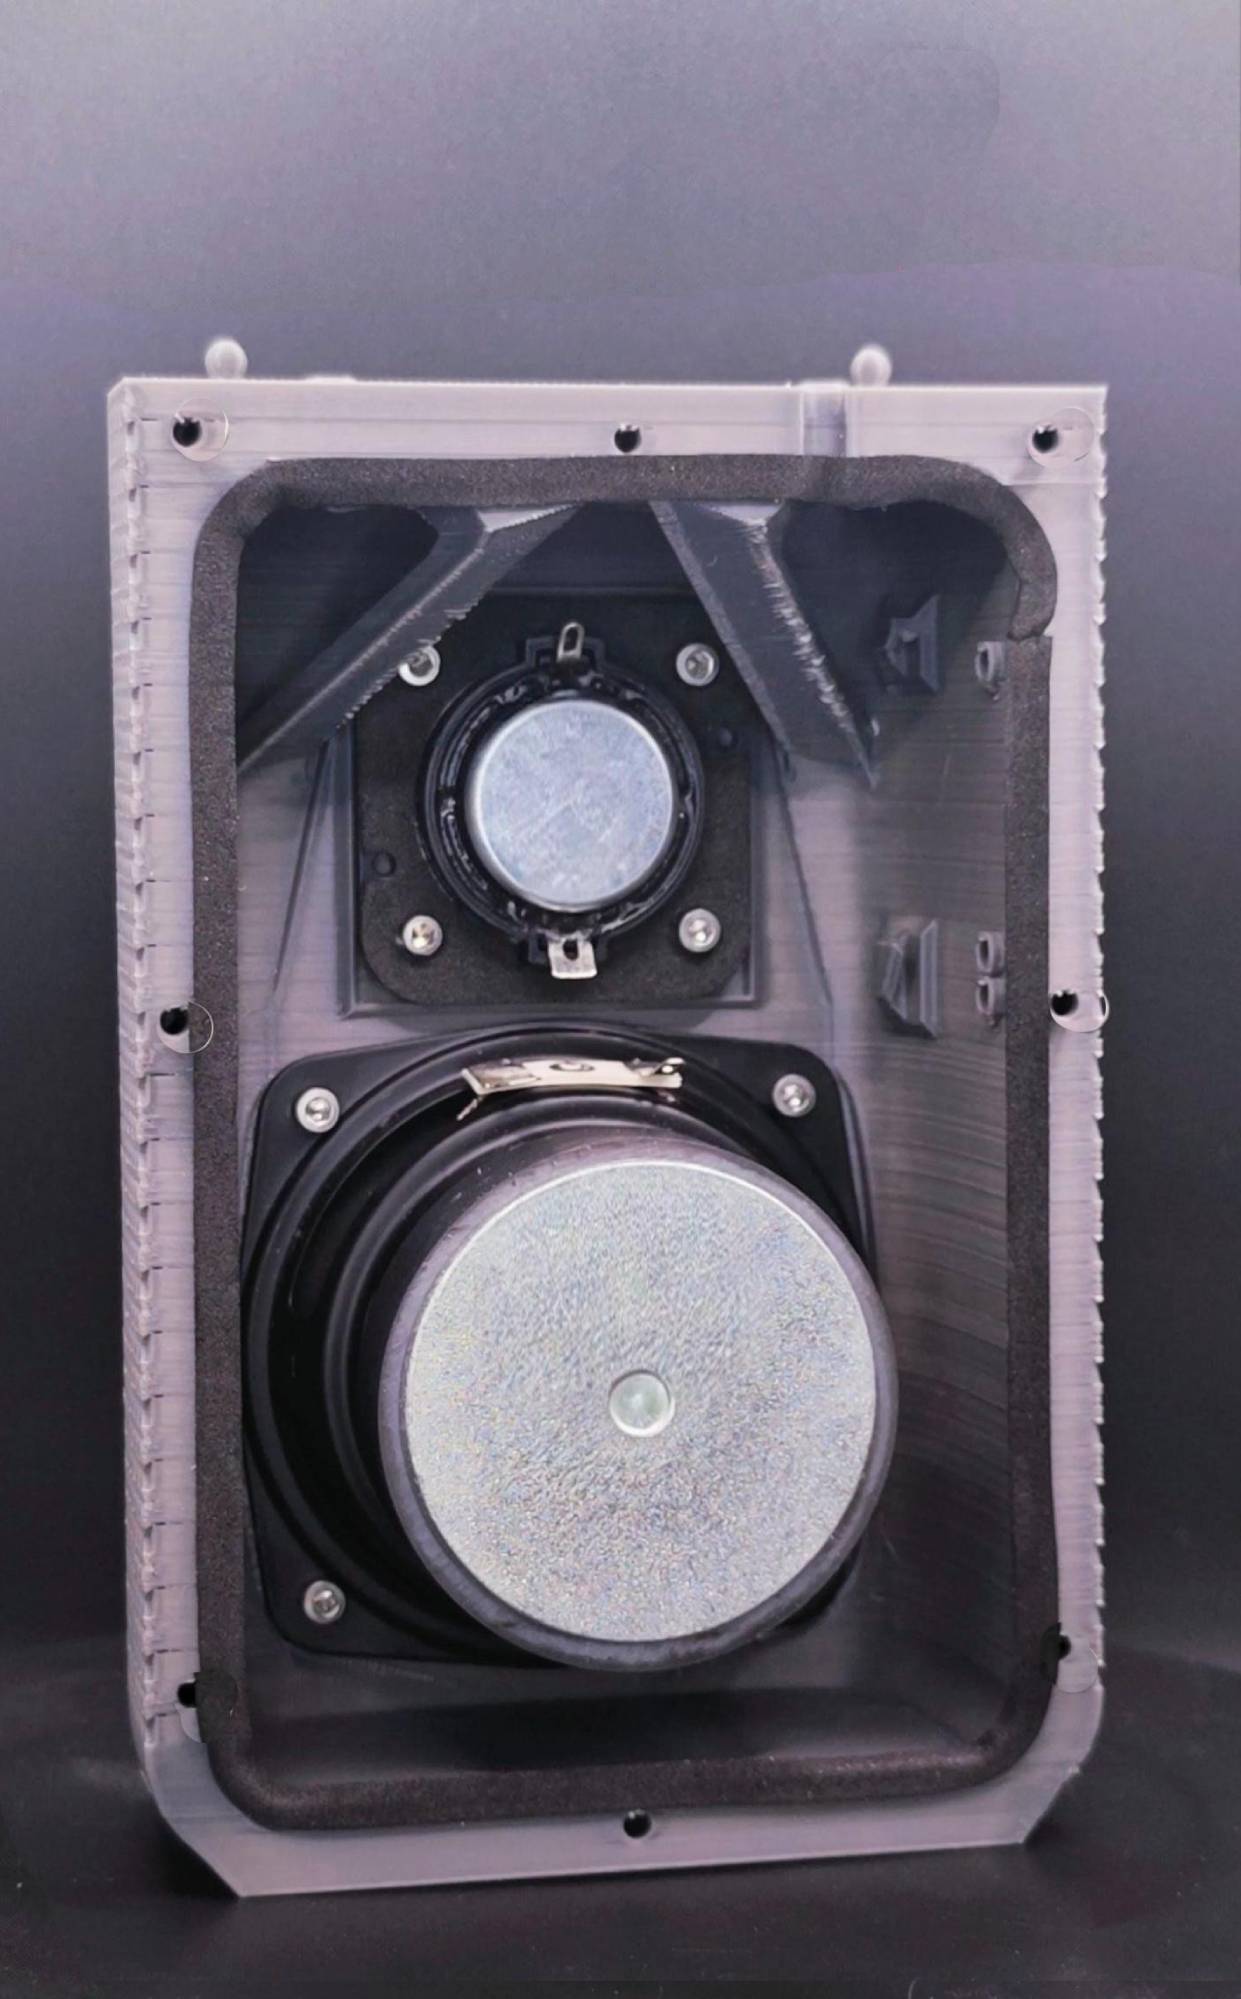 1. Use four (4) M3x10mm hex screws to install the tweeter with the terminals facing north and south.
- Use another four (4) M3x10mm hex screws to install the woofer with both speaker terminals facing north.
-
Prepare Crossover Wiring
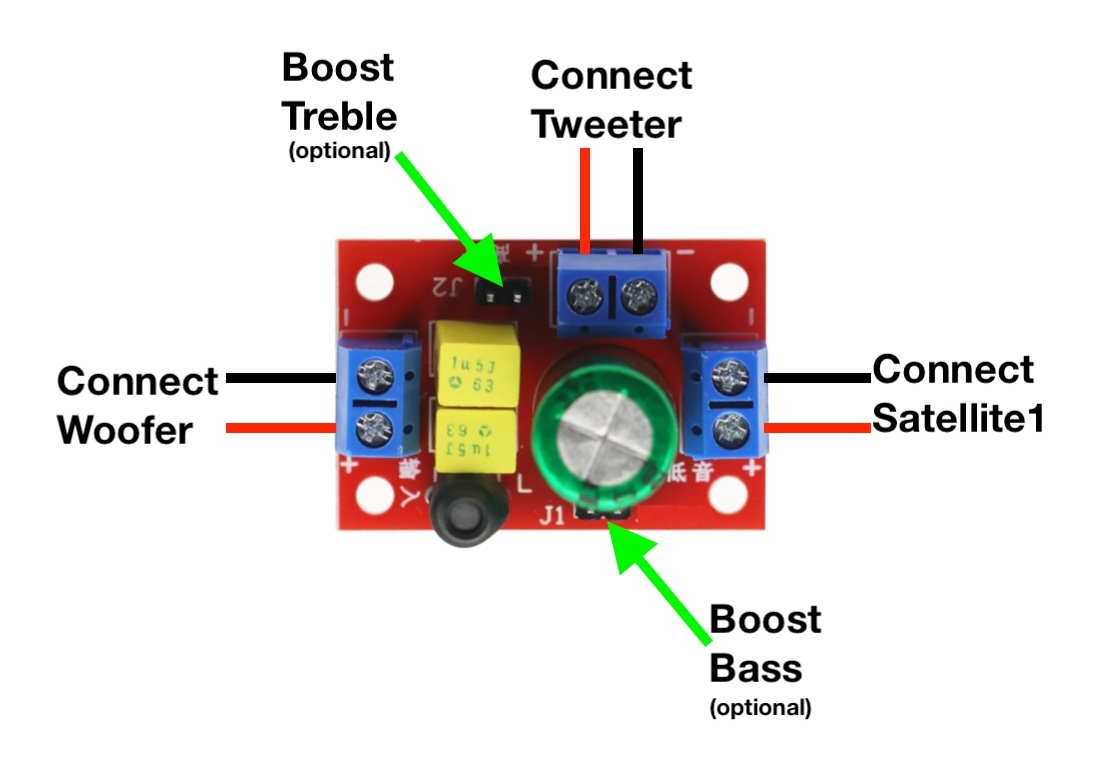
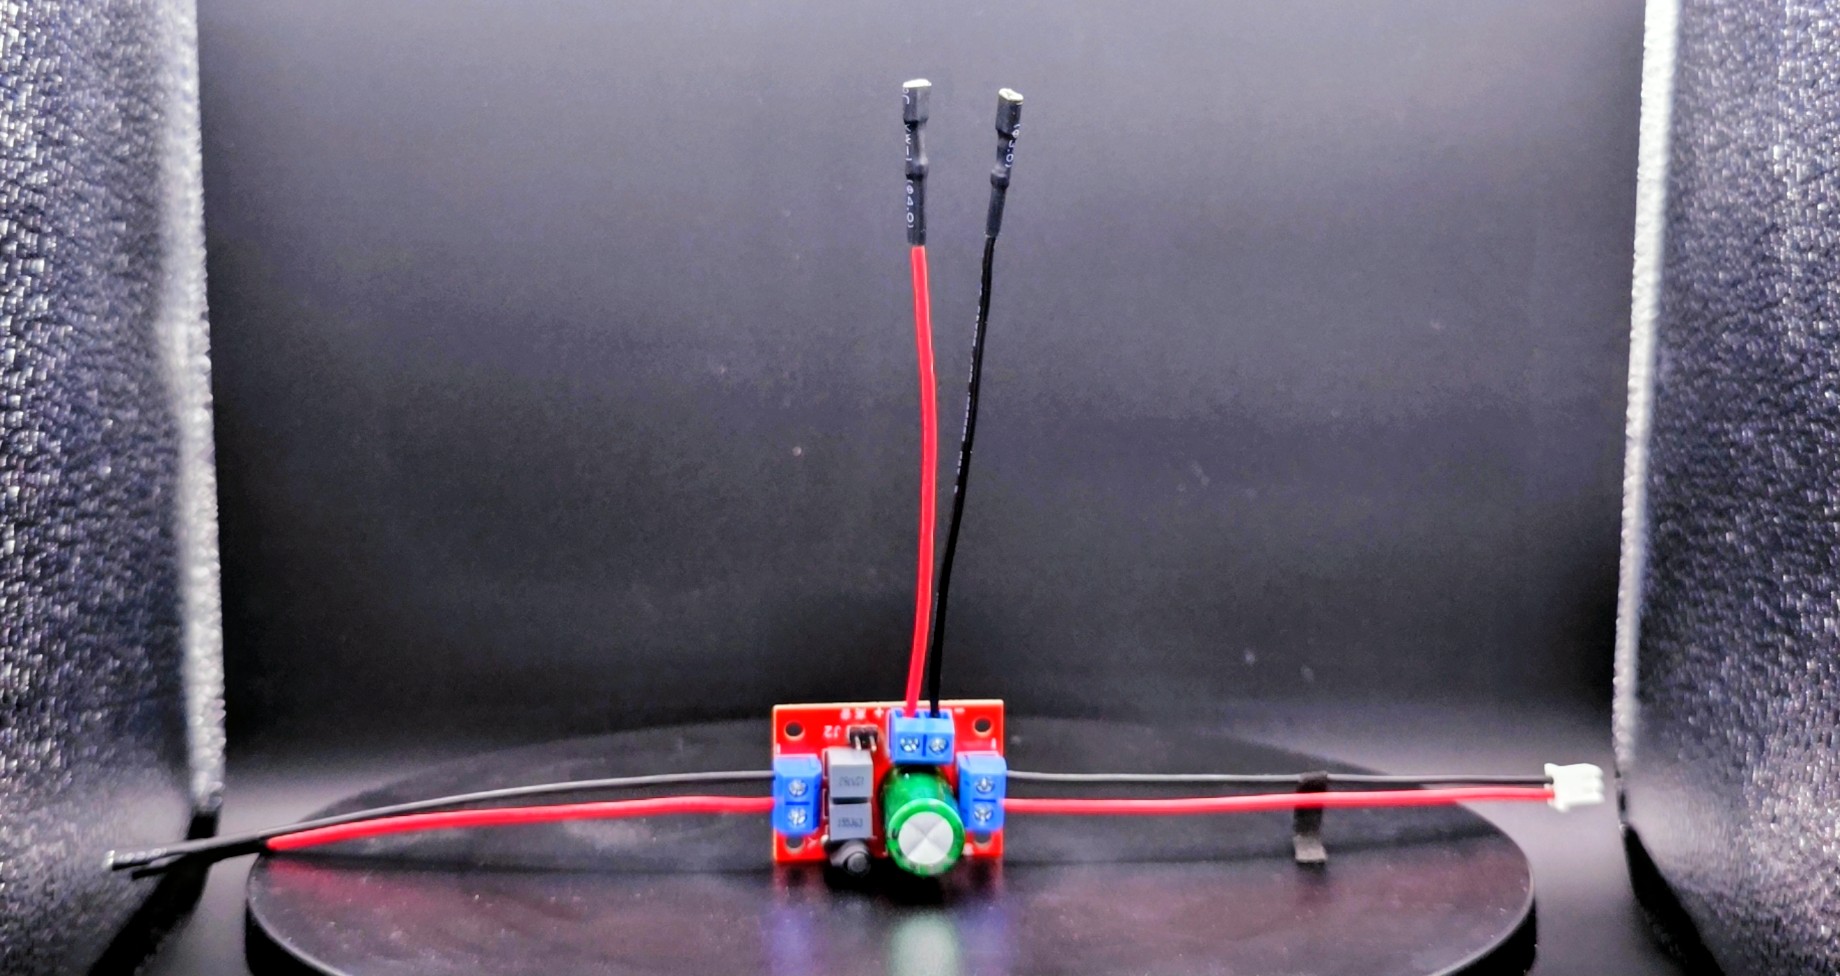 1. Orient the crossover so no blue terminal faces south.
 - Use a small phillips head screwdriver to connect the supplied JST-XH cable to the west-facing terminal.
- On the north and east terminals, secure the 5.3 mm red wires to positive (+) and the 2.8 mm black wires to negative (–).
- Optionally use the supplied jumpers to boost bass and/or treble.
-
Install Crossover & Connect Speakers
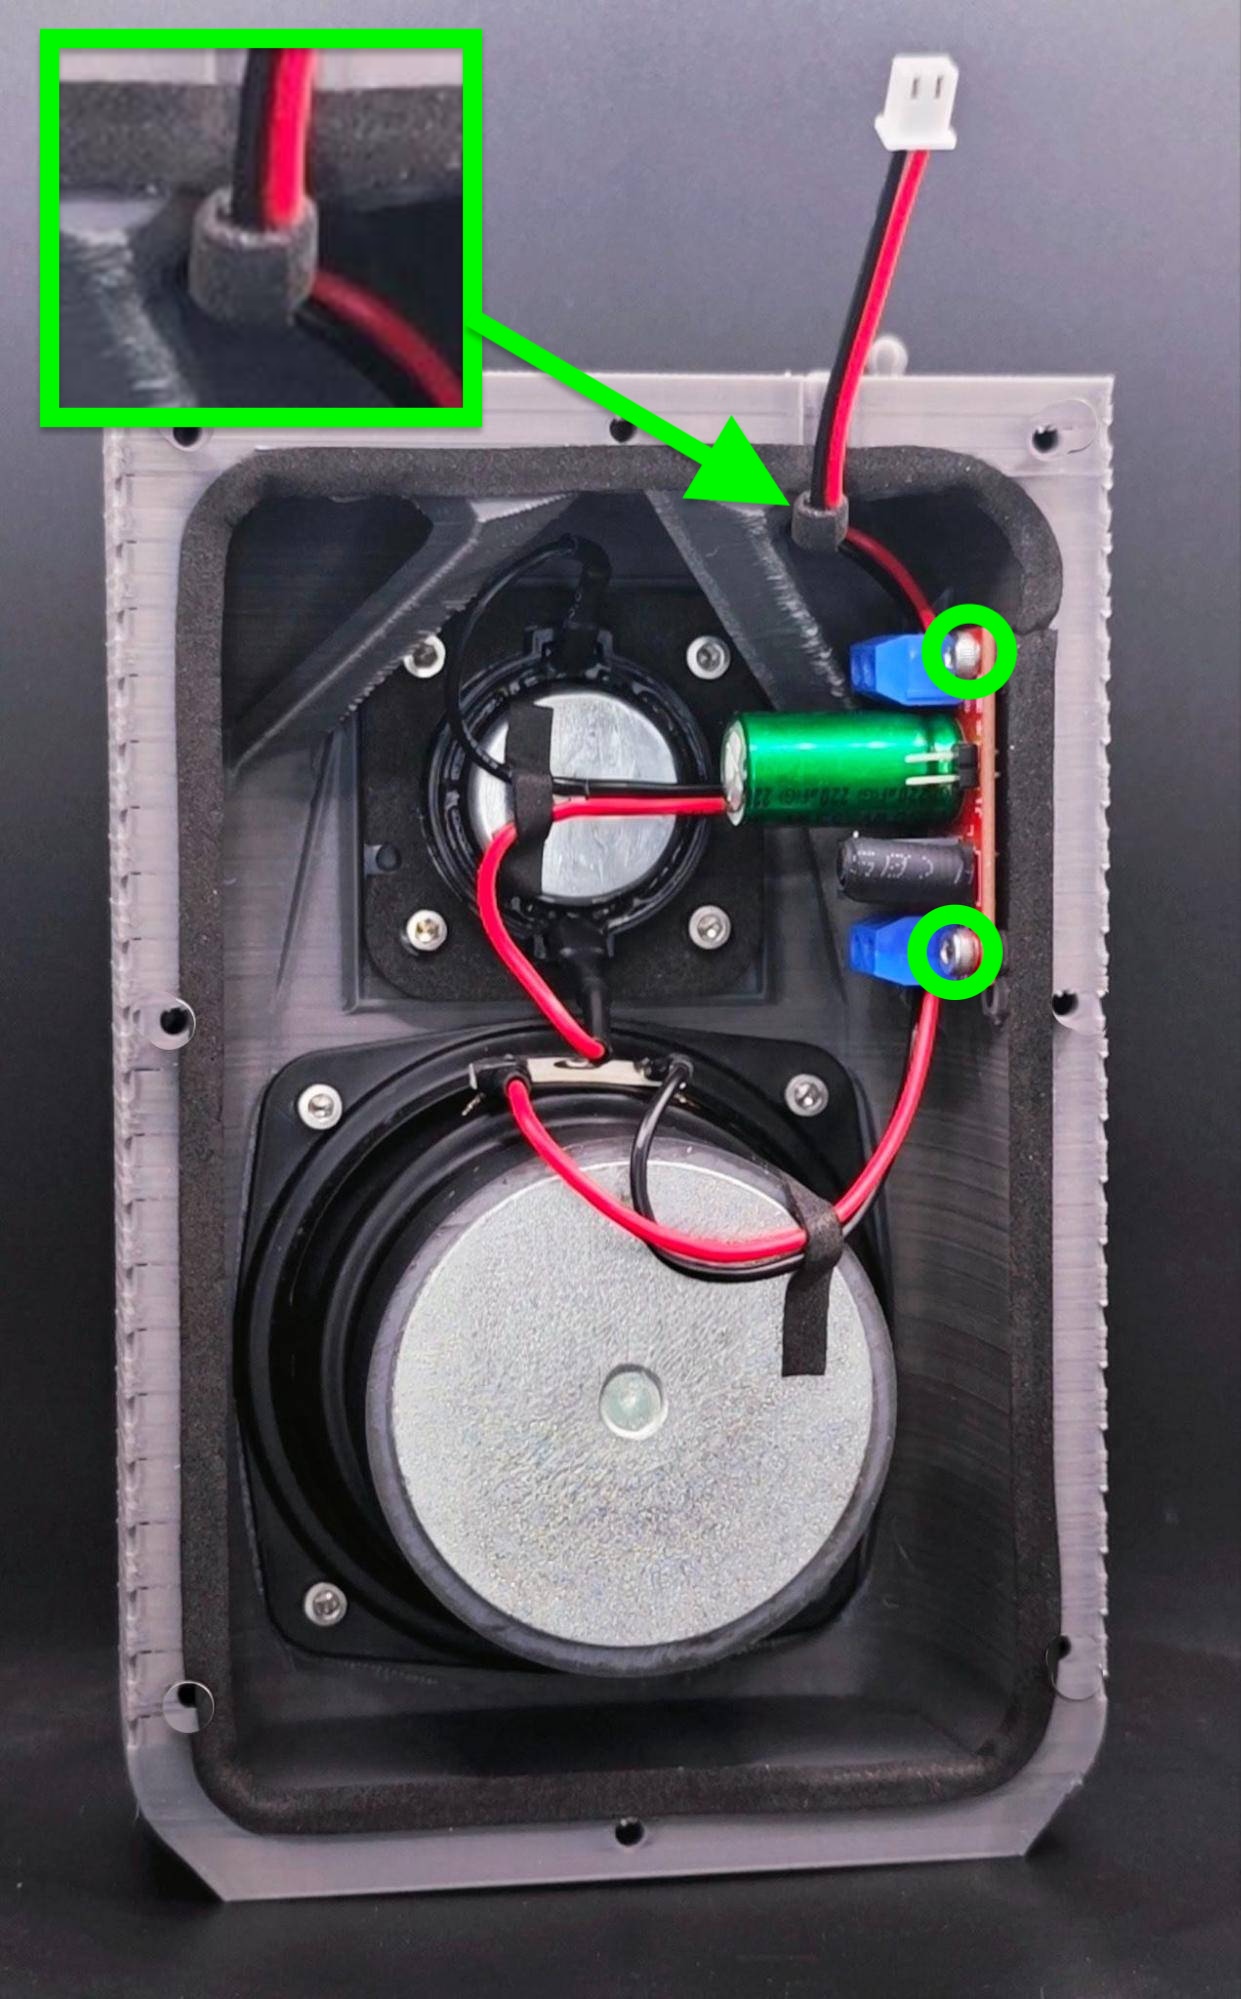 1. Use two (2) M3x10mm hex screws to securely mount the crossover to the front piece. Connect cables to speakers.
 - We recommend applying sealing foam around the JST-XH cable to ensure an airtight seal at the speaker hole.
-
Insert Screws
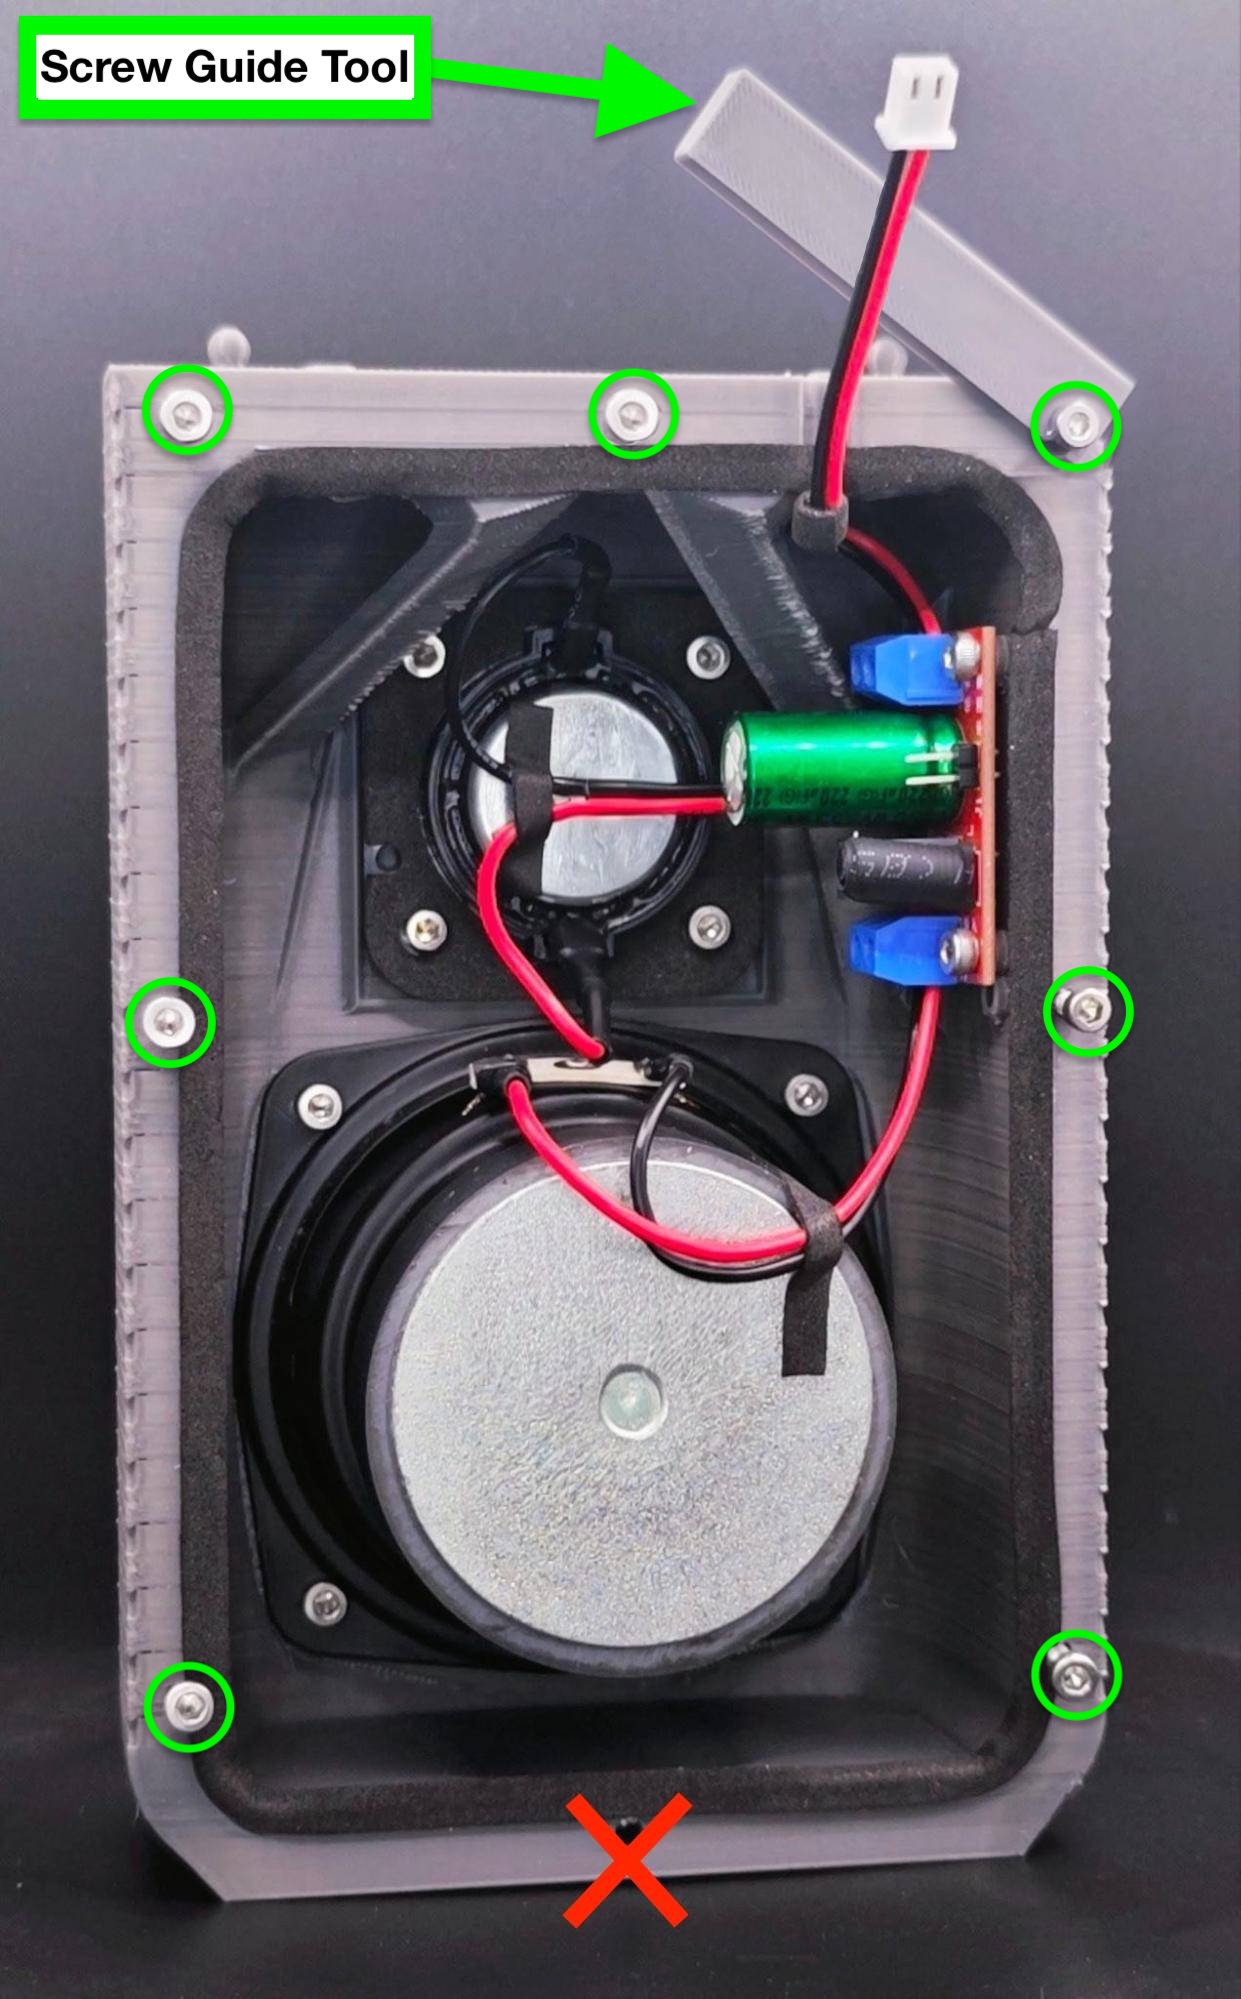 Insert seven (7) M3x10mm hex screws into the front chamber, use the screw guide tool to not drive them in too far. Do not add a screw at the bottom.
 -
Mount Back Chamber
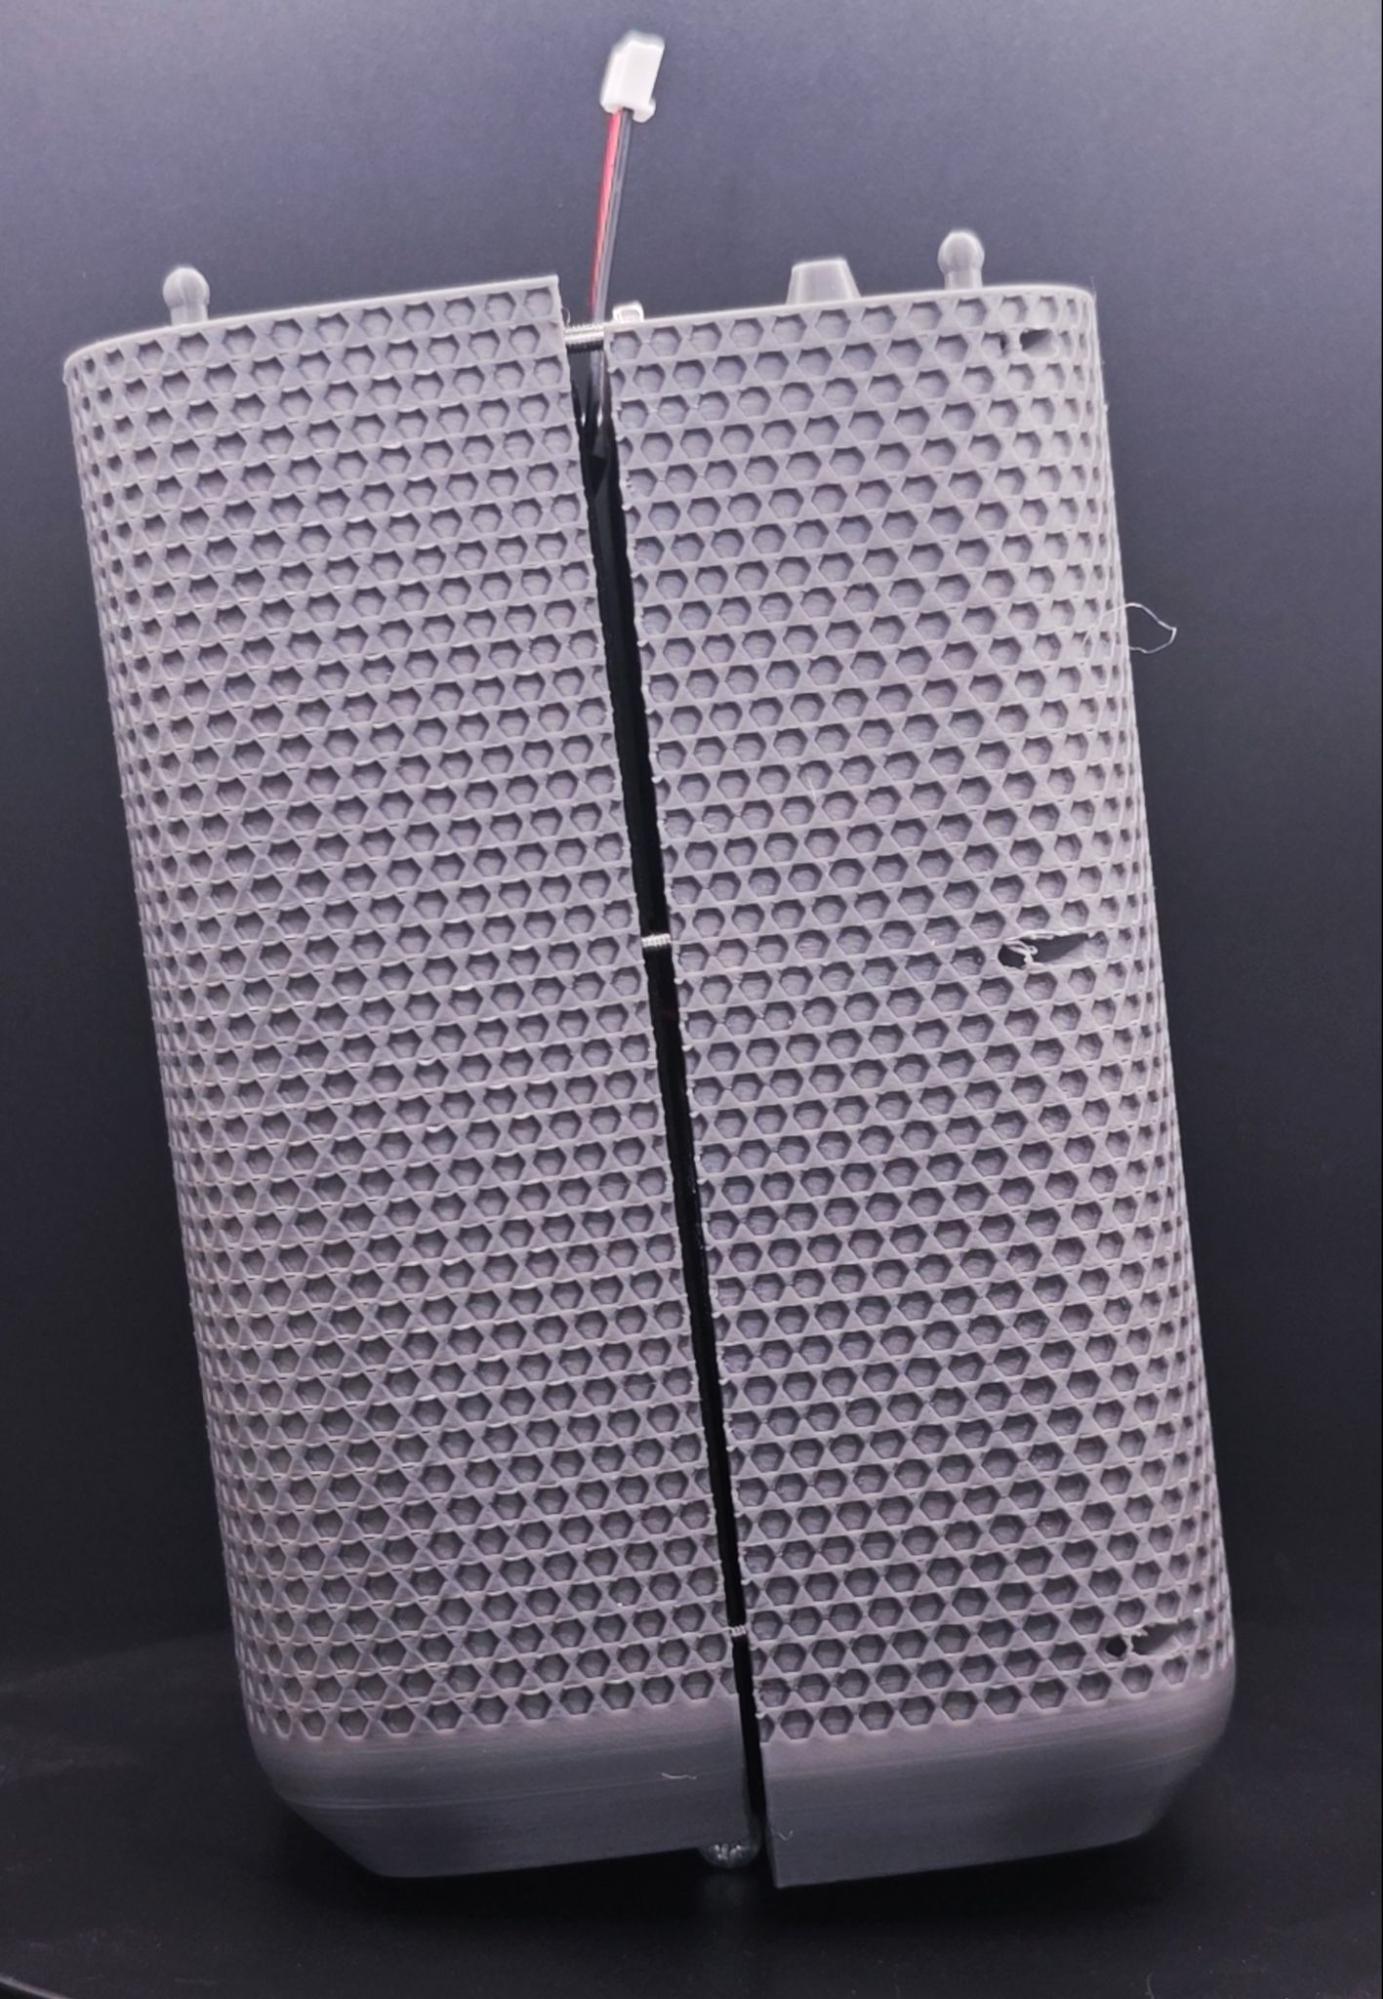 Align the two chamber parts together, making sure the JST wire is not pinched and that the foam forms an airtight seal. Slide the parts together with the front piece moving downward and the back piece moving upward.
 -
Fasten All Screws
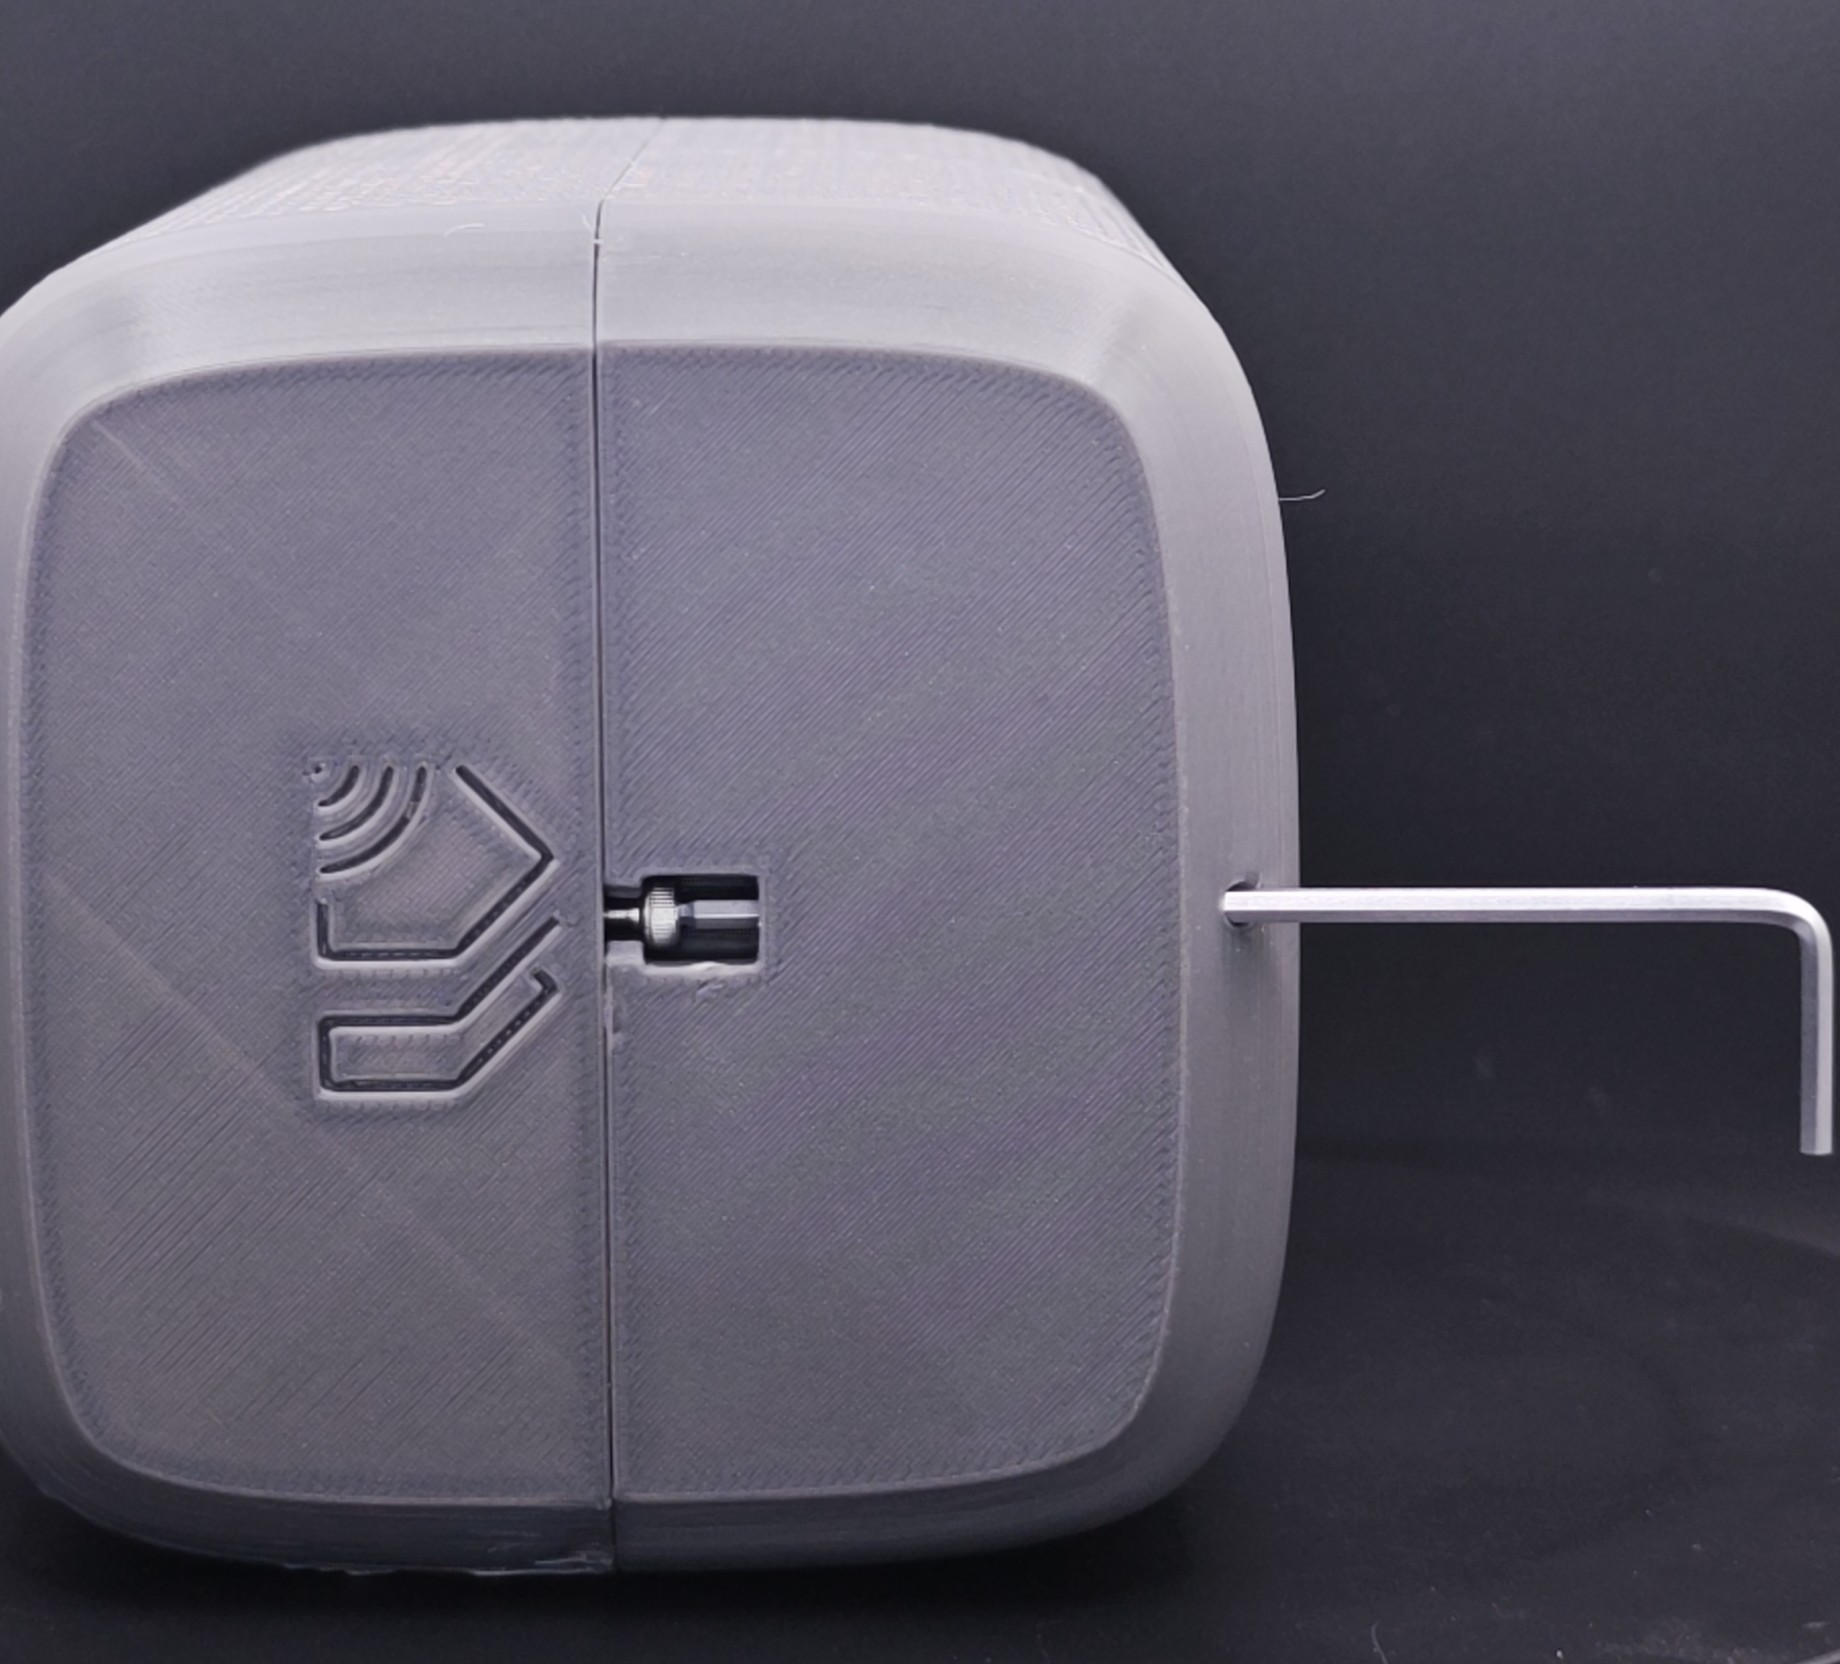 Drop the bottom screw into place and use the hex wrench to loosely fasten.
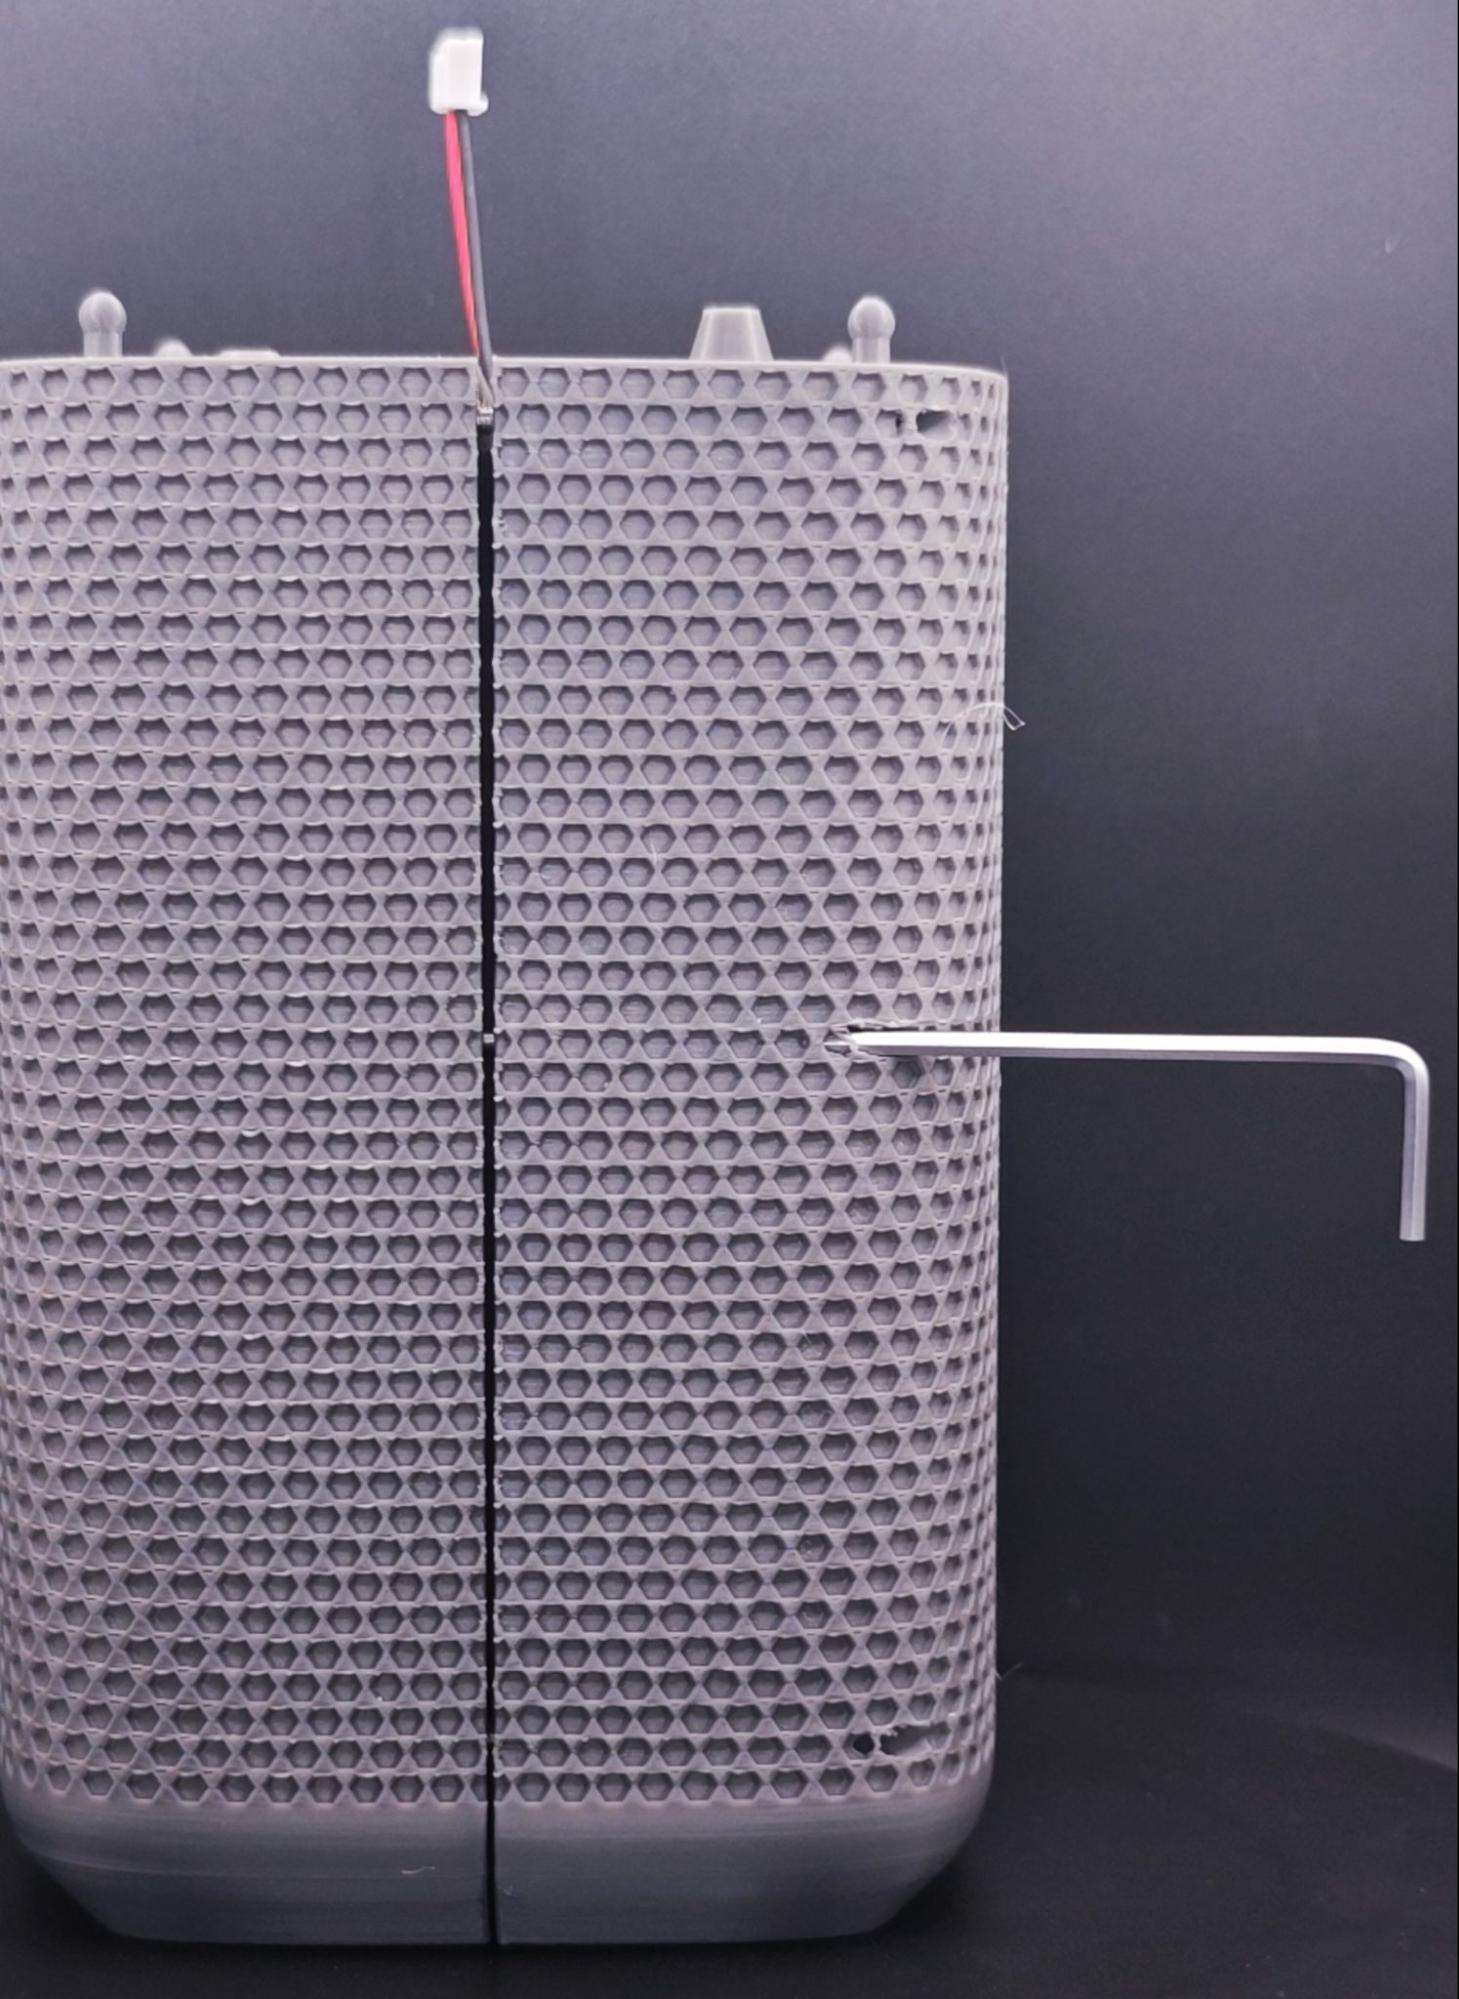 Evenly tighten all the screws in an alternating pattern until you feel resistance (approx 4-5 turns), be careful to not overtighten the screws.
 -
Mount the PCB Dev Kit

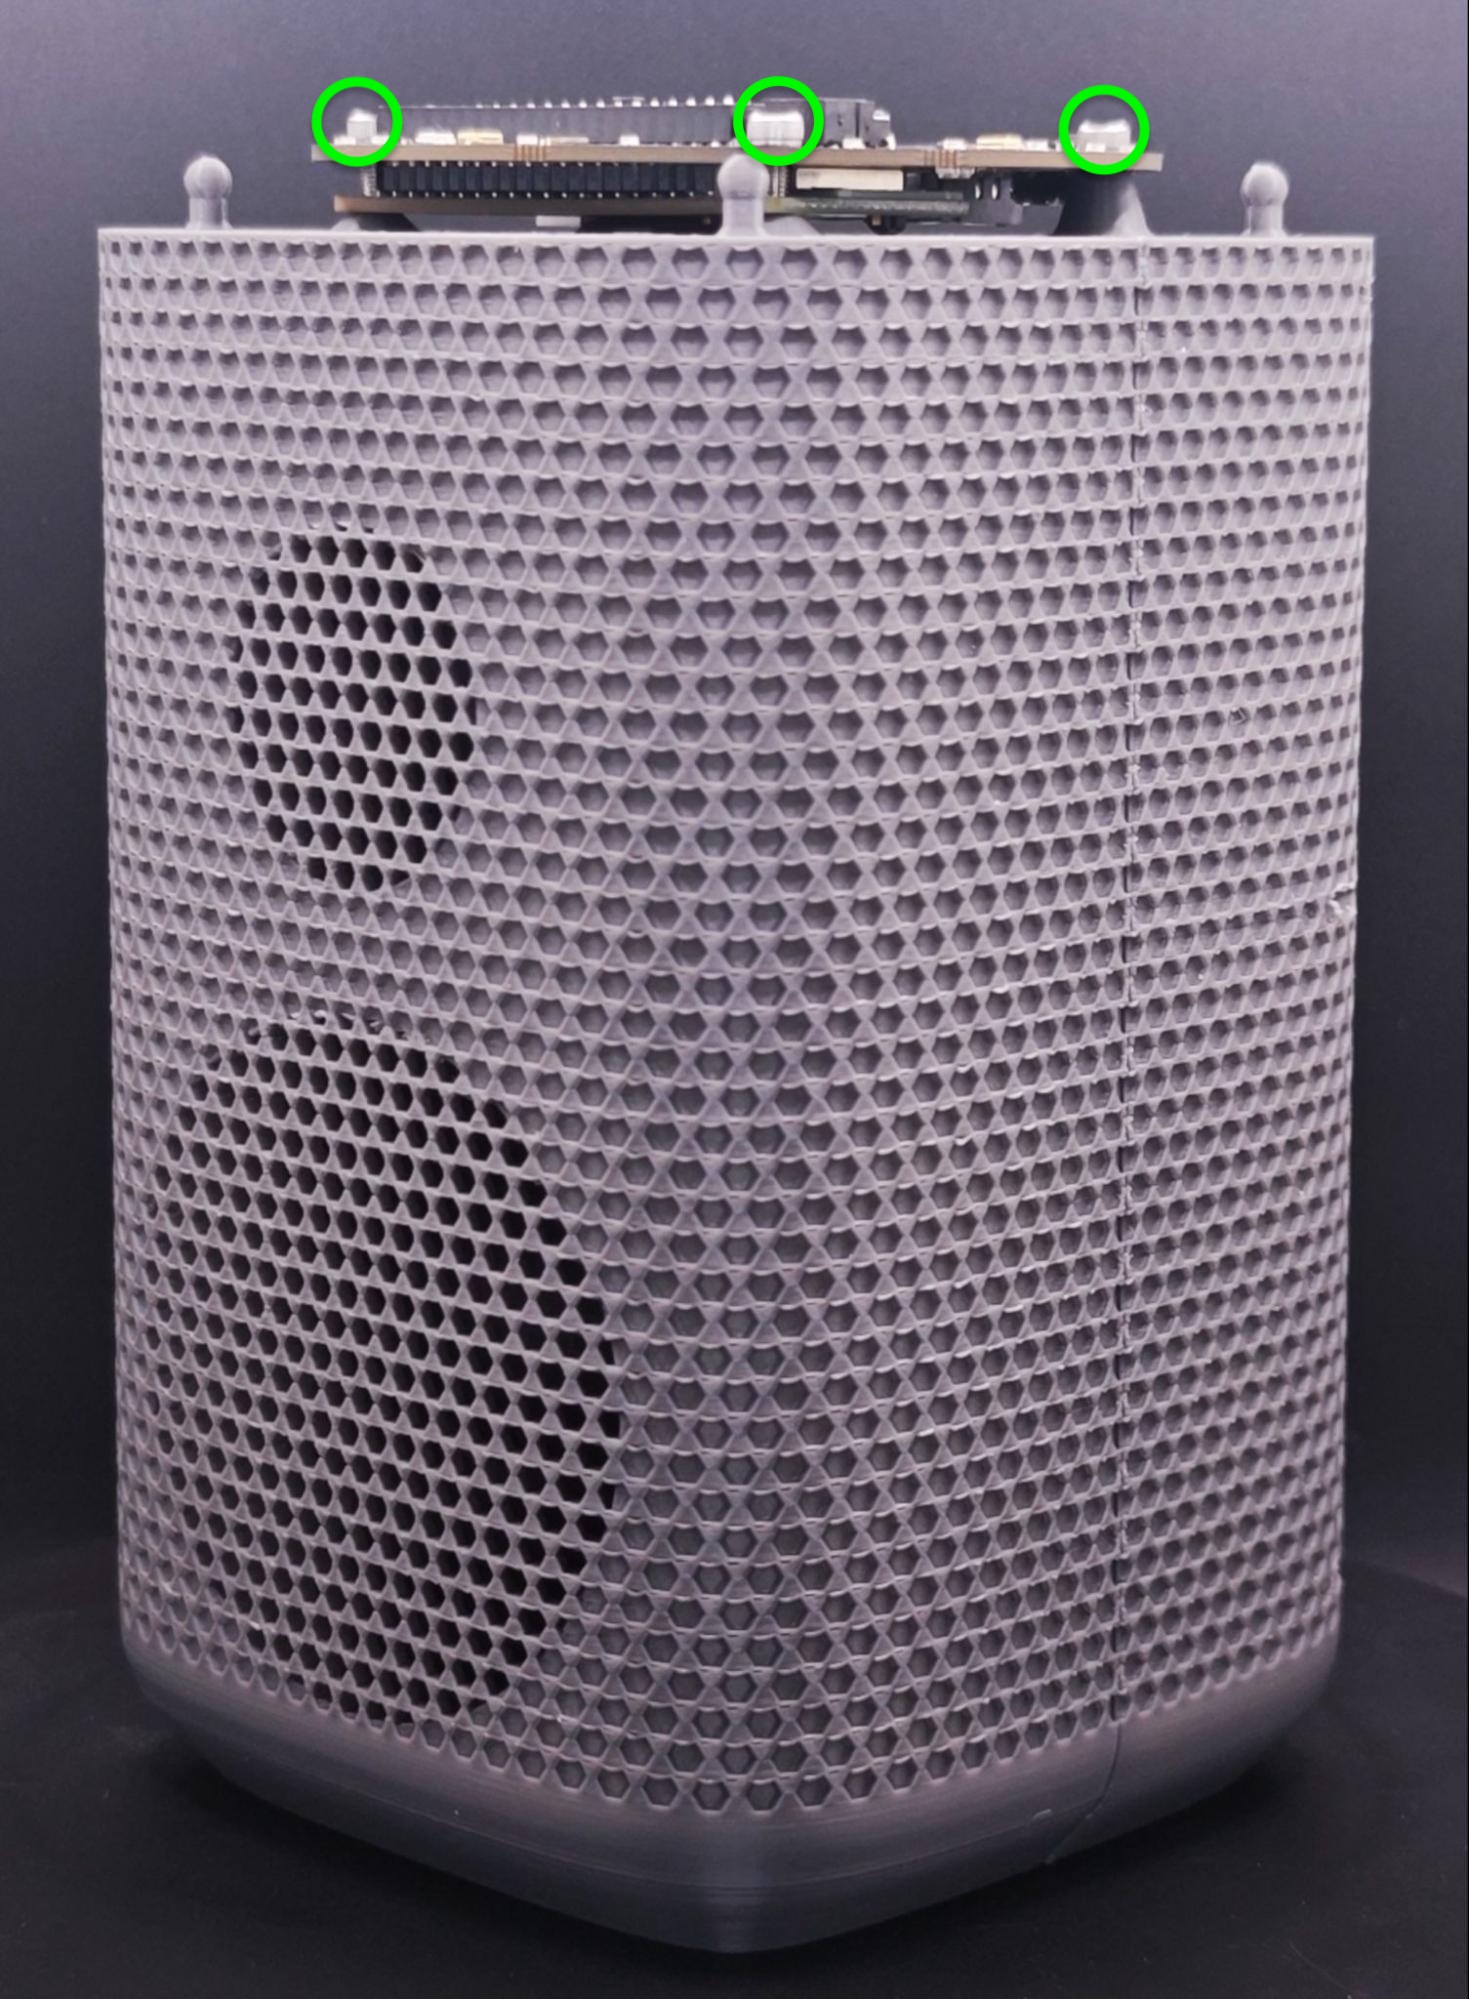 1. Press the Core and Hat PCBs firmly together (see details here) and connect the JST-XH cable.
- Rest the Sat1 on the enclosure's four mounting posts while ensuring the headphone jack is facing the rear. Hand-tighten four (4) hex screws to secure the PCBs to the enclosure.
-
Assemble Top Piece & LED Diffuser
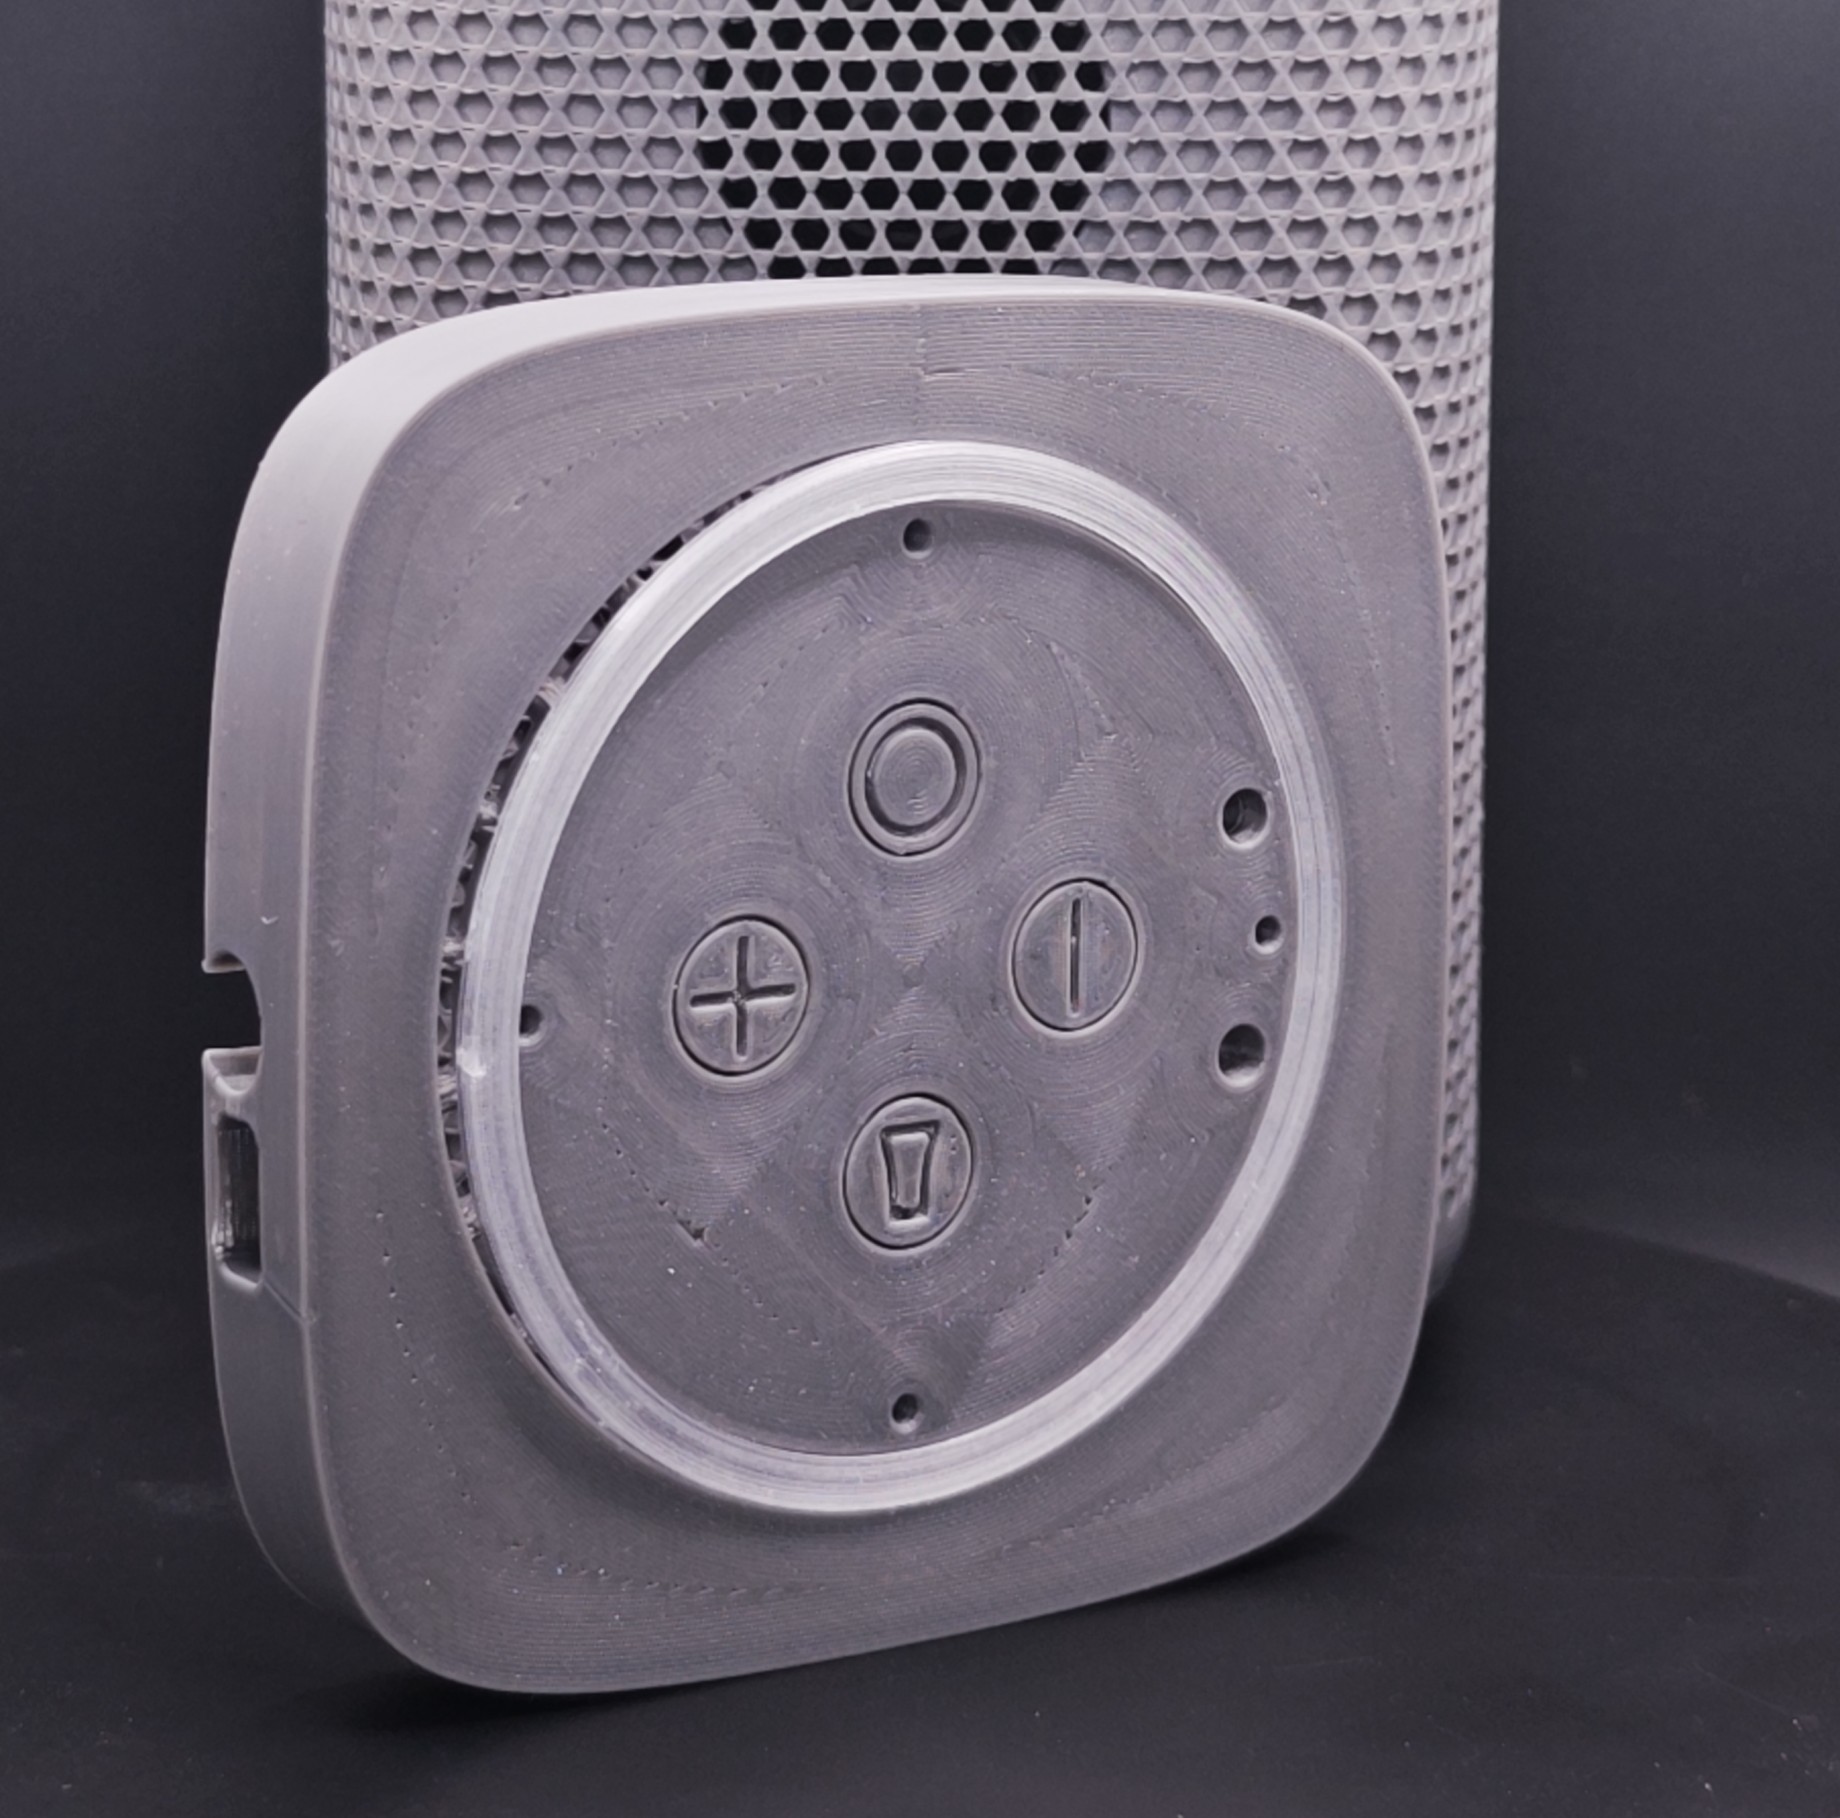
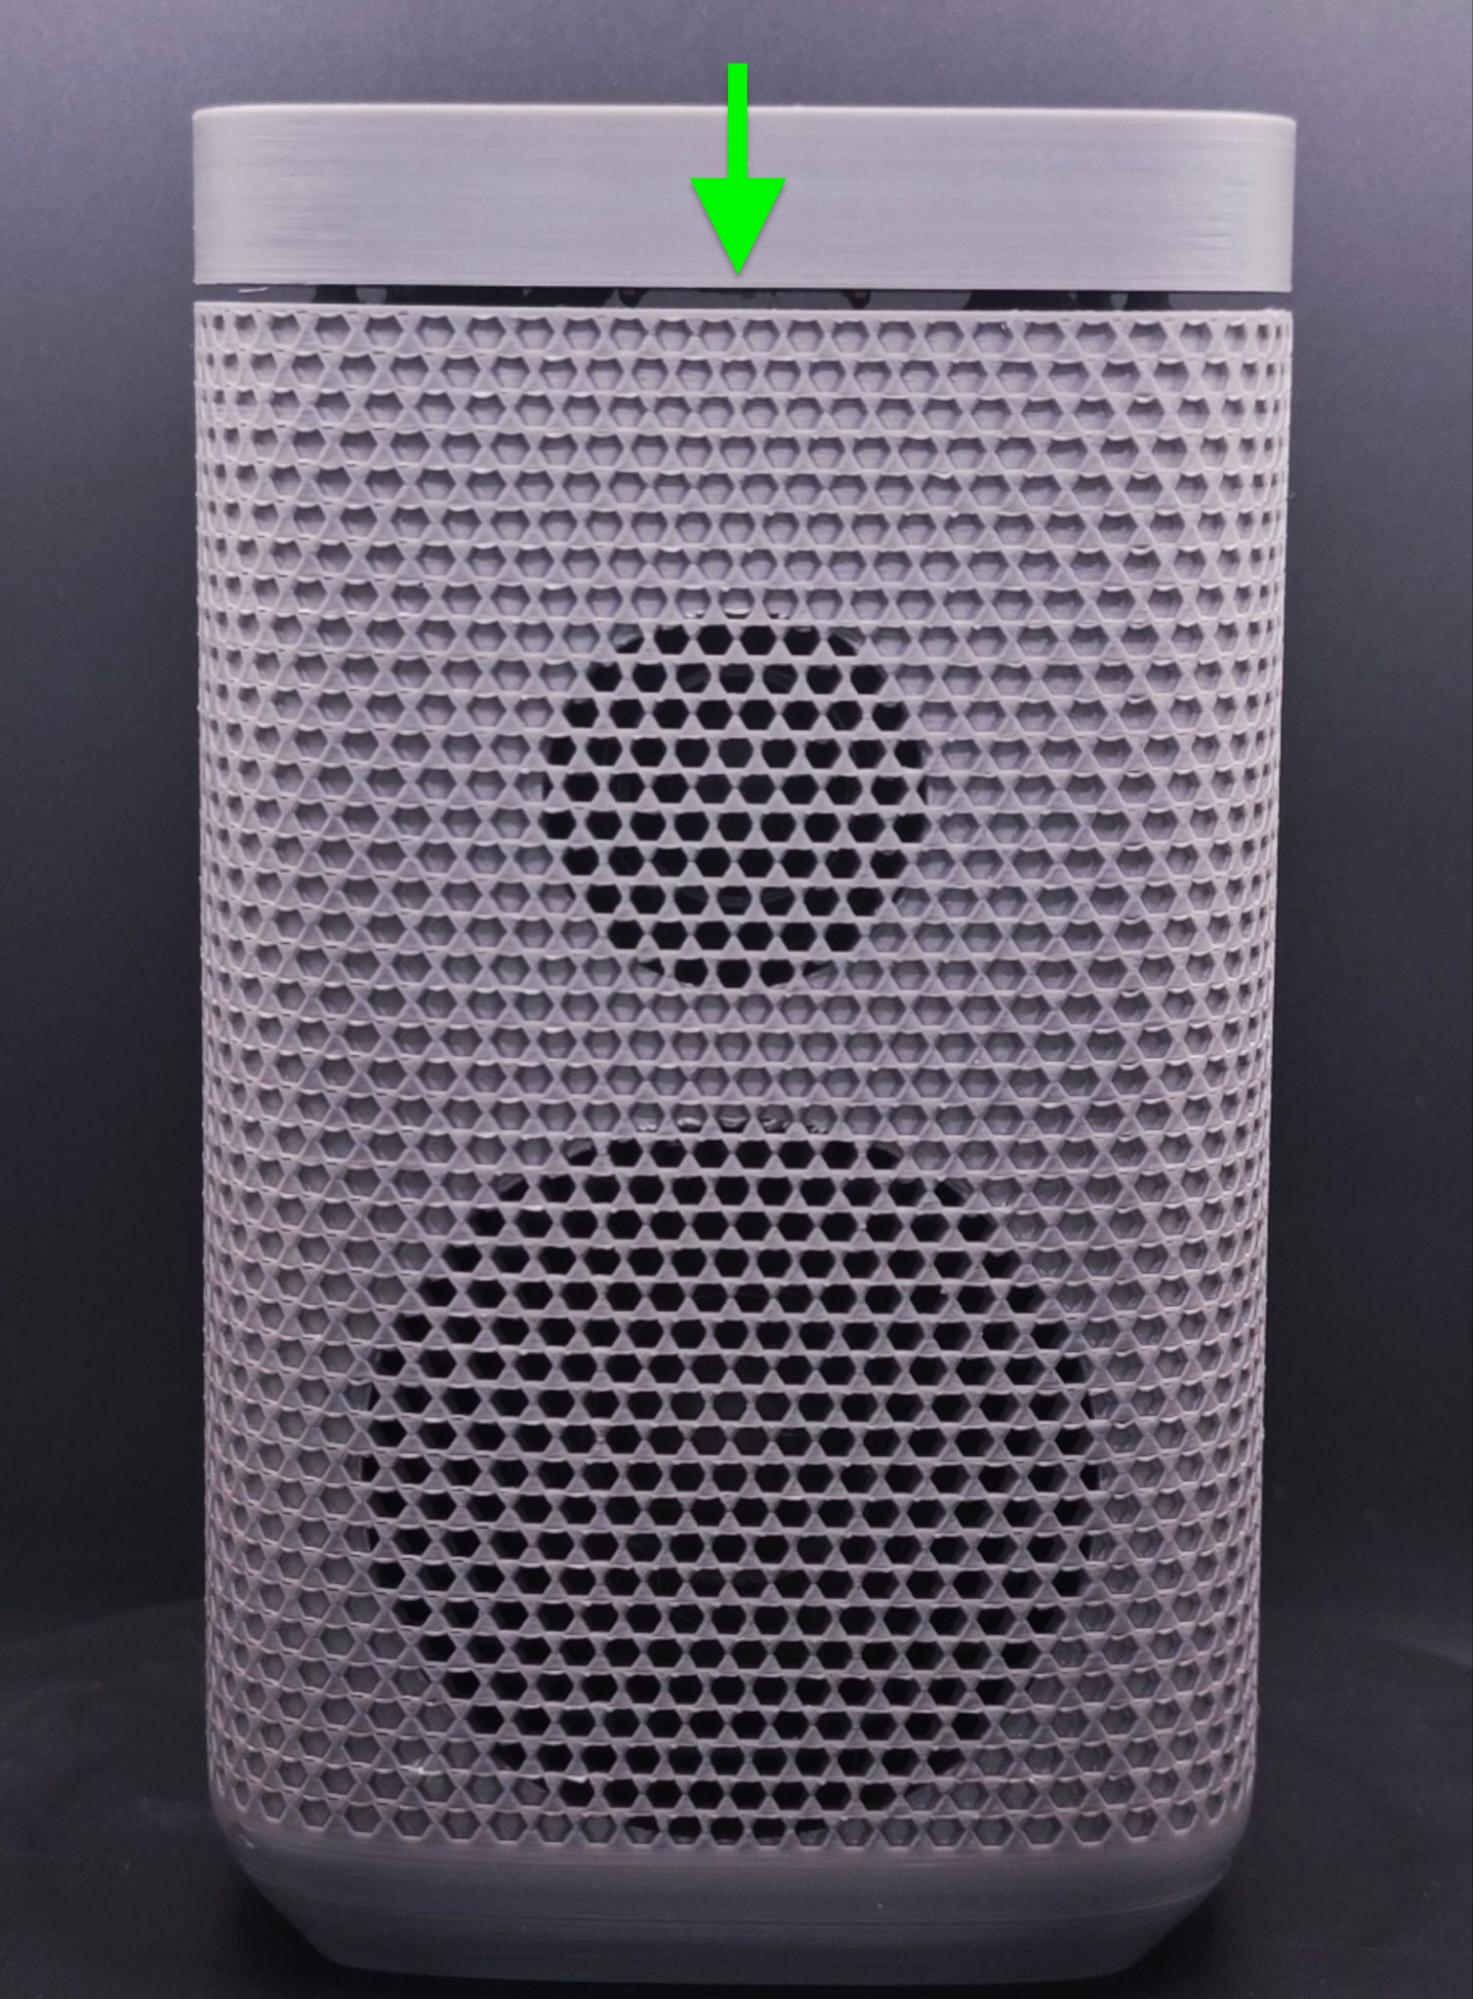 1. Snap the LED diffuser into the top piece.
- Lightly push the top piece assembly down on the enclosure's 4 ball joints making sure the headphone jack opening is facing the rear.
Congratulations on Assembling your Satellite1 Smart Speaker!
Power up the speaker with the Dev Kit's supplied 30W power USB-C power adapter and follow the necessary steps to connect to Home Assistant, and then stream some music!
Print-at-Home
The 3D-printable 3MF project files, STL and STEP files are published online for anyone who wants to print or remix the enclosure at home.
Links
Printing Parameters
- We recommend using 0.4mm nozzle diameter and dry Bambu-grade PETG filament.
- Use 3 wall perimeter and 30% cubicle infill for the front and back speaker chamber parts
- Use 3 wall perimeter and 15% cubicle infill for the top, screw guide and diffuser
- Print the diffuser in transparent PETG or even white PLA for the best results.
- No supports required!
Compatible Speaker Drivers
The Satellite1 Smart Speaker Enclosure Kit is acoustically and mechanically engineered to work with a specific set of high-quality LG speaker drivers. These drivers were selected for their excellent sound quality, compatibility with the Satellite1 amplifier and crossover, and reliable availability in bulk from trusted suppliers.
Due to packaging and supply-chain complexities during launch, we do not currently sell the speaker drivers or other electronic components separately. We do plan to offer an “electronics-only” kit after launch.
If you choose to purchase the recommended speaker drivers from third-party online retailers, please be aware that counterfeit or cloned products do exist. Additionally, modifying the enclosure to accommodate alternative speaker drivers may affect sound quality and wake-word performance.
Have fun hacking!
- Tweeter MLT20-F4-S4830 (Sorry, no reliable supplier links we can confidently recommend.)
- Woofer MLW78-F4-R6015 (Sorry, no reliable supplier links we can confidently recommend.)
- Crossover (Sorry, no reliable model number.)