Squircle Enclosures
As of February 17, 2026, this enclosure is no longer compatible with latest generation Satellite1.1 Dev Kits, which features an external WiFi antenna. We welcome pull request updates to this open-source enclosure, or recommend printing or purchasing our latest enclosures.
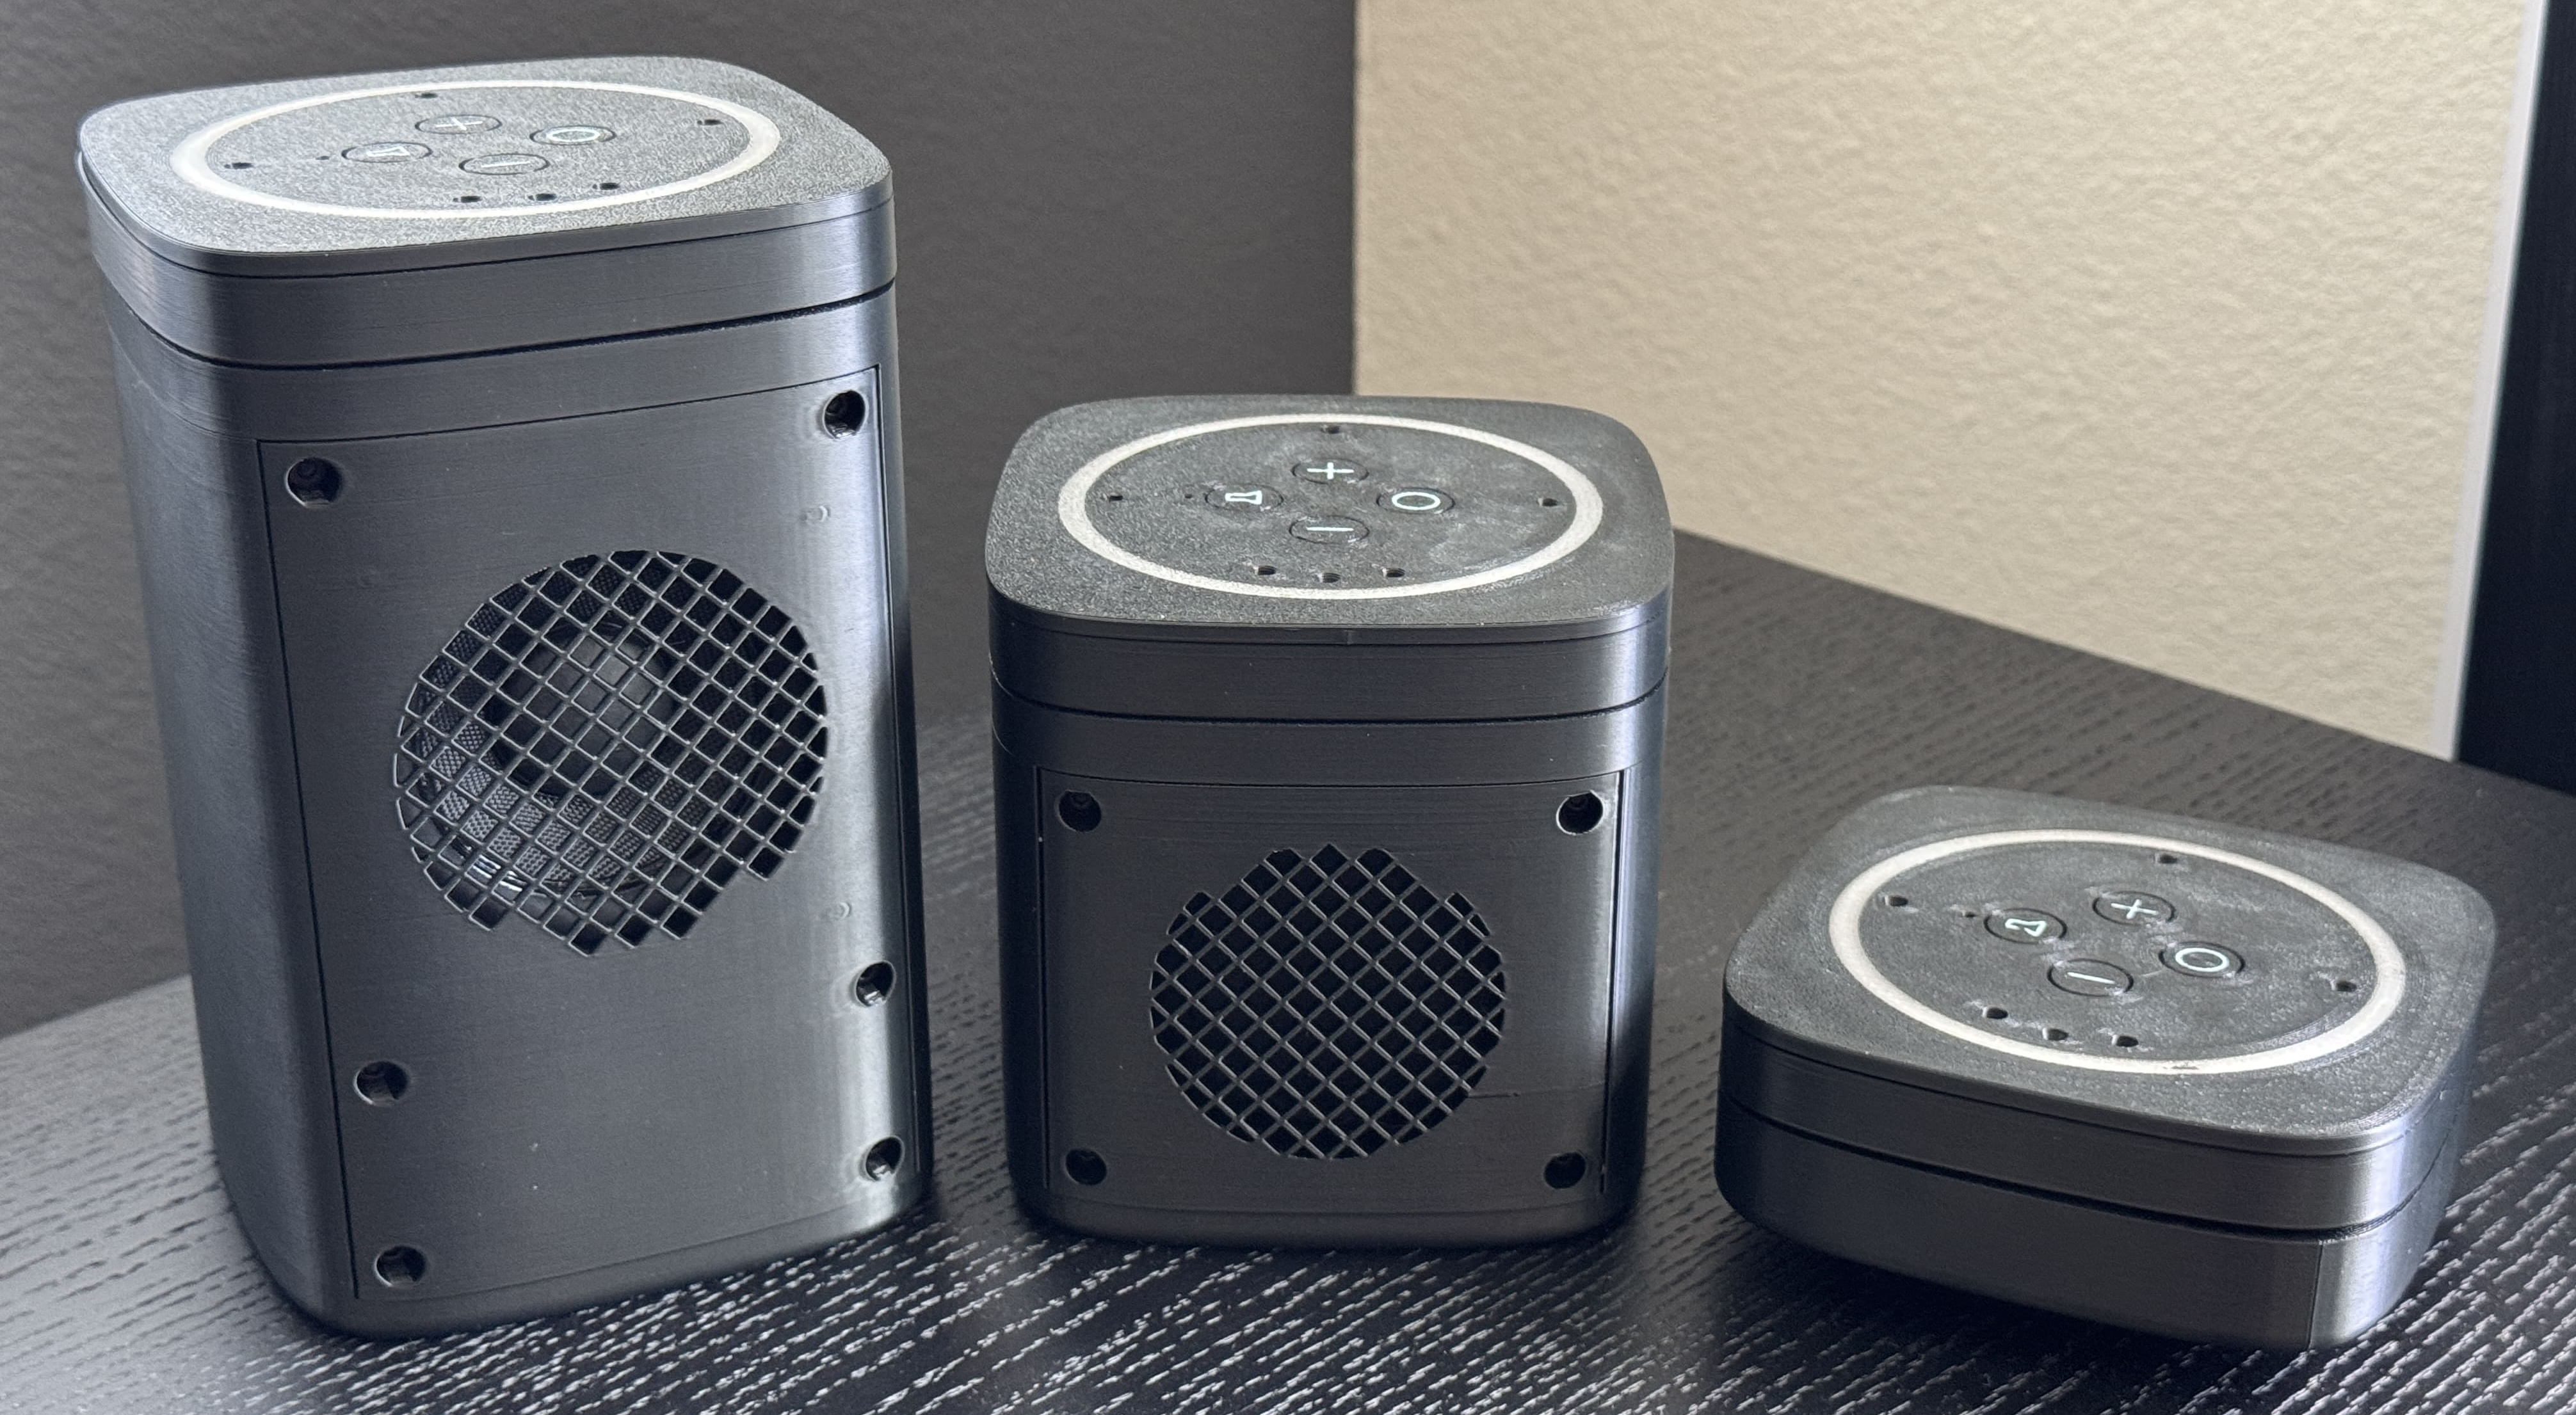
The "Squircle Enclosure Family" for the Satellite1 Dev Kit includes three optional speaker chamber sizes—small (1-inch), medium (2.5-inch), and large (3-inch)—with the top components of the design remaining identical across all sizes. The entire enclosure is designed to be assembled using M3 x 8mm screws. You 3D print the enclosure at home and separately purchase and install one of our recommended speakers based on your preference.
Understanding the Design
The "Top Plate", "Diffuser Ring", "PCB Spacer" & "Lock Ring" are common parts that are shared across all sizes of the squircle enclosure family.

You can inspect individual .STEP and .STL files in the Satellite1-Enclosures repository. We cannot release CAD project files due to commercial licensing restrictions.
Choose a Speaker and Enclosure Size
-
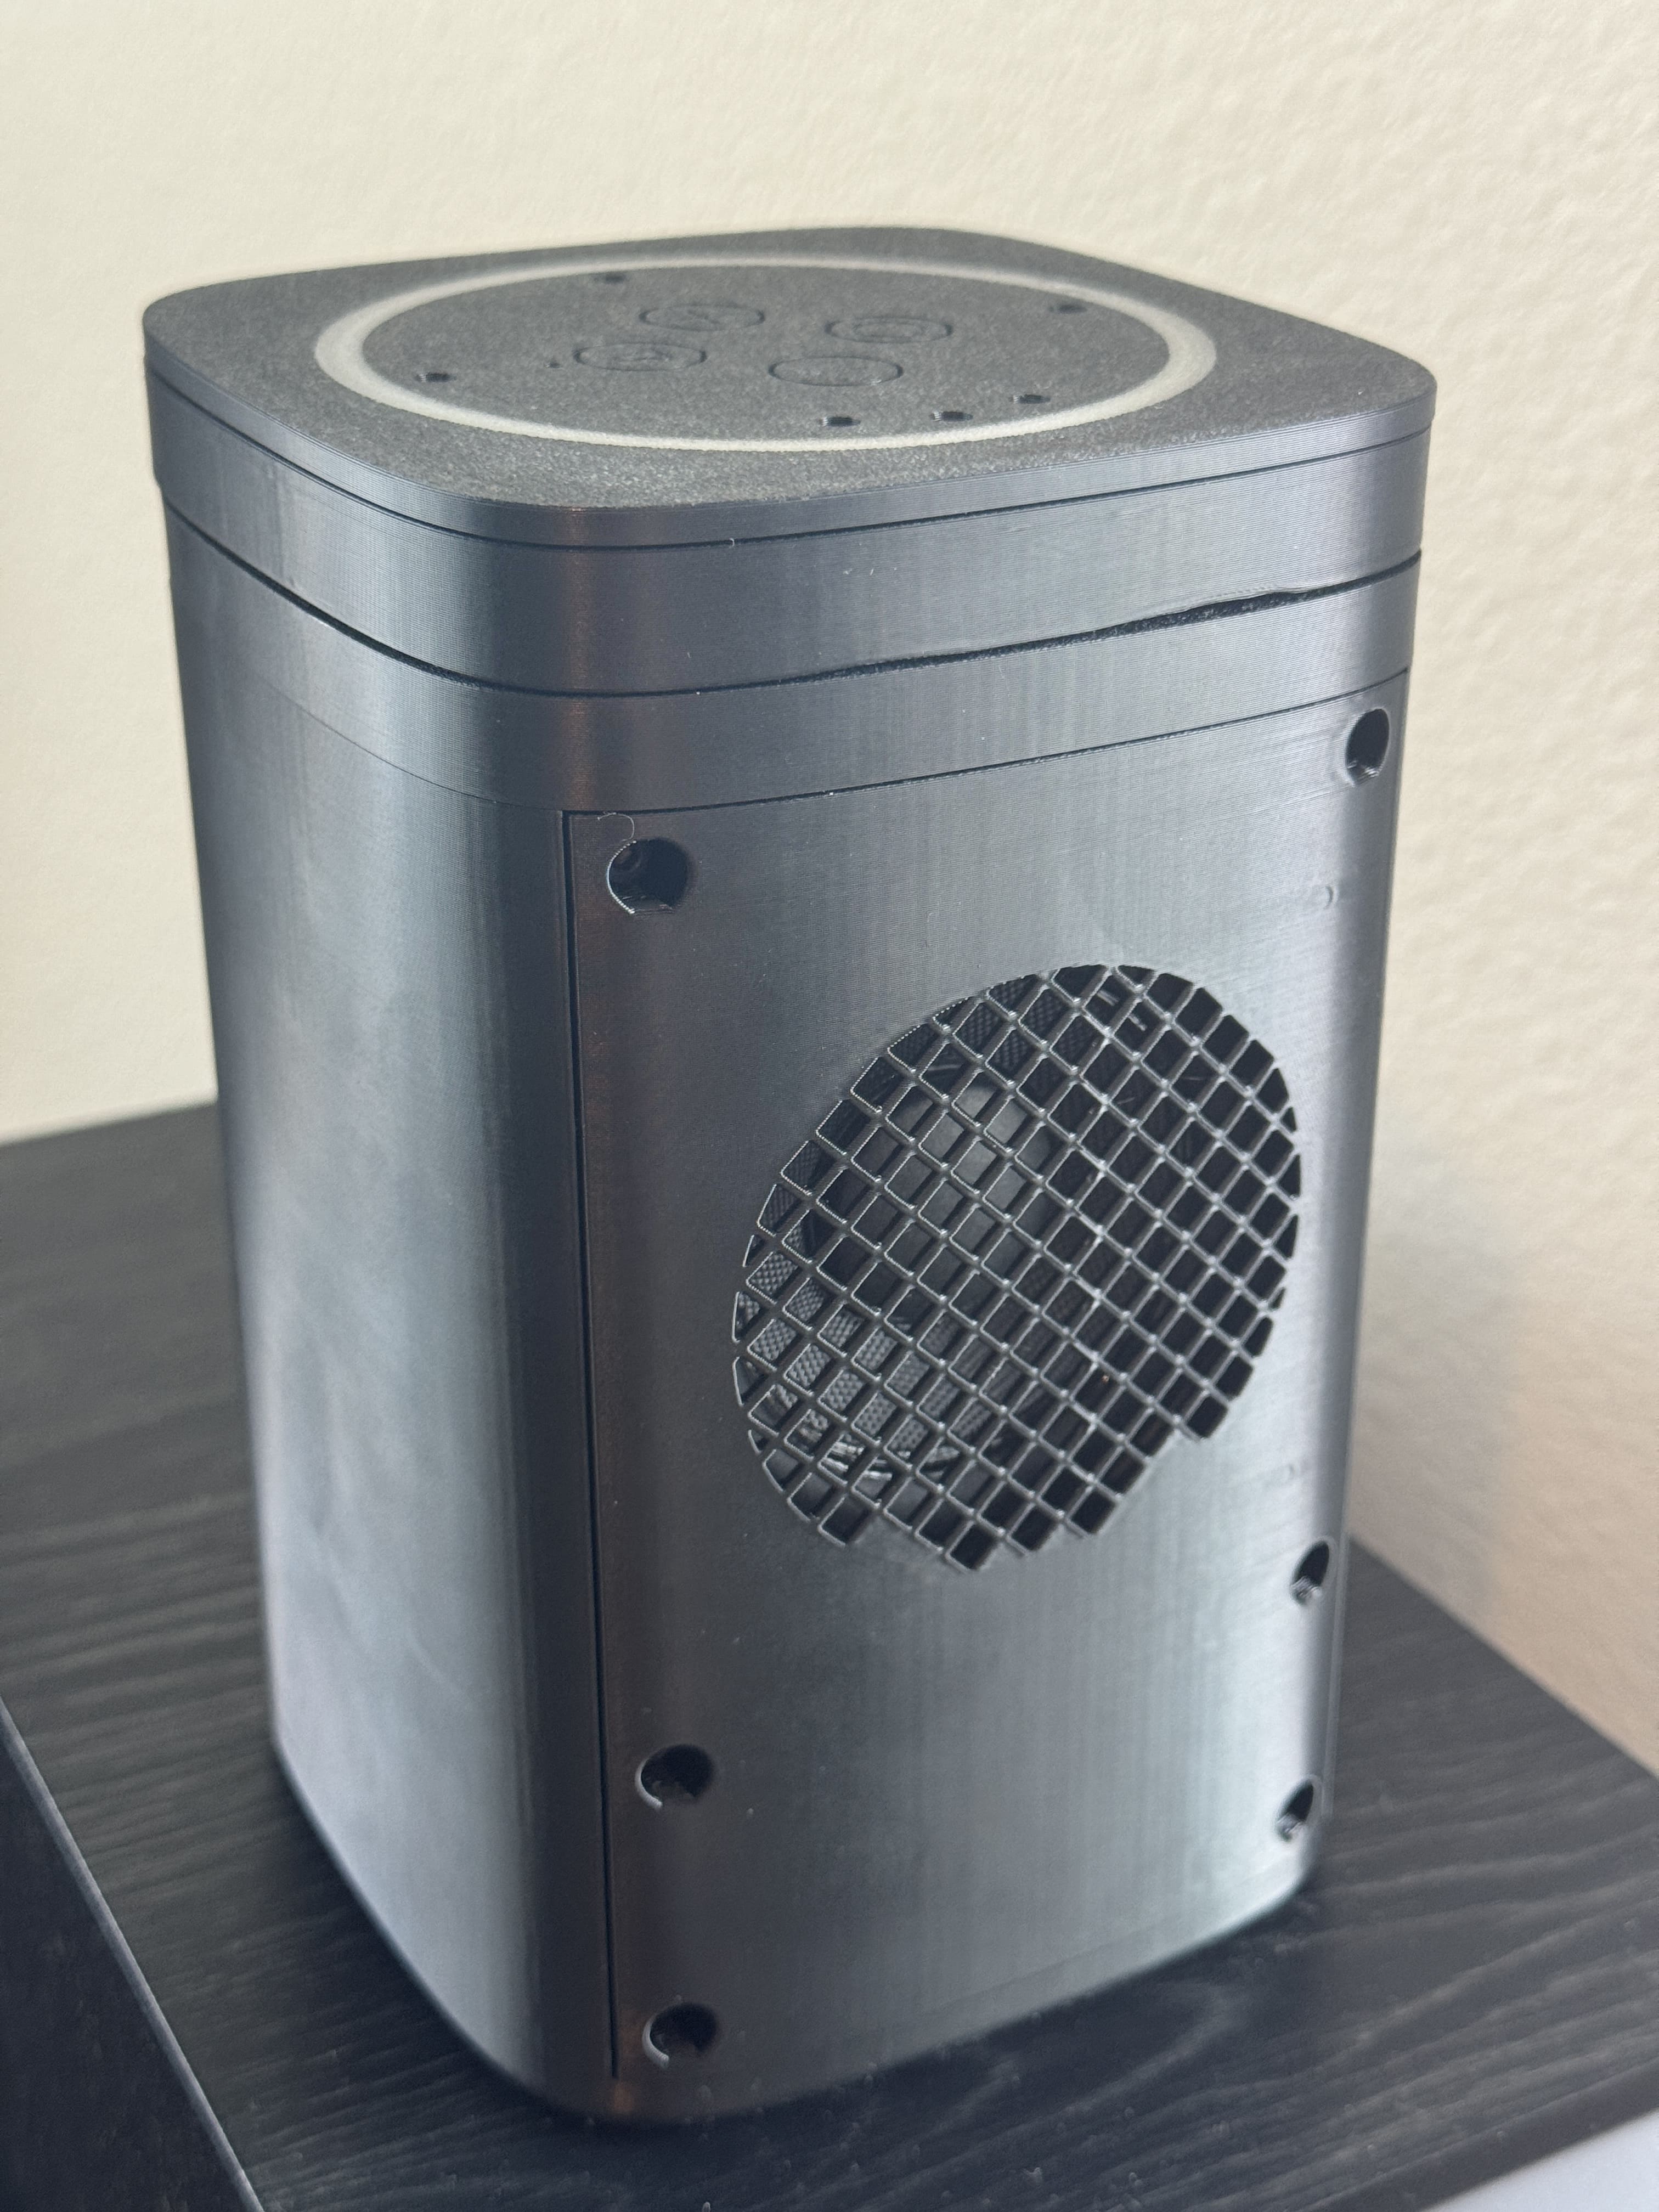
Large (3-Inch) Speaker Enclosure
-
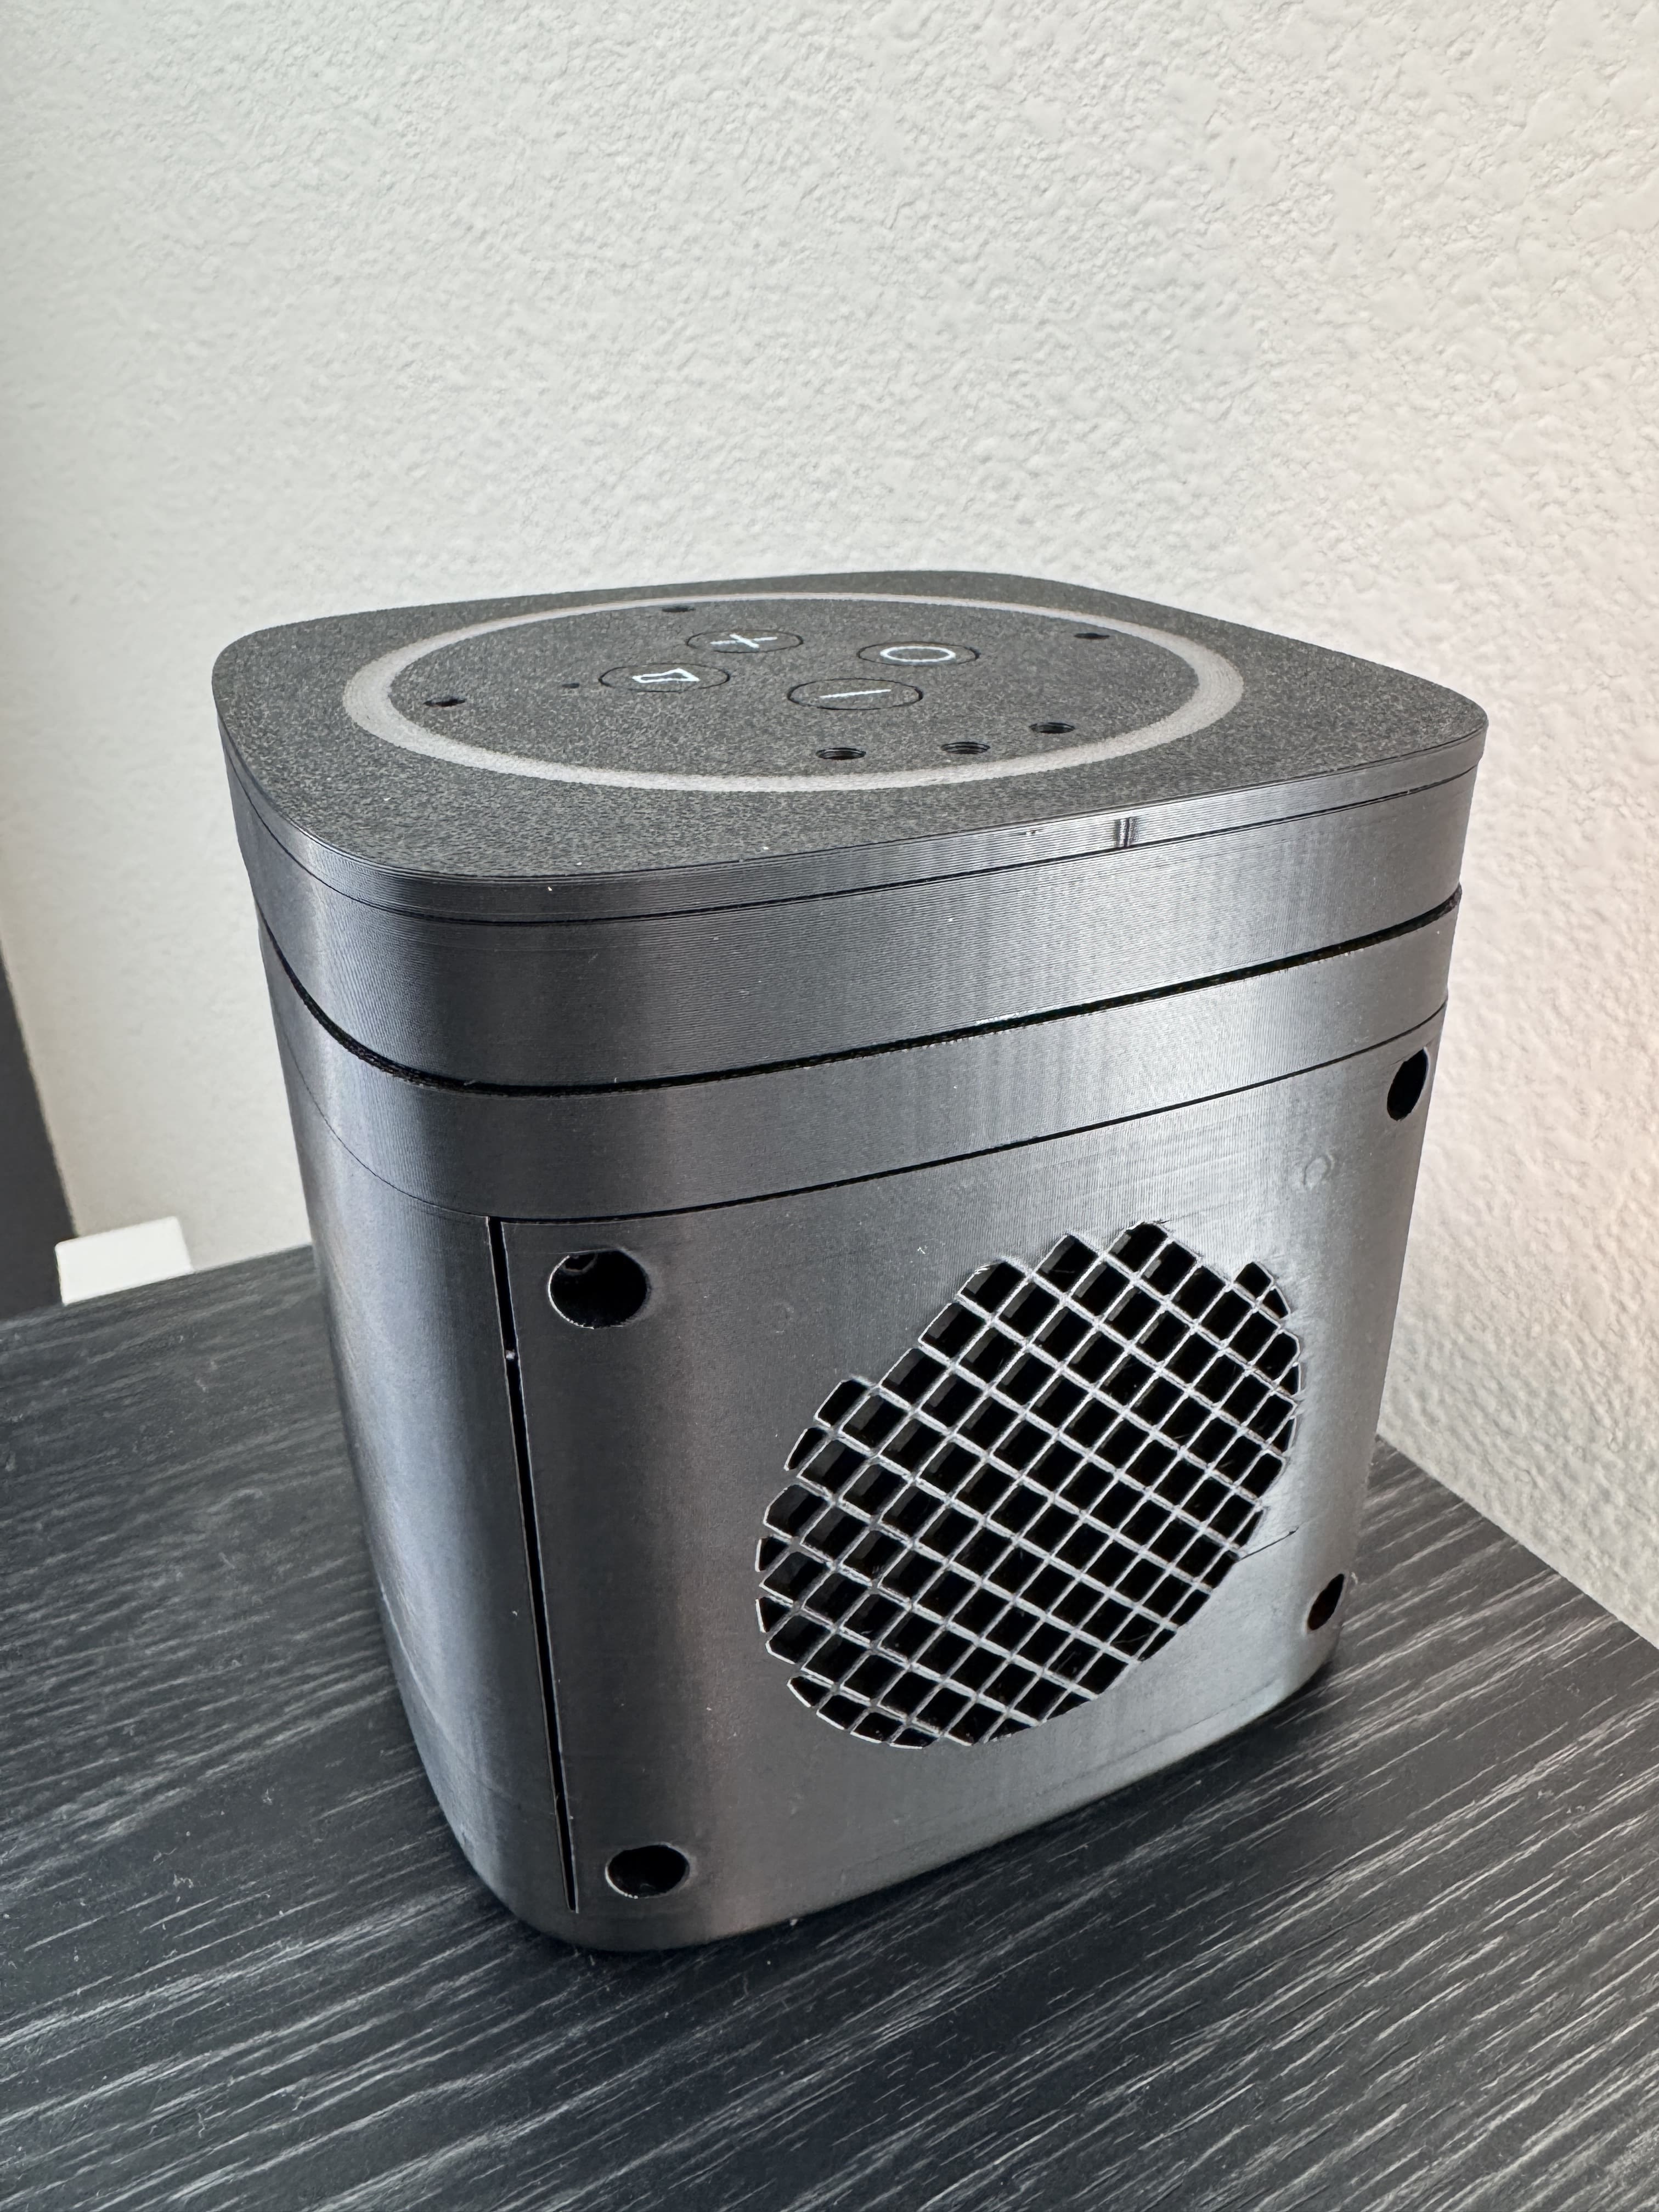
Medium (2-Inch) Speaker Enclosure
-
Small (1-Inch) Speaker Enclosure

Recommended Accessories
-
 The 2.54mm JST-XH 2-Pin Male Connector goes in-between the Satellite1's built-in amplifier and your selected speaker.
 -
Spade connectors and a crimper tool
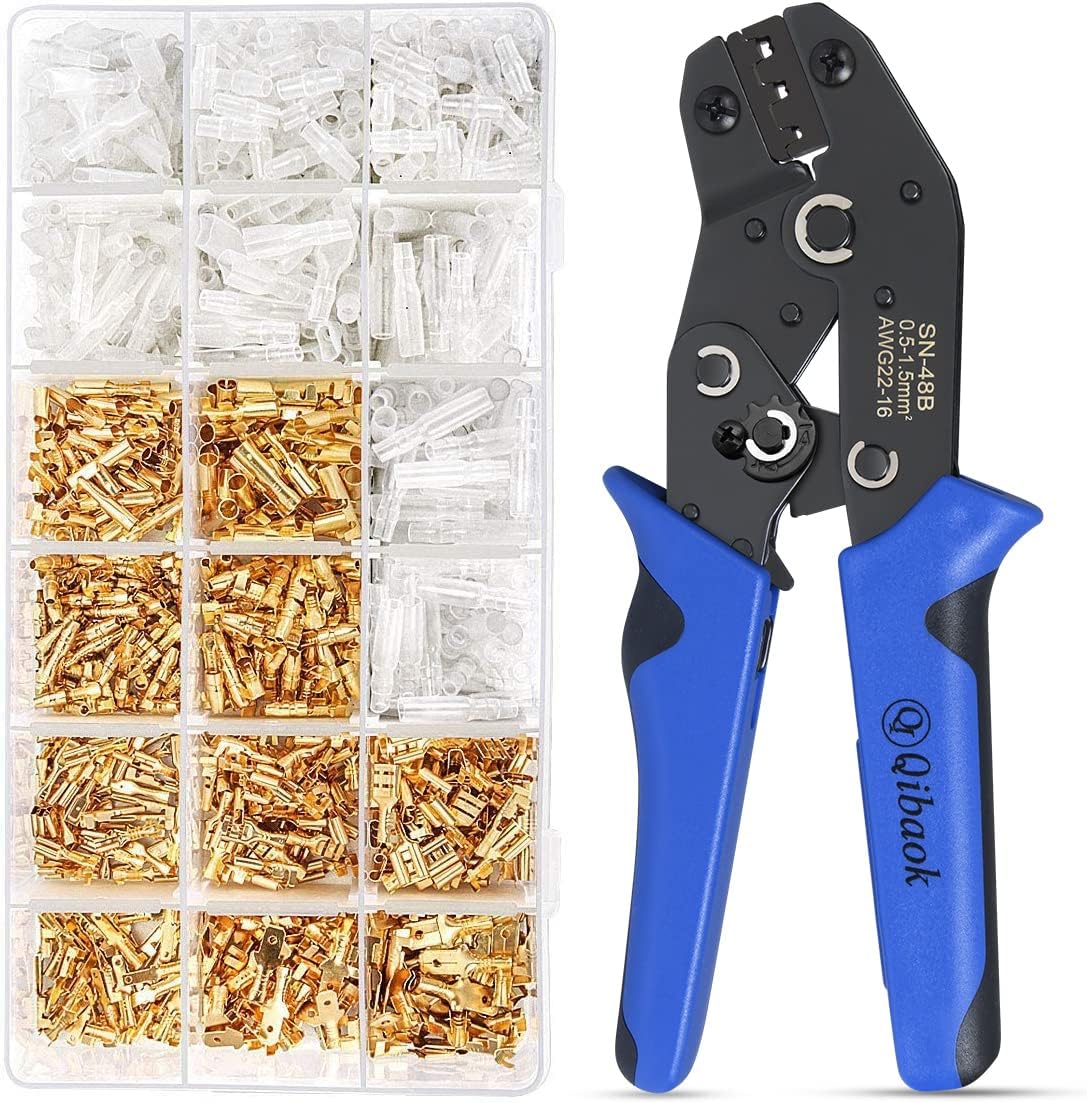 For the cleanest connection between the speaker and the JST-XH cable, we recommend using spade connectors. If you prefer, you can solder the cable to the speaker terminals, or simply wrap the cable around the terminals—it’s entirely up to you.
Get it on Amazon
For the cleanest connection between the speaker and the JST-XH cable, we recommend using spade connectors. If you prefer, you can solder the cable to the speaker terminals, or simply wrap the cable around the terminals—it’s entirely up to you.
Get it on Amazon
How to 3D Print the Enclosures
Download the appropriate pre-built .3mf project file and open in your favorite slicer software:
Remove unnecessary plates, depending on your speaker selection, enclosure type, and whether your printer supports multi-material or multi-part printing.
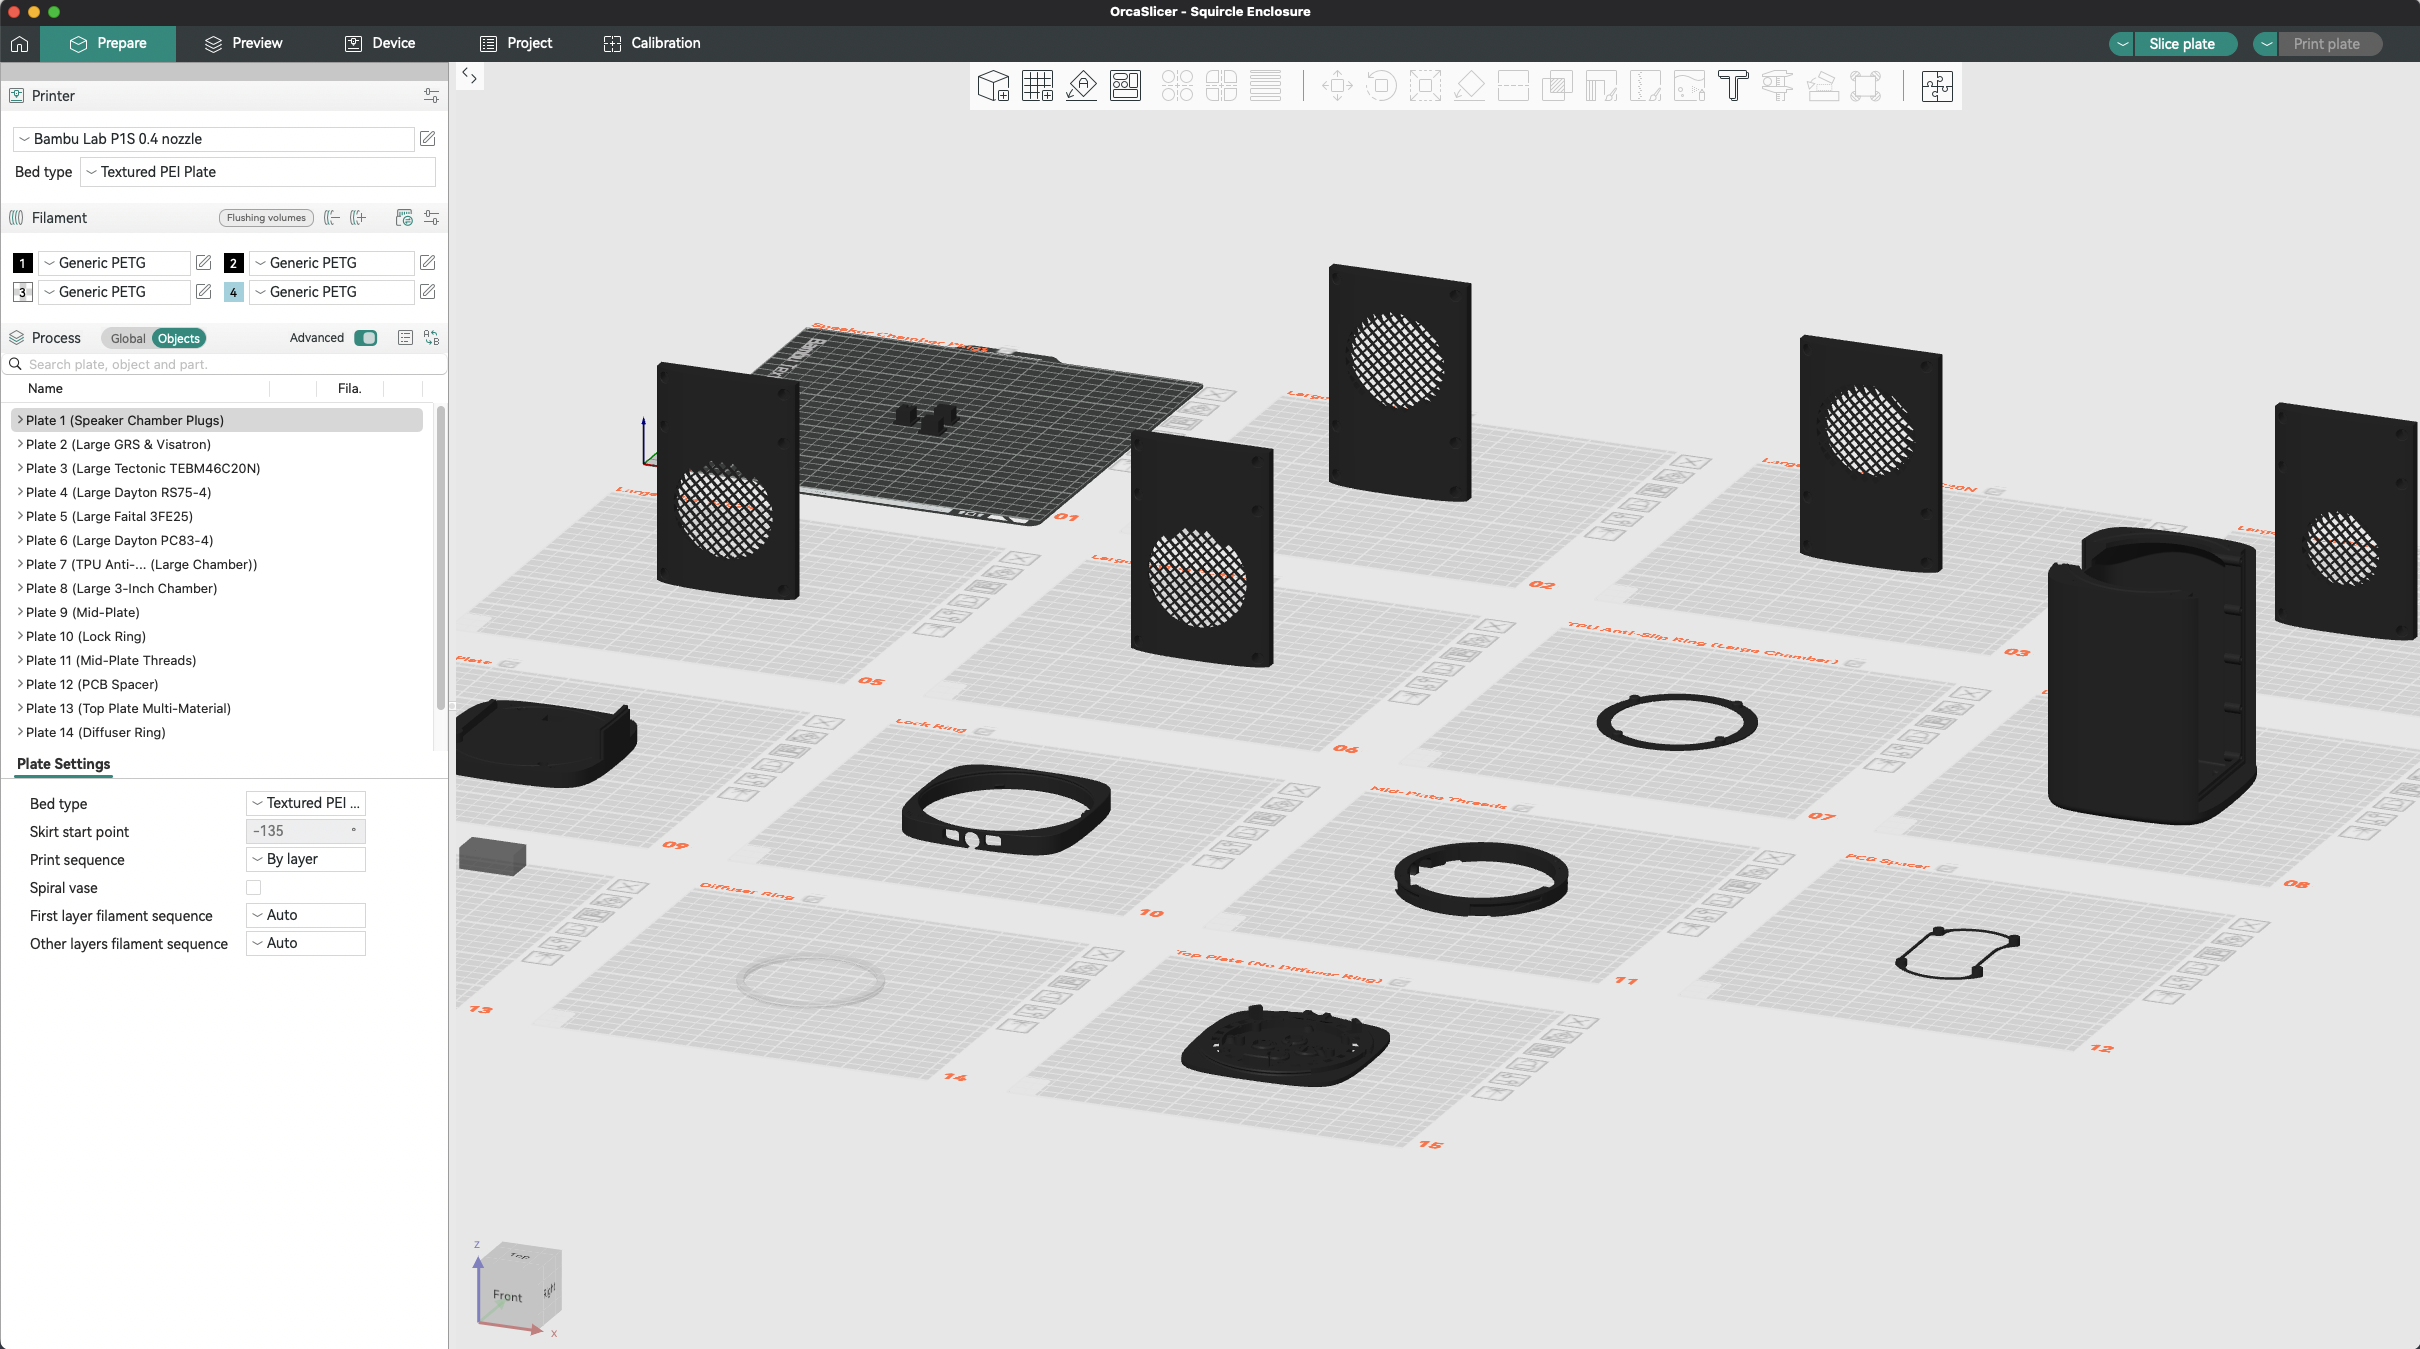
Recommend PETG-HF
We recommend PETG-HF with 30% infill for ideal acoustics. PLA with 15% infill will work as well.
No Supports Required
Study the screenshot above and you'll see how to print each part such that no supports are needed.
Screws Are Required
M3 x 8mm screws are required for assembly. To maintain thread integrity, minimize repeated installation and removal of screws.
Sensors are not supported, yet
Enclosing a "Dev Kit" affects sensor accuracy—lux, temperature, and humidity readings won’t reflect the room, and the top plate is not designed to support mmWave sensors. Our upcoming power-over-ethernet SHOE board and a PoE mid-plate will relocate the sensors into the speaker chamber and add a PoE port to the enclosure.
When playing music at full volume the wake word may not respond
This is caused by vibrations traveling through the enclosure to the microphones. We're working with experts to address this in the official injection-molded enclosures. Stay tuned.
Assemble the Enclosure
Top Plate Assembly
-
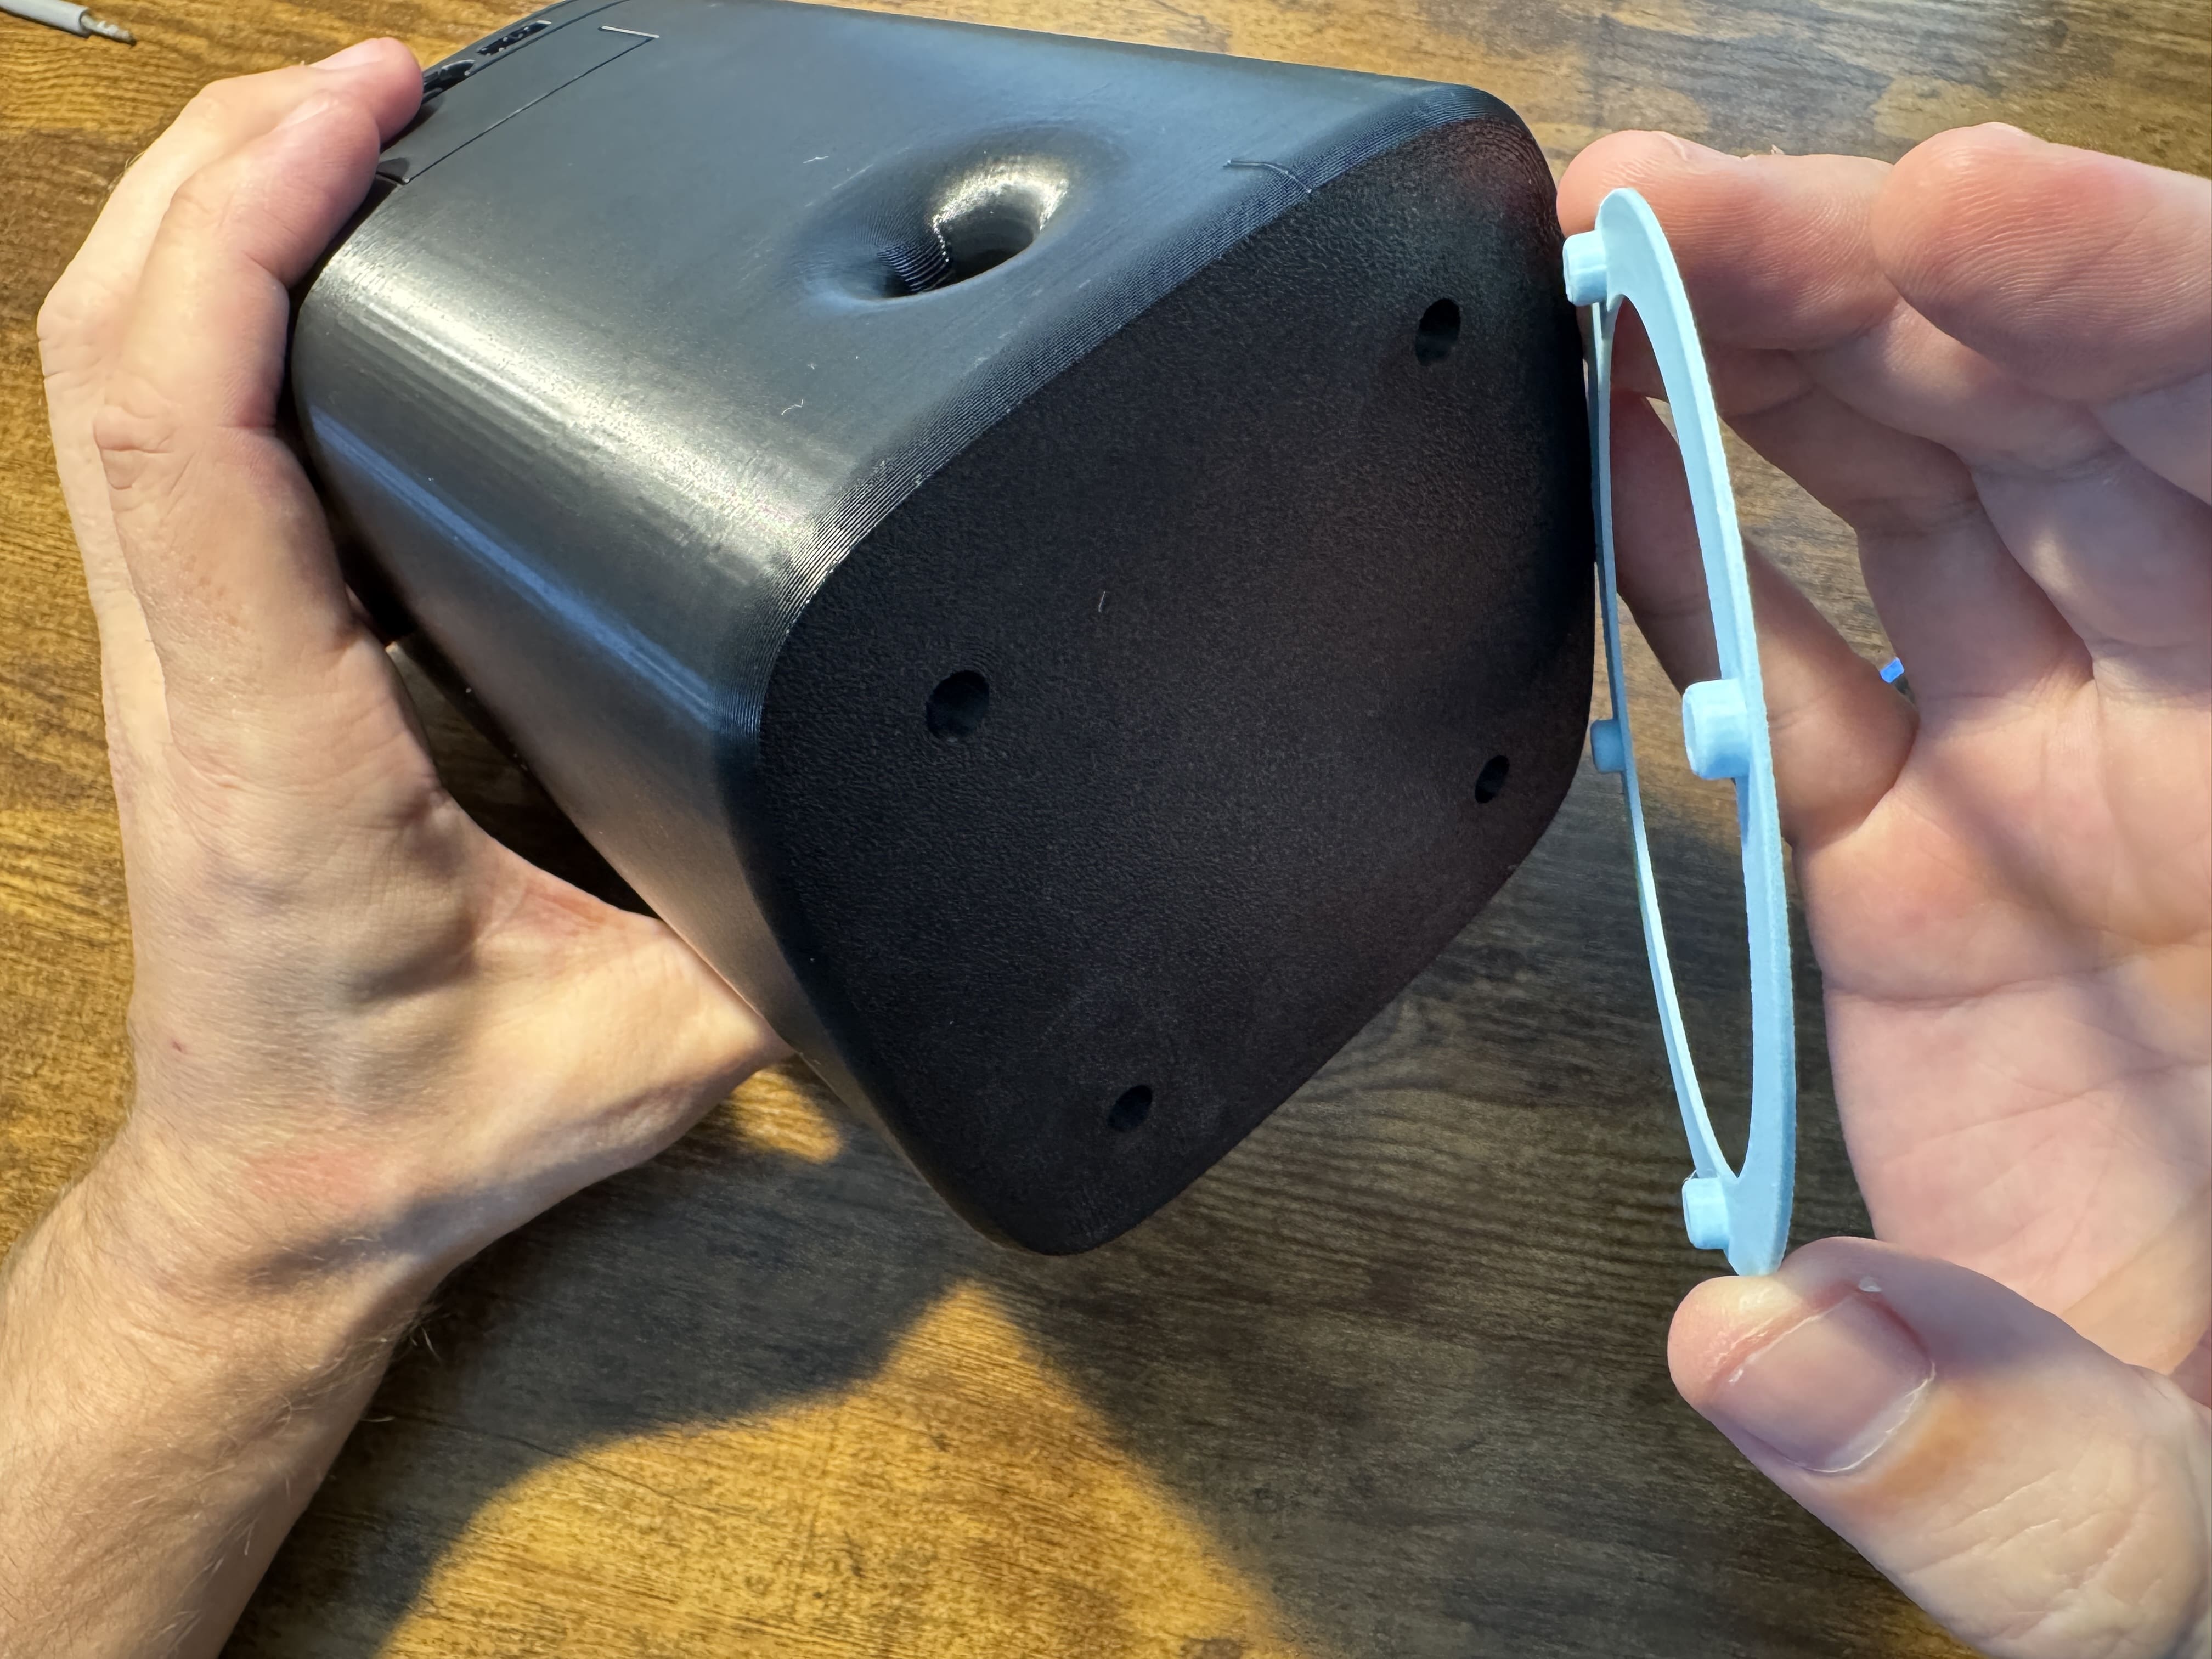
Install Diffuser Ring
 If you printed the diffuser ring as a separate part, apply light pressure around the ring to snap it in place. If you used our multi-material print, you can skip this step.
 -
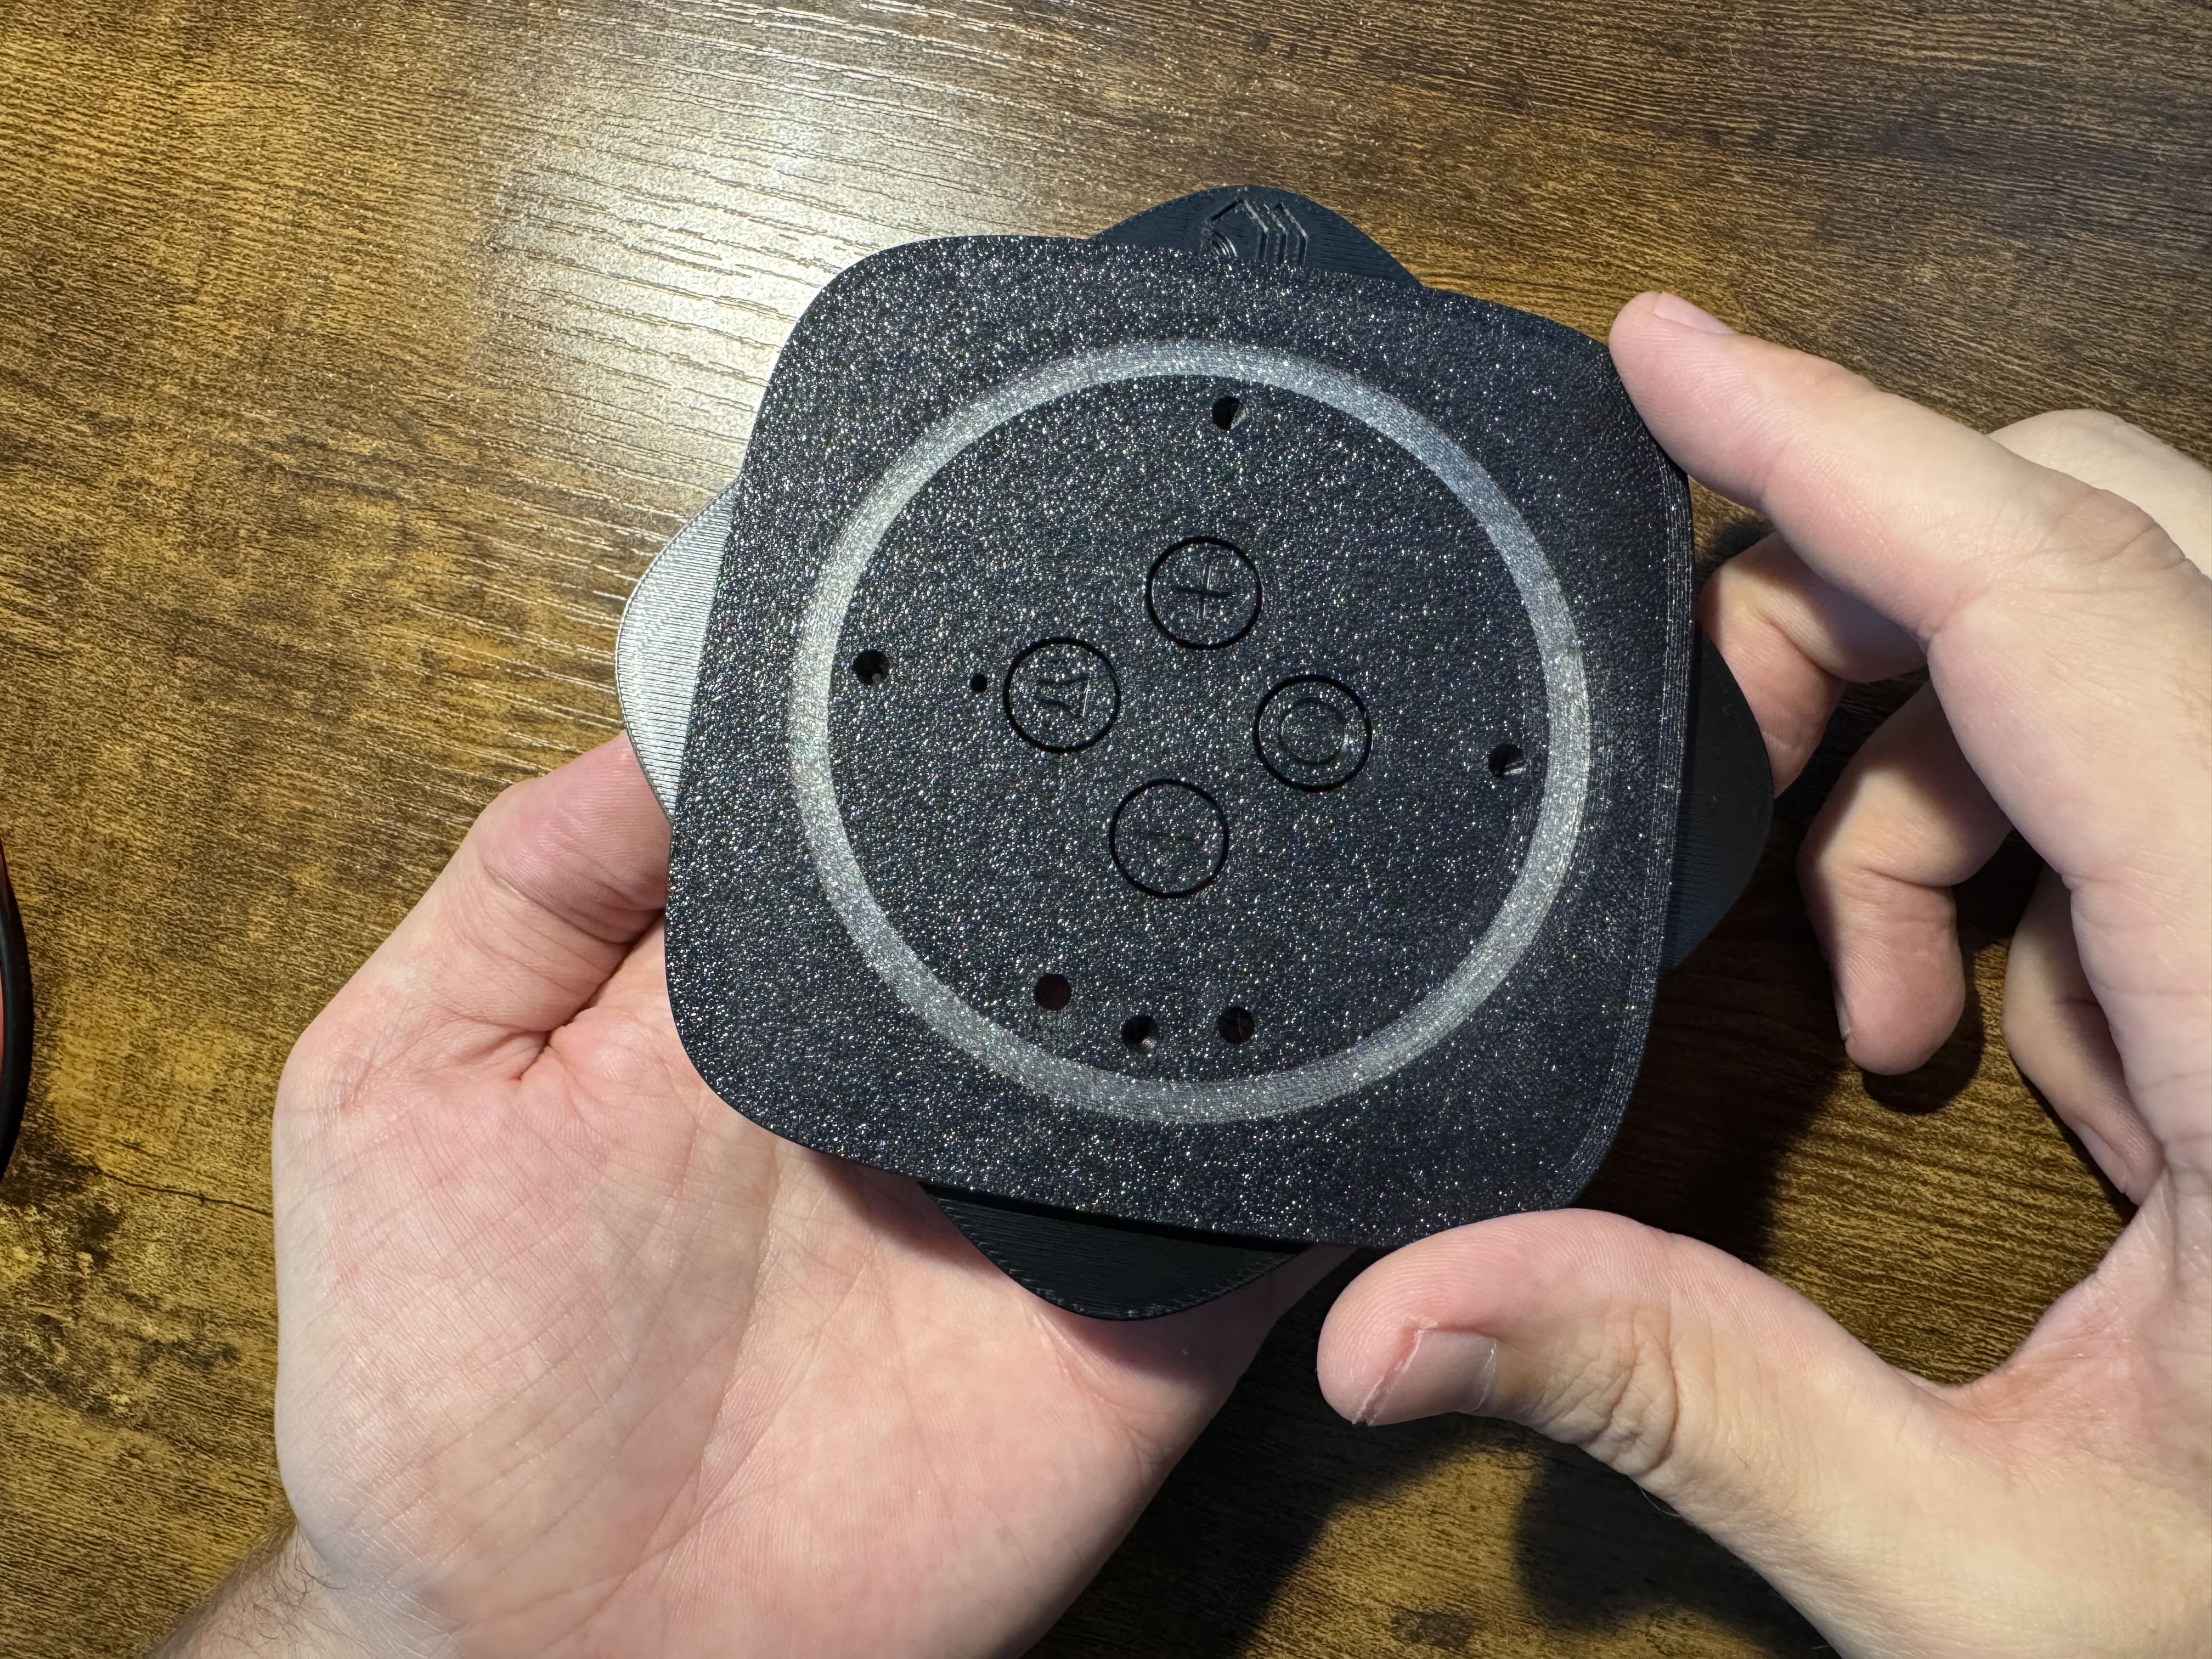
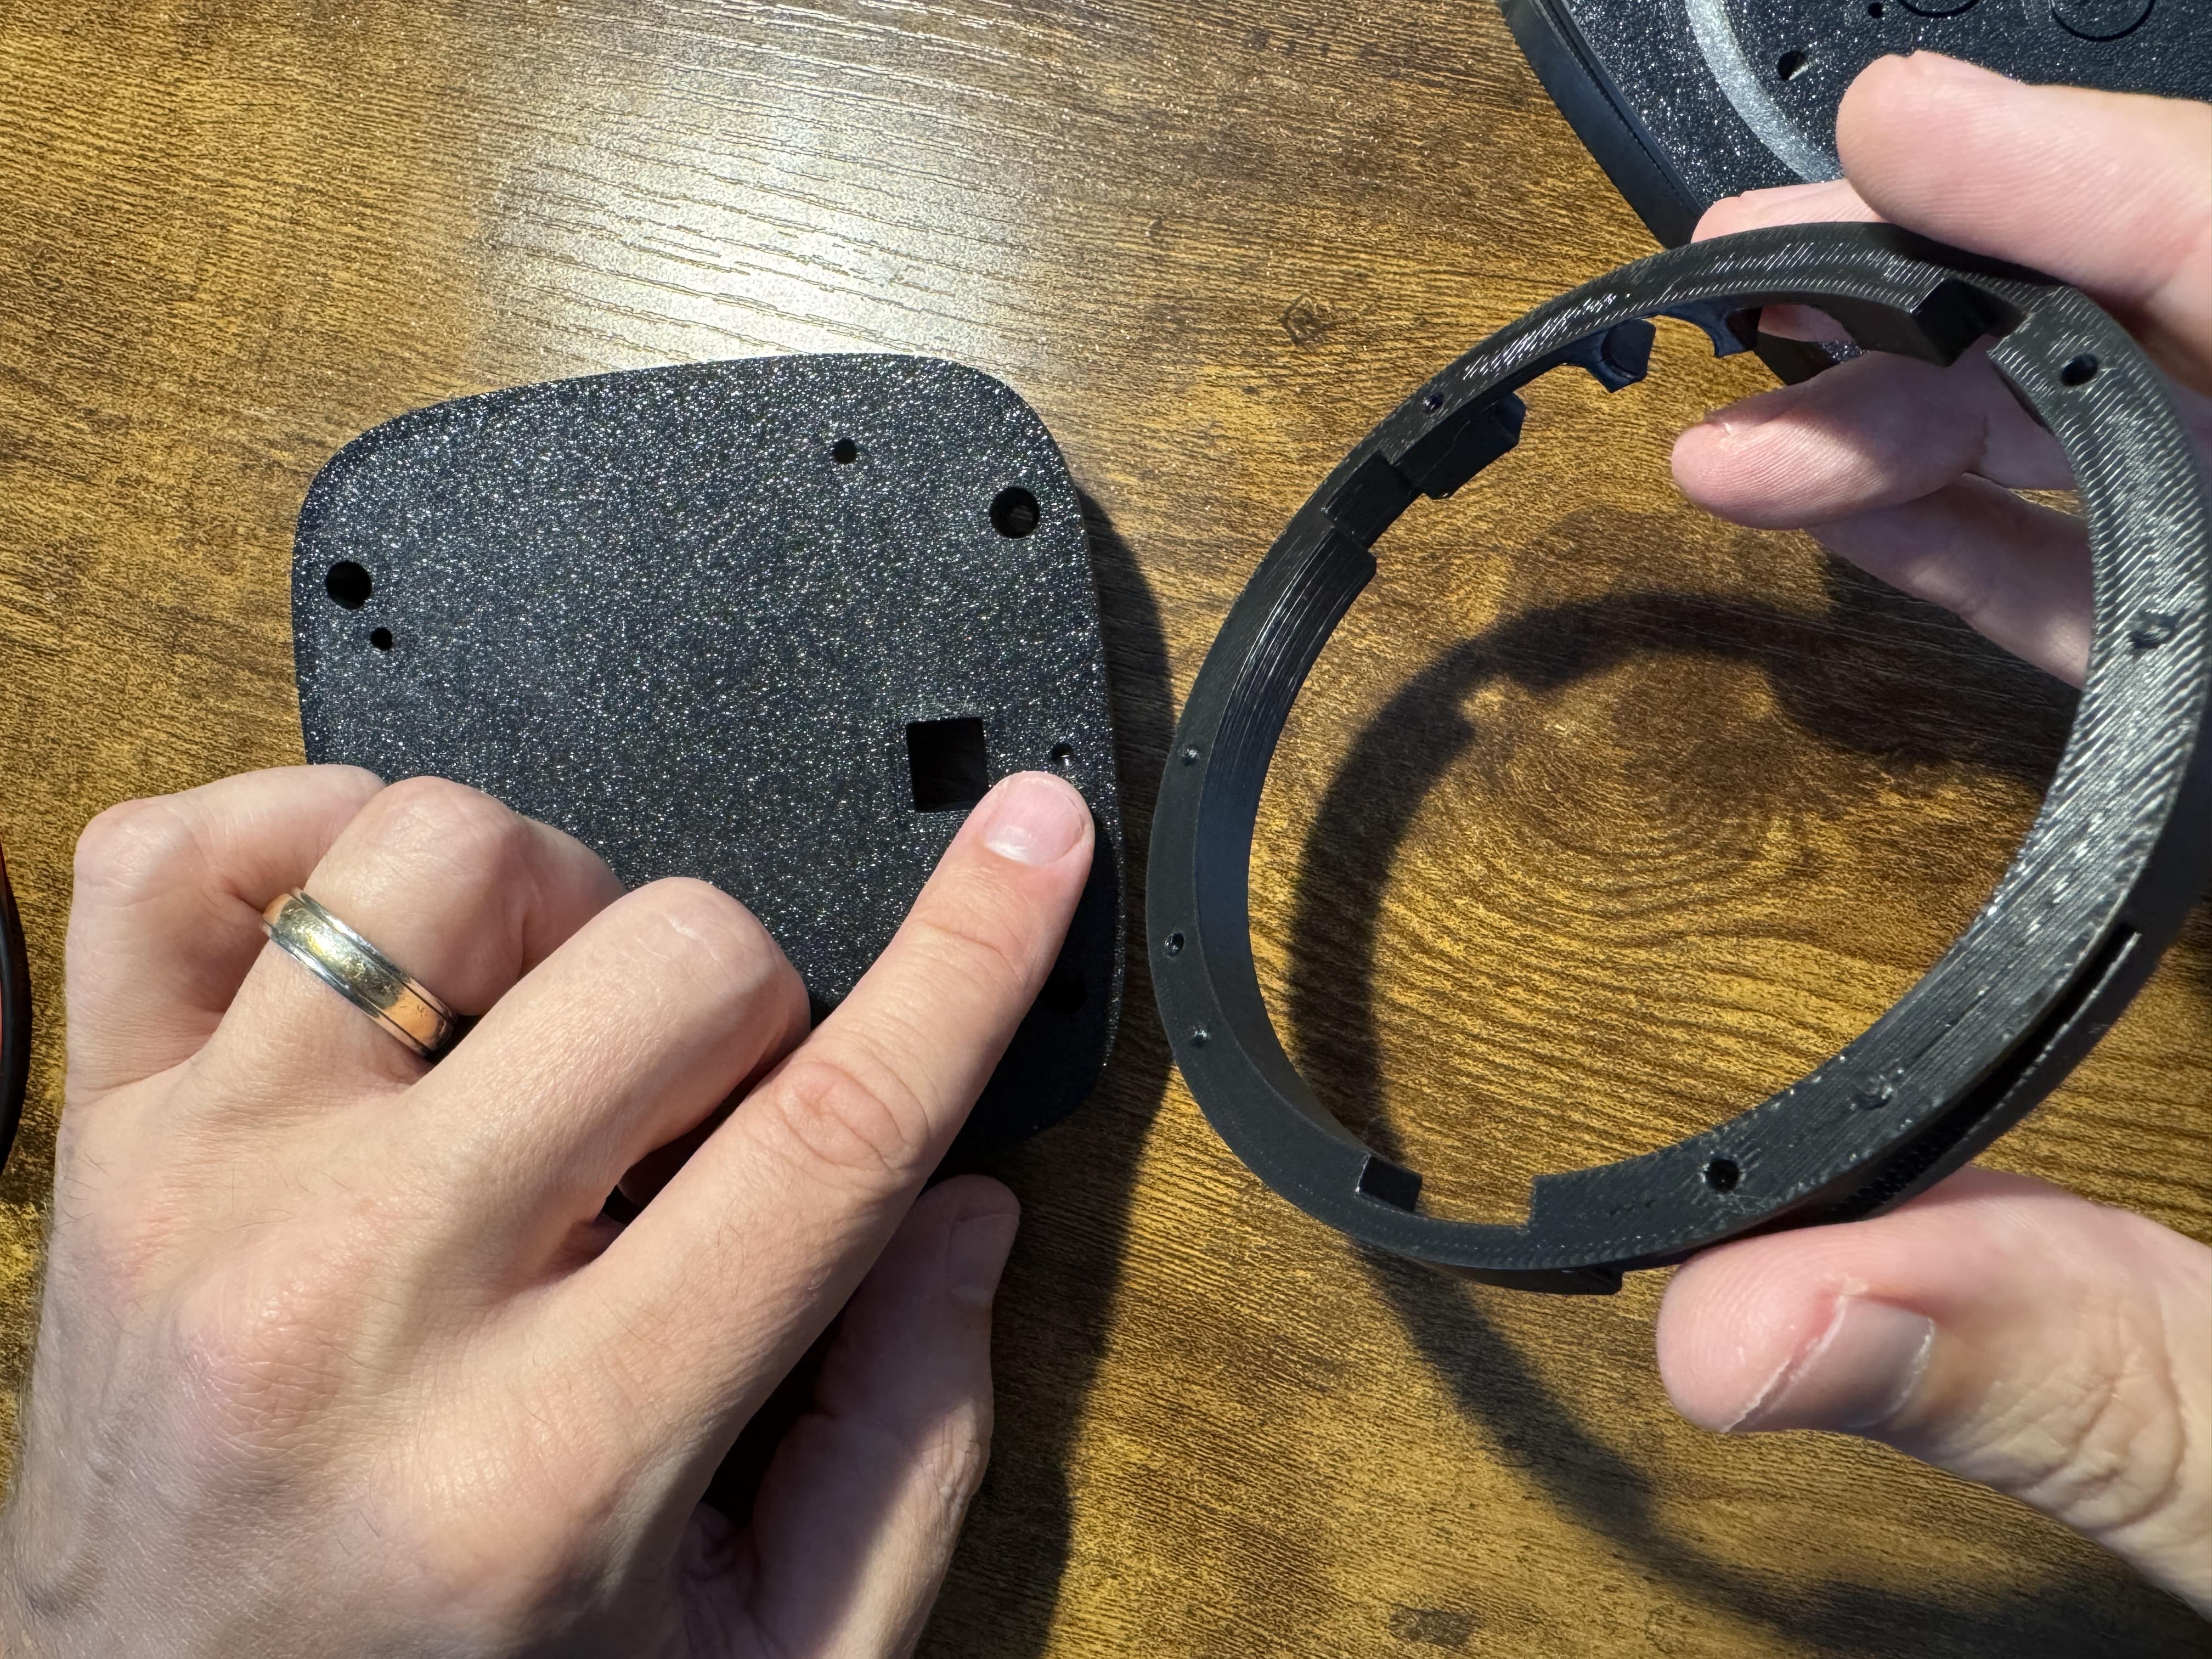
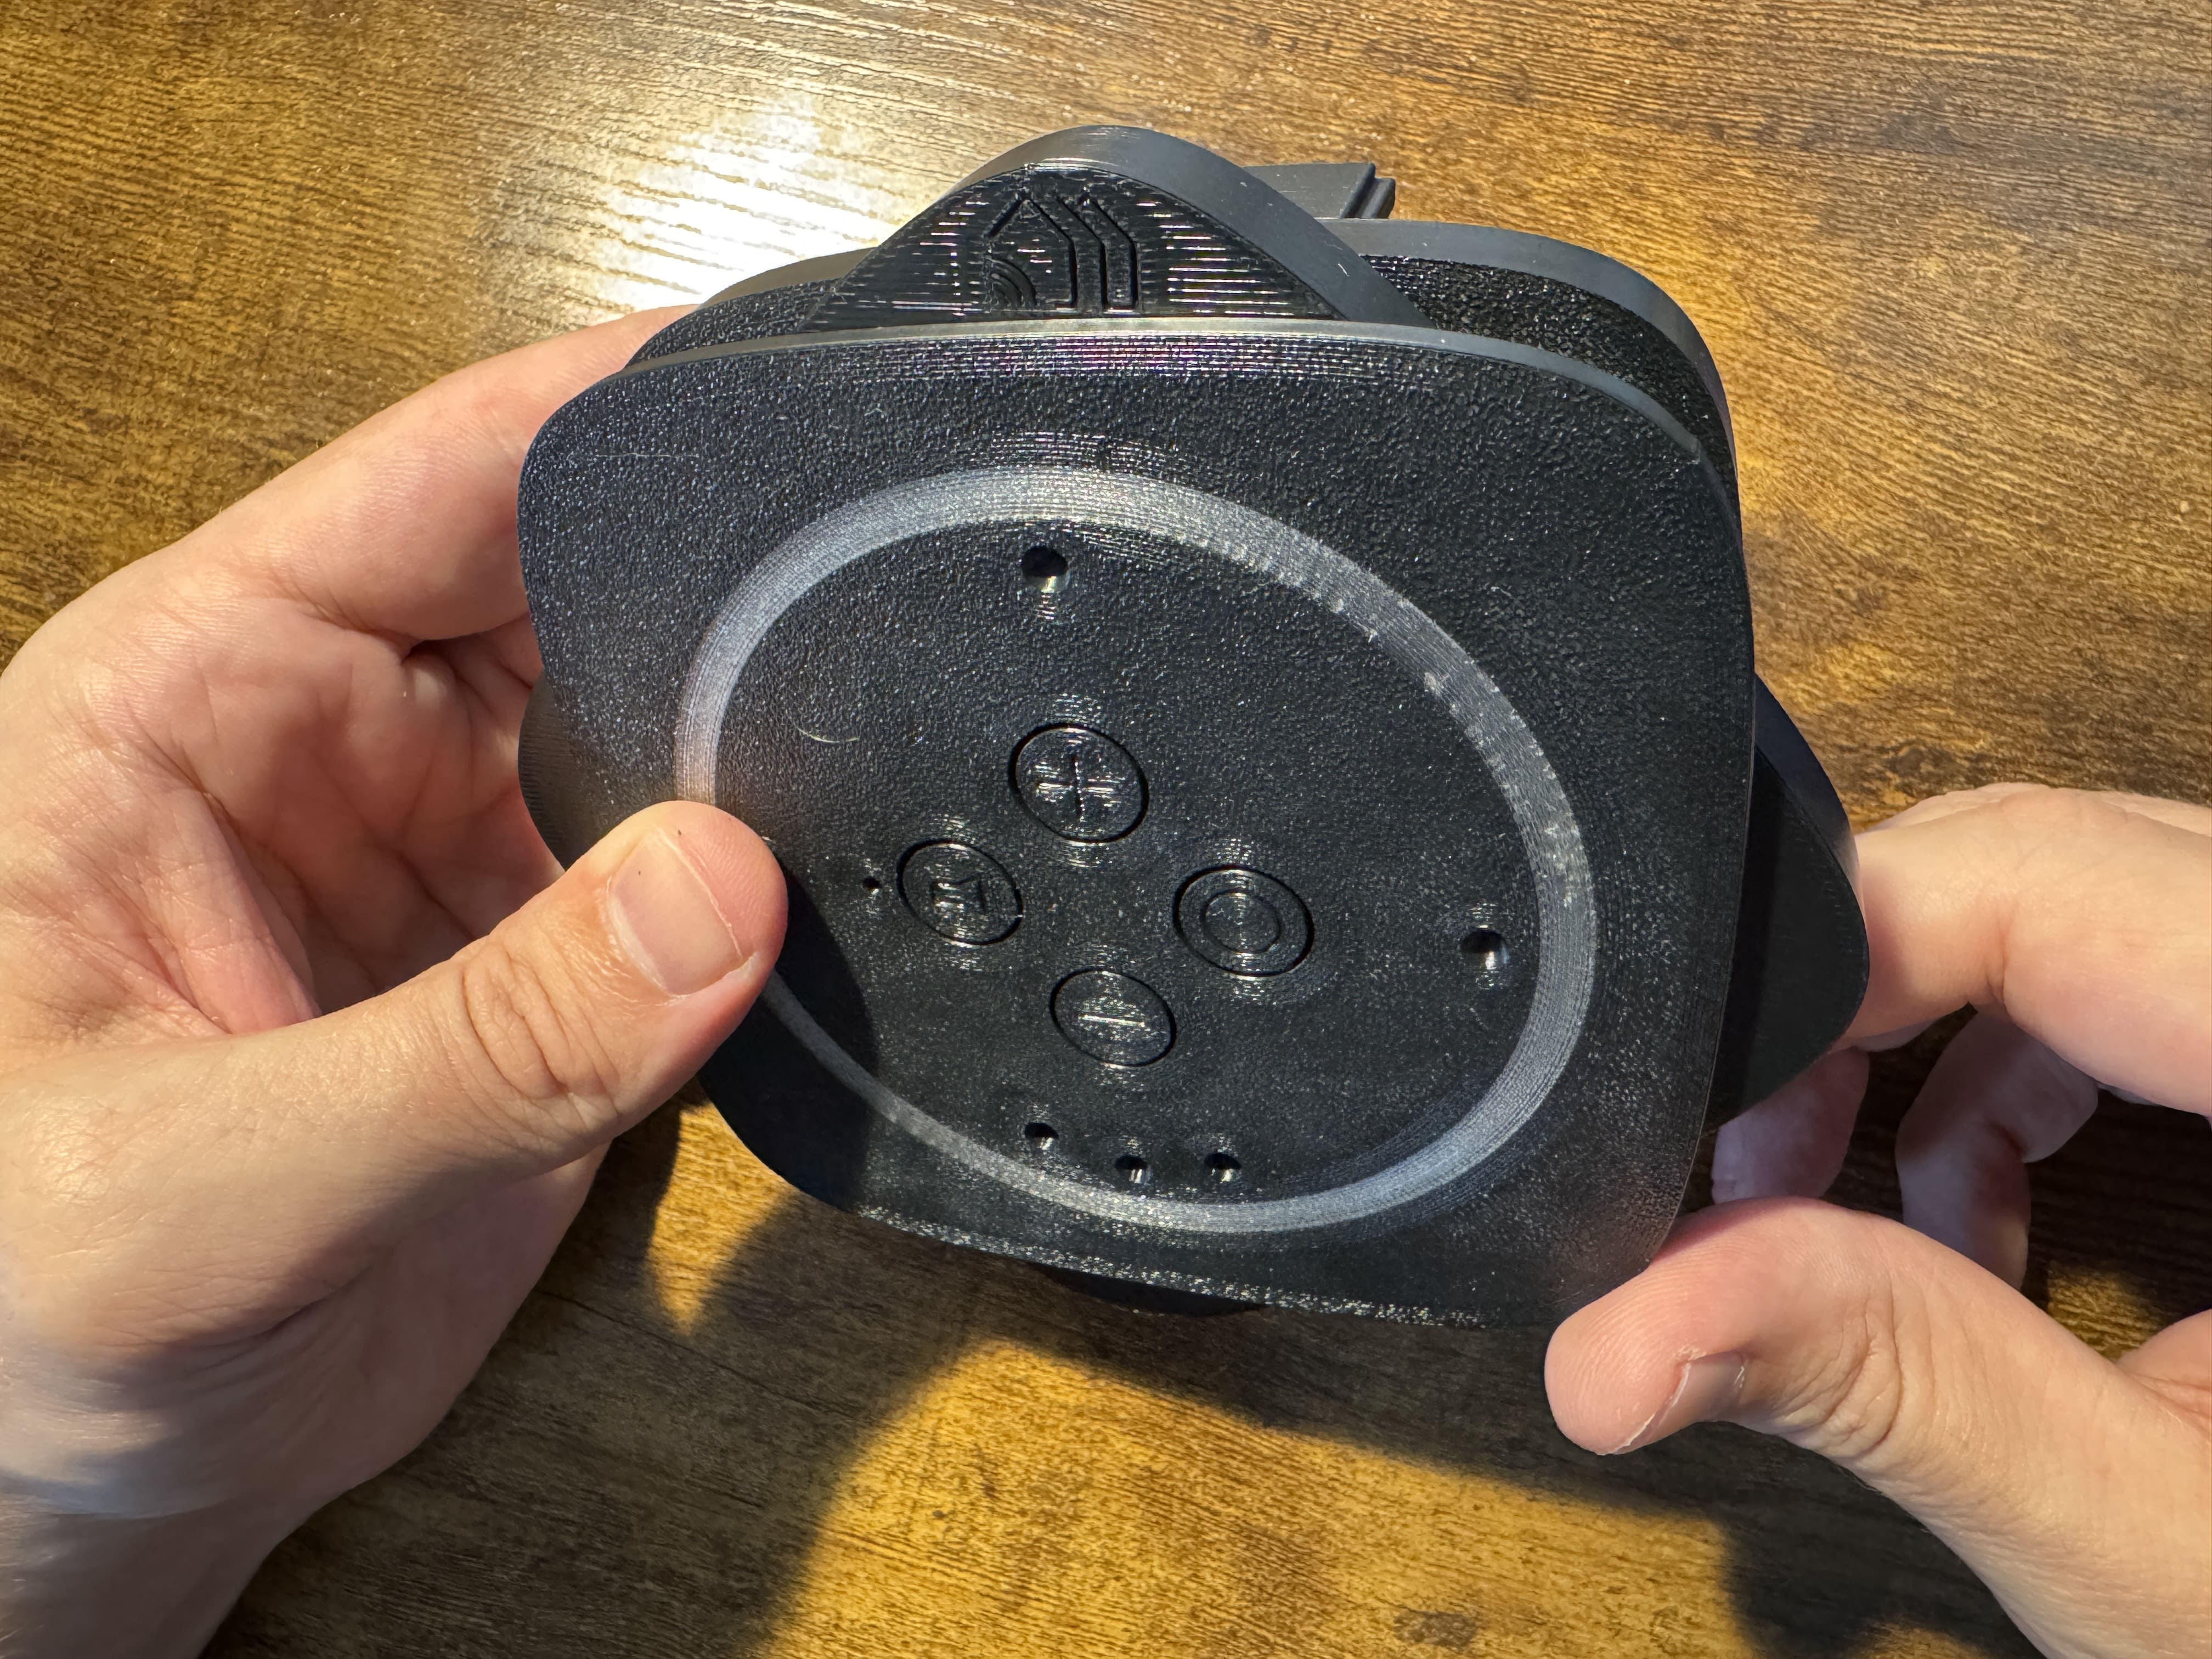
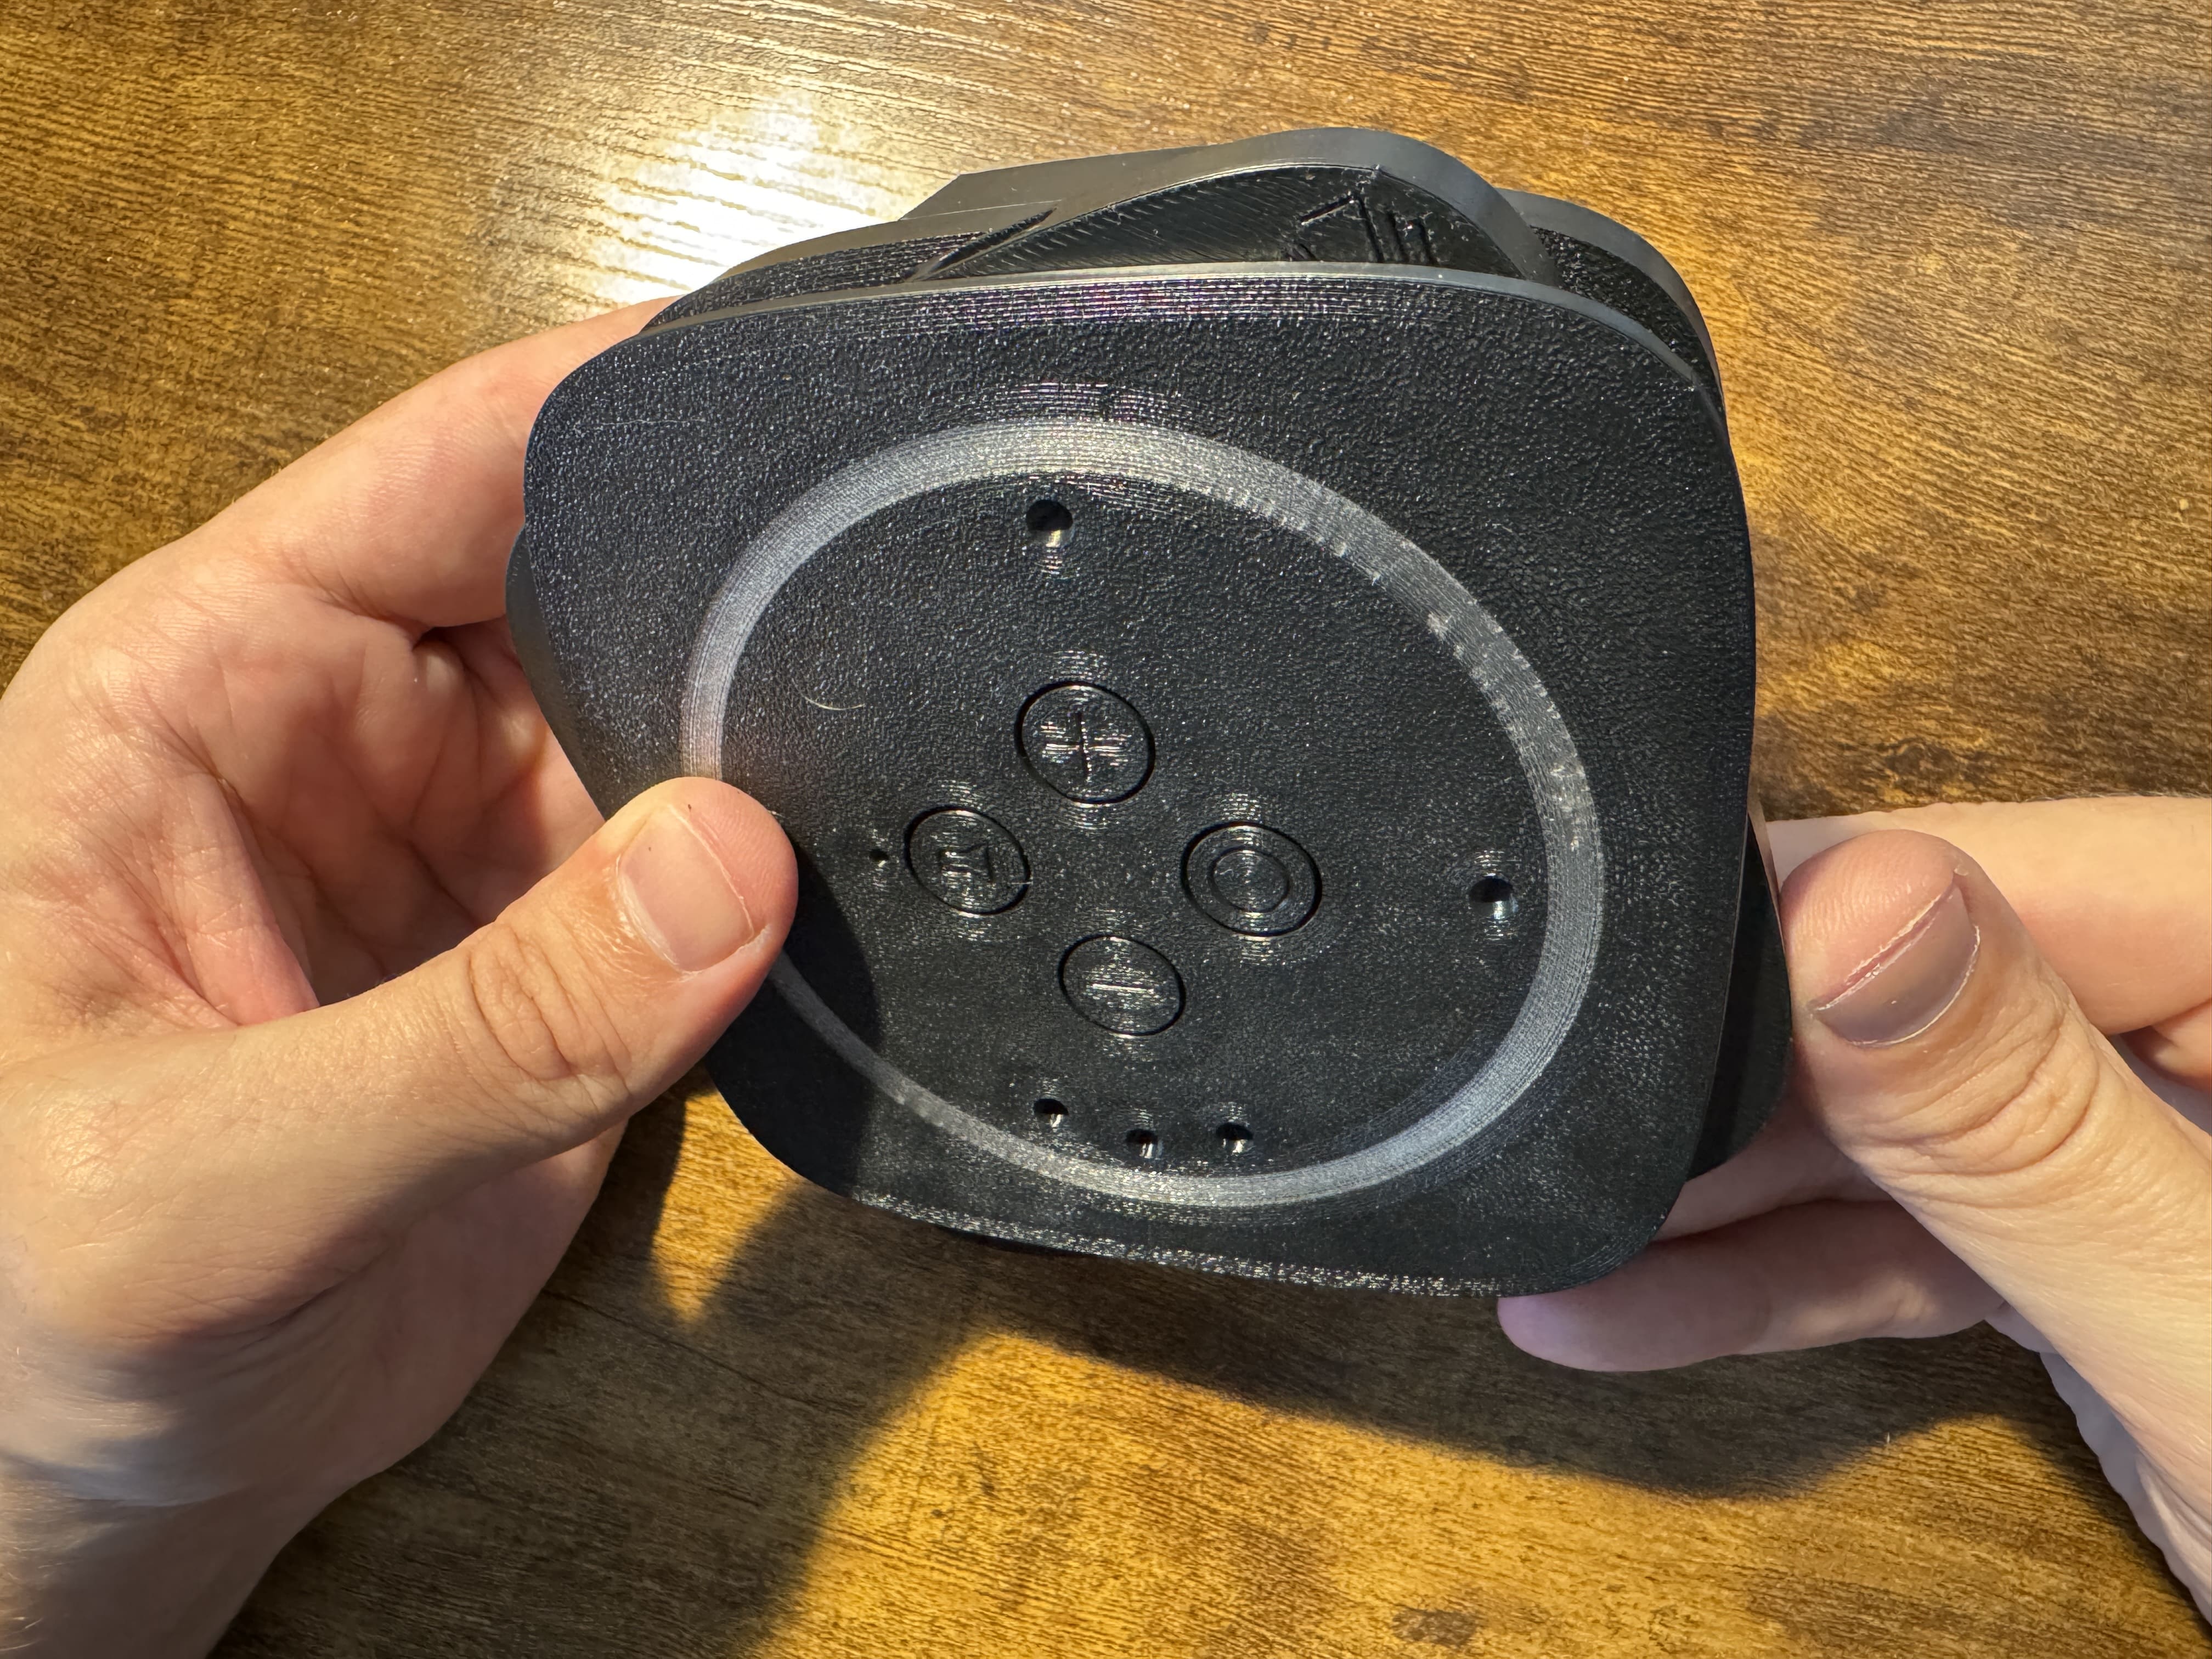
Align the FPH Logos
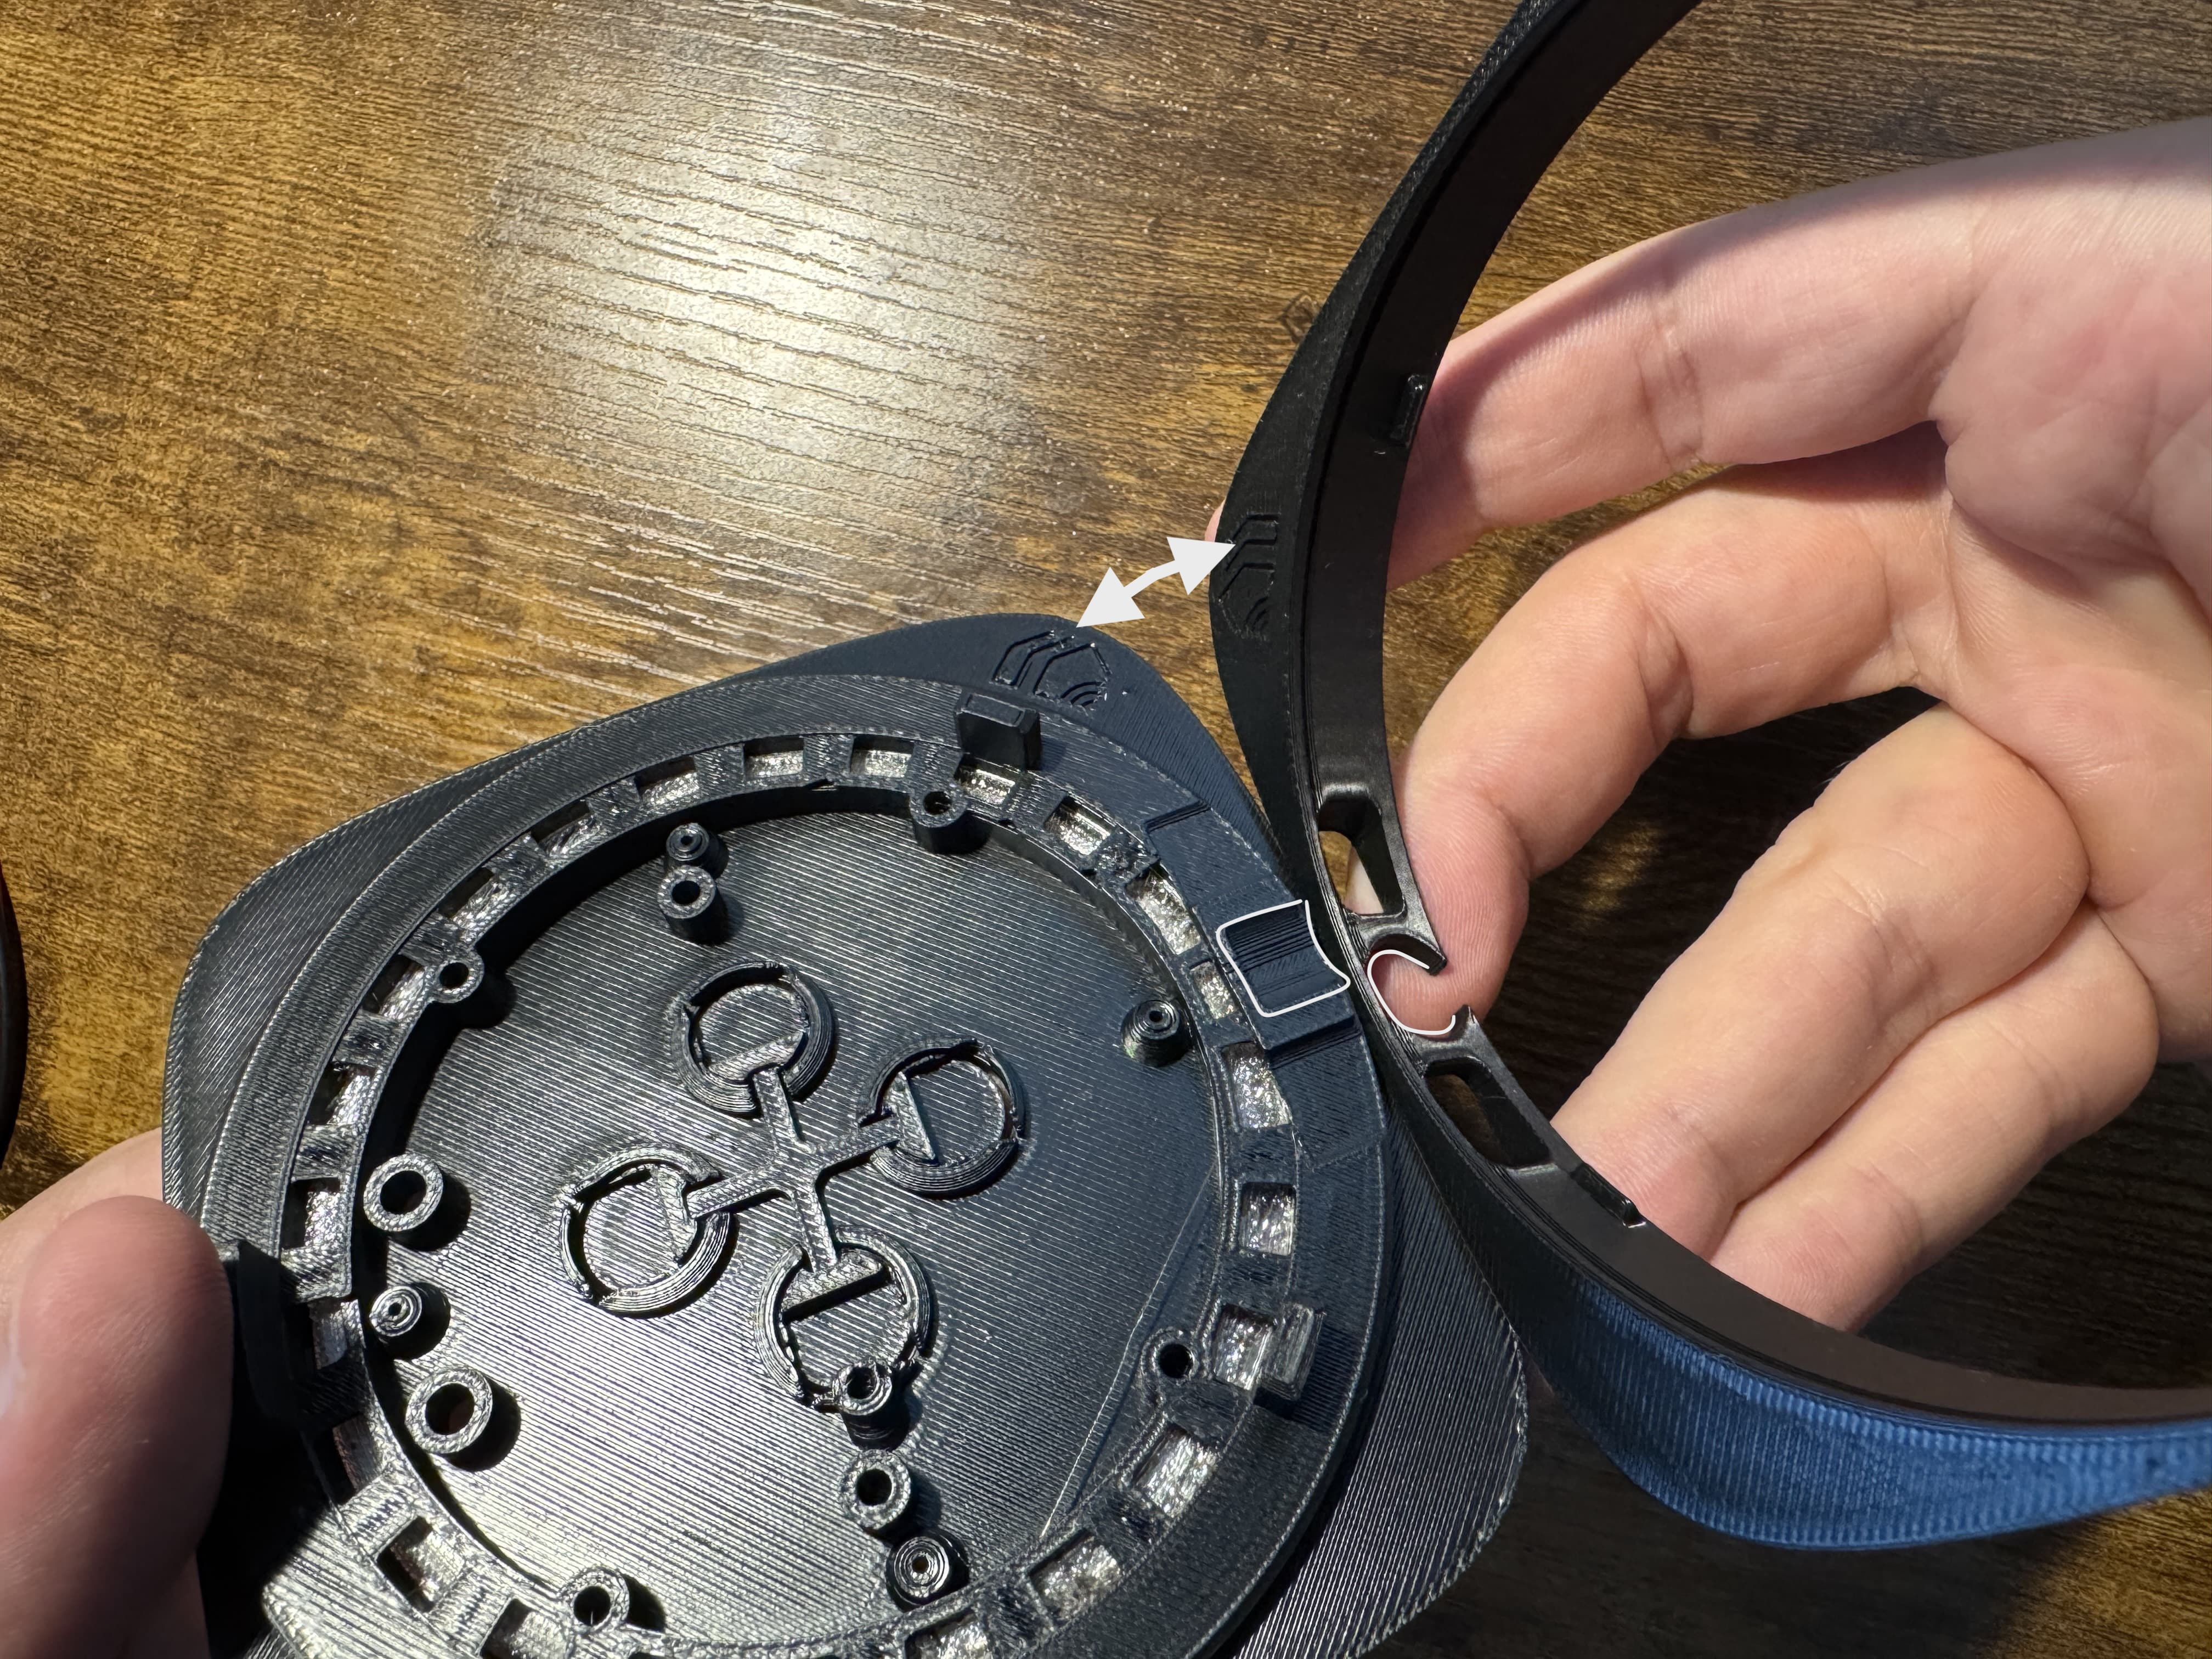 Find the two FPH logos on the top plate and lock ring. Line up the logos and the I/O ports.
 -
Snap Parts Together
 Sandwich the logos together and you'll feel both parts snap together.
 -
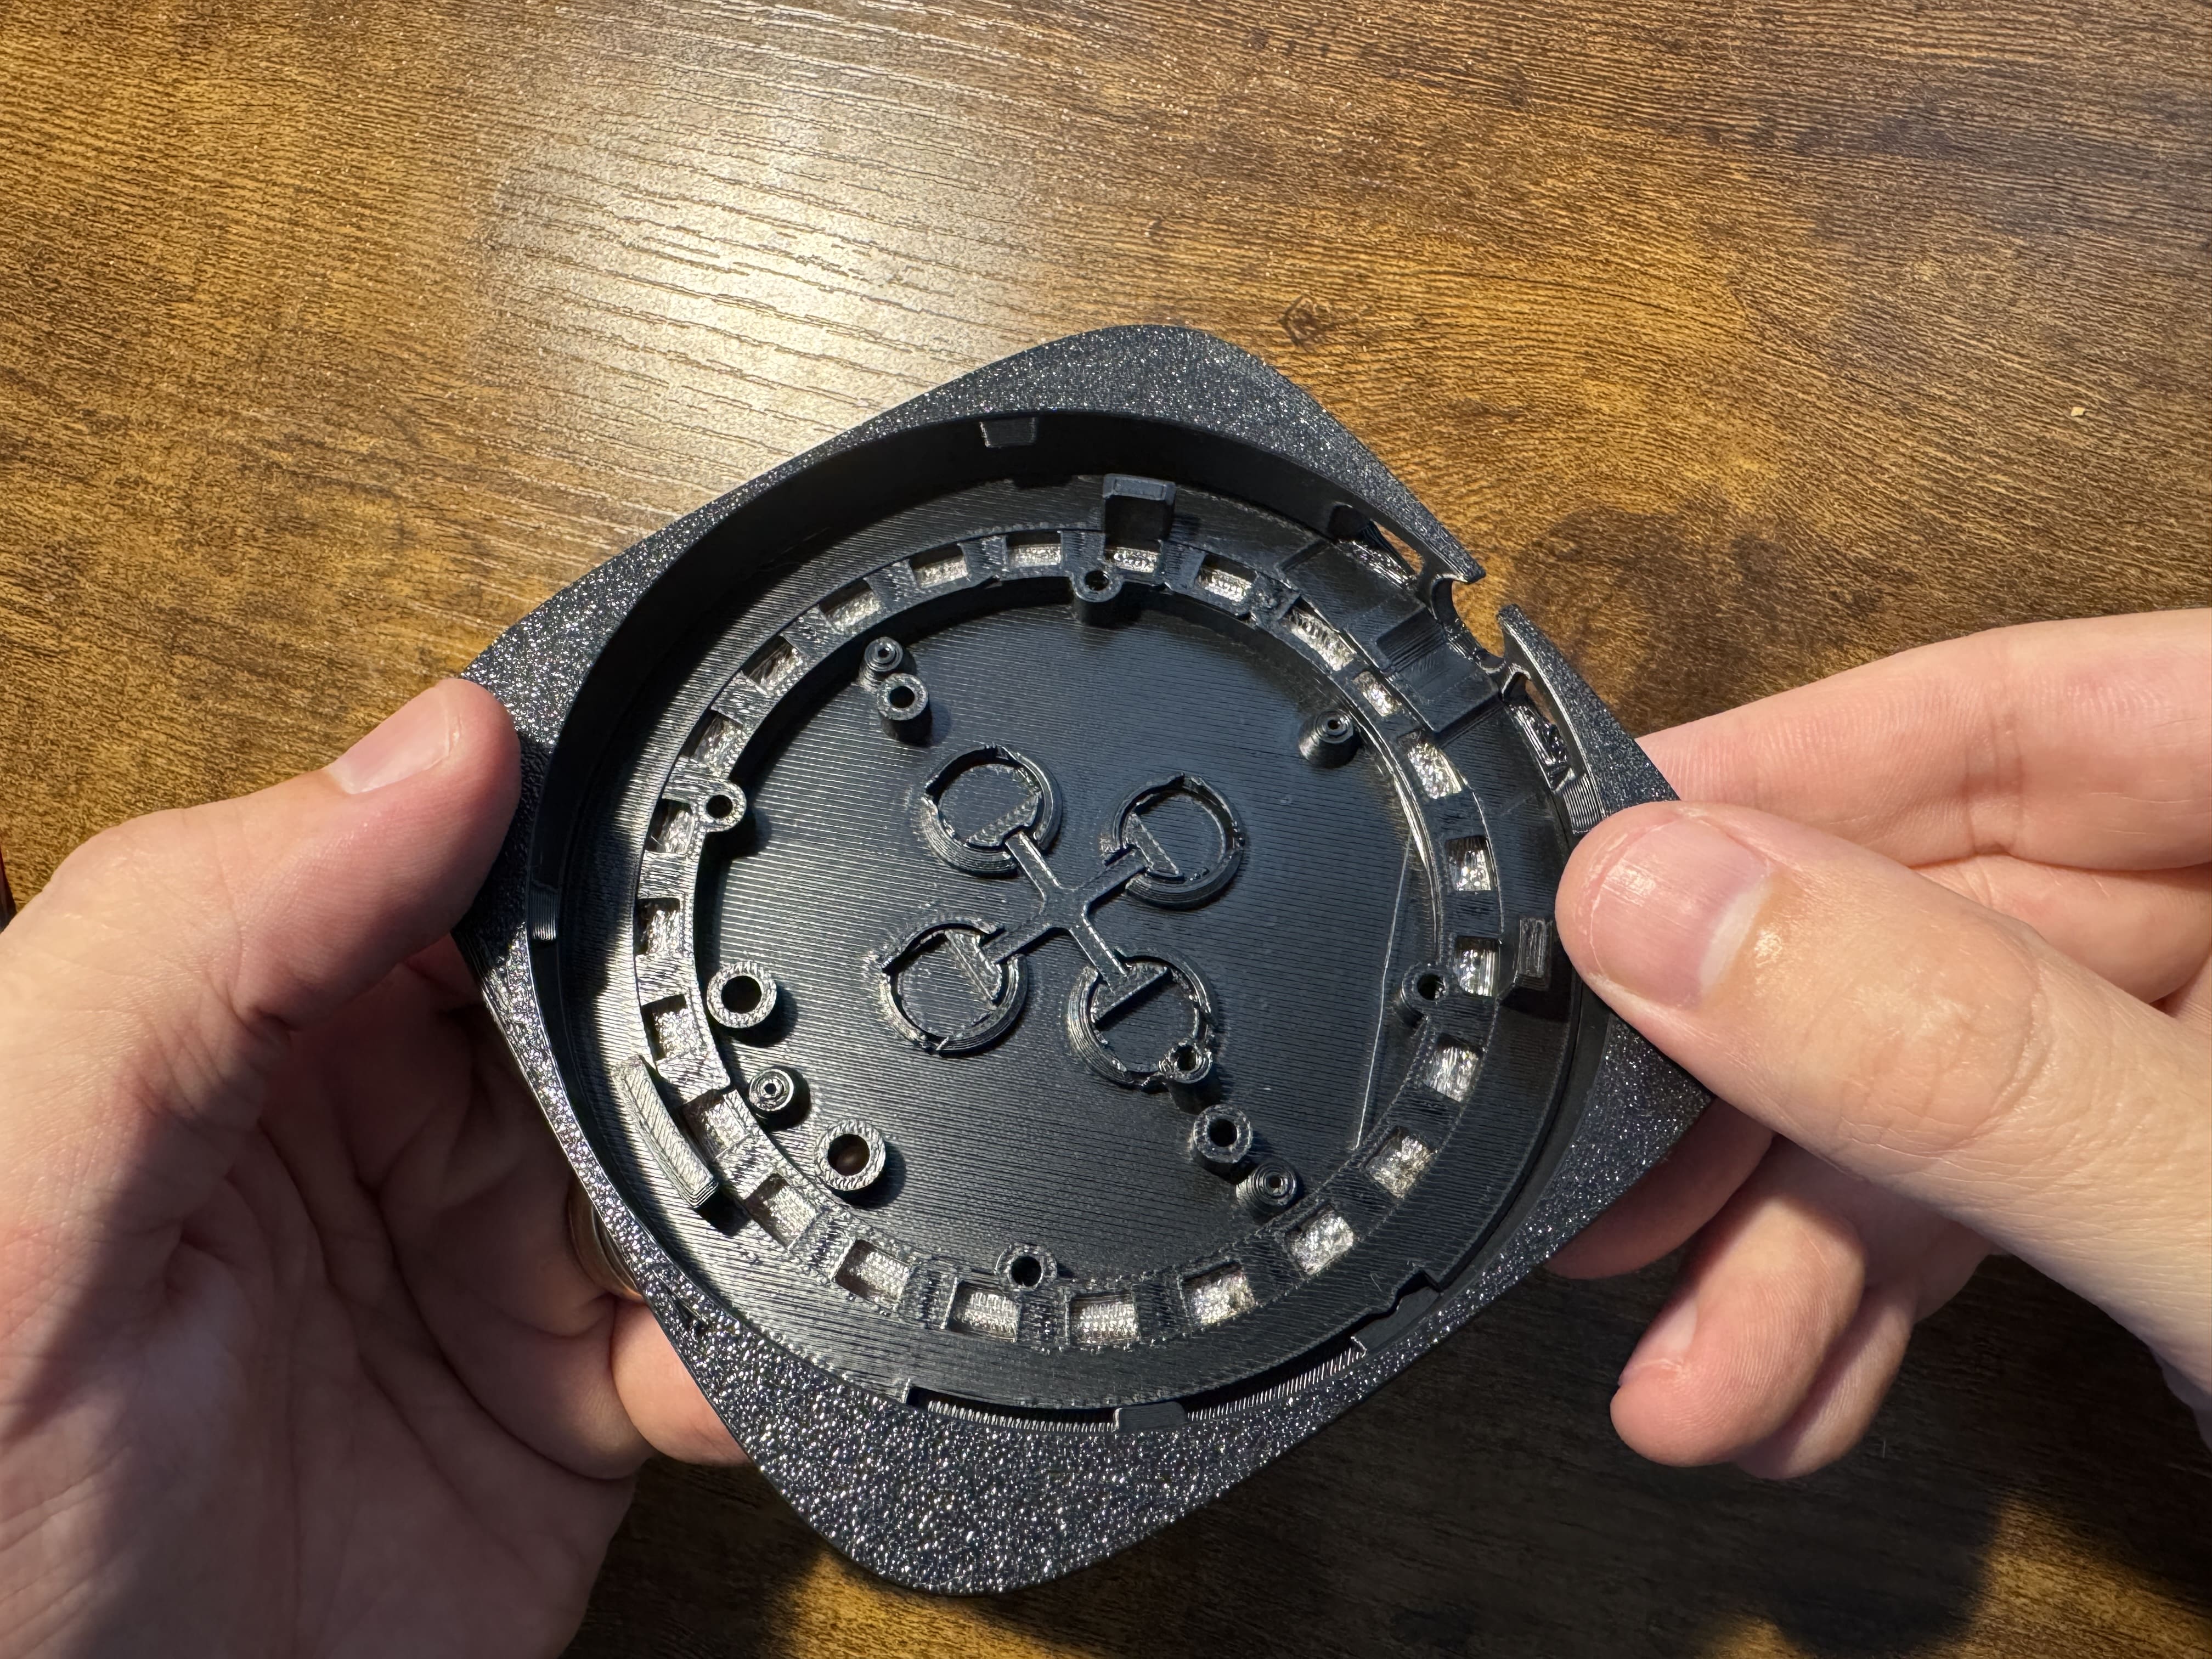
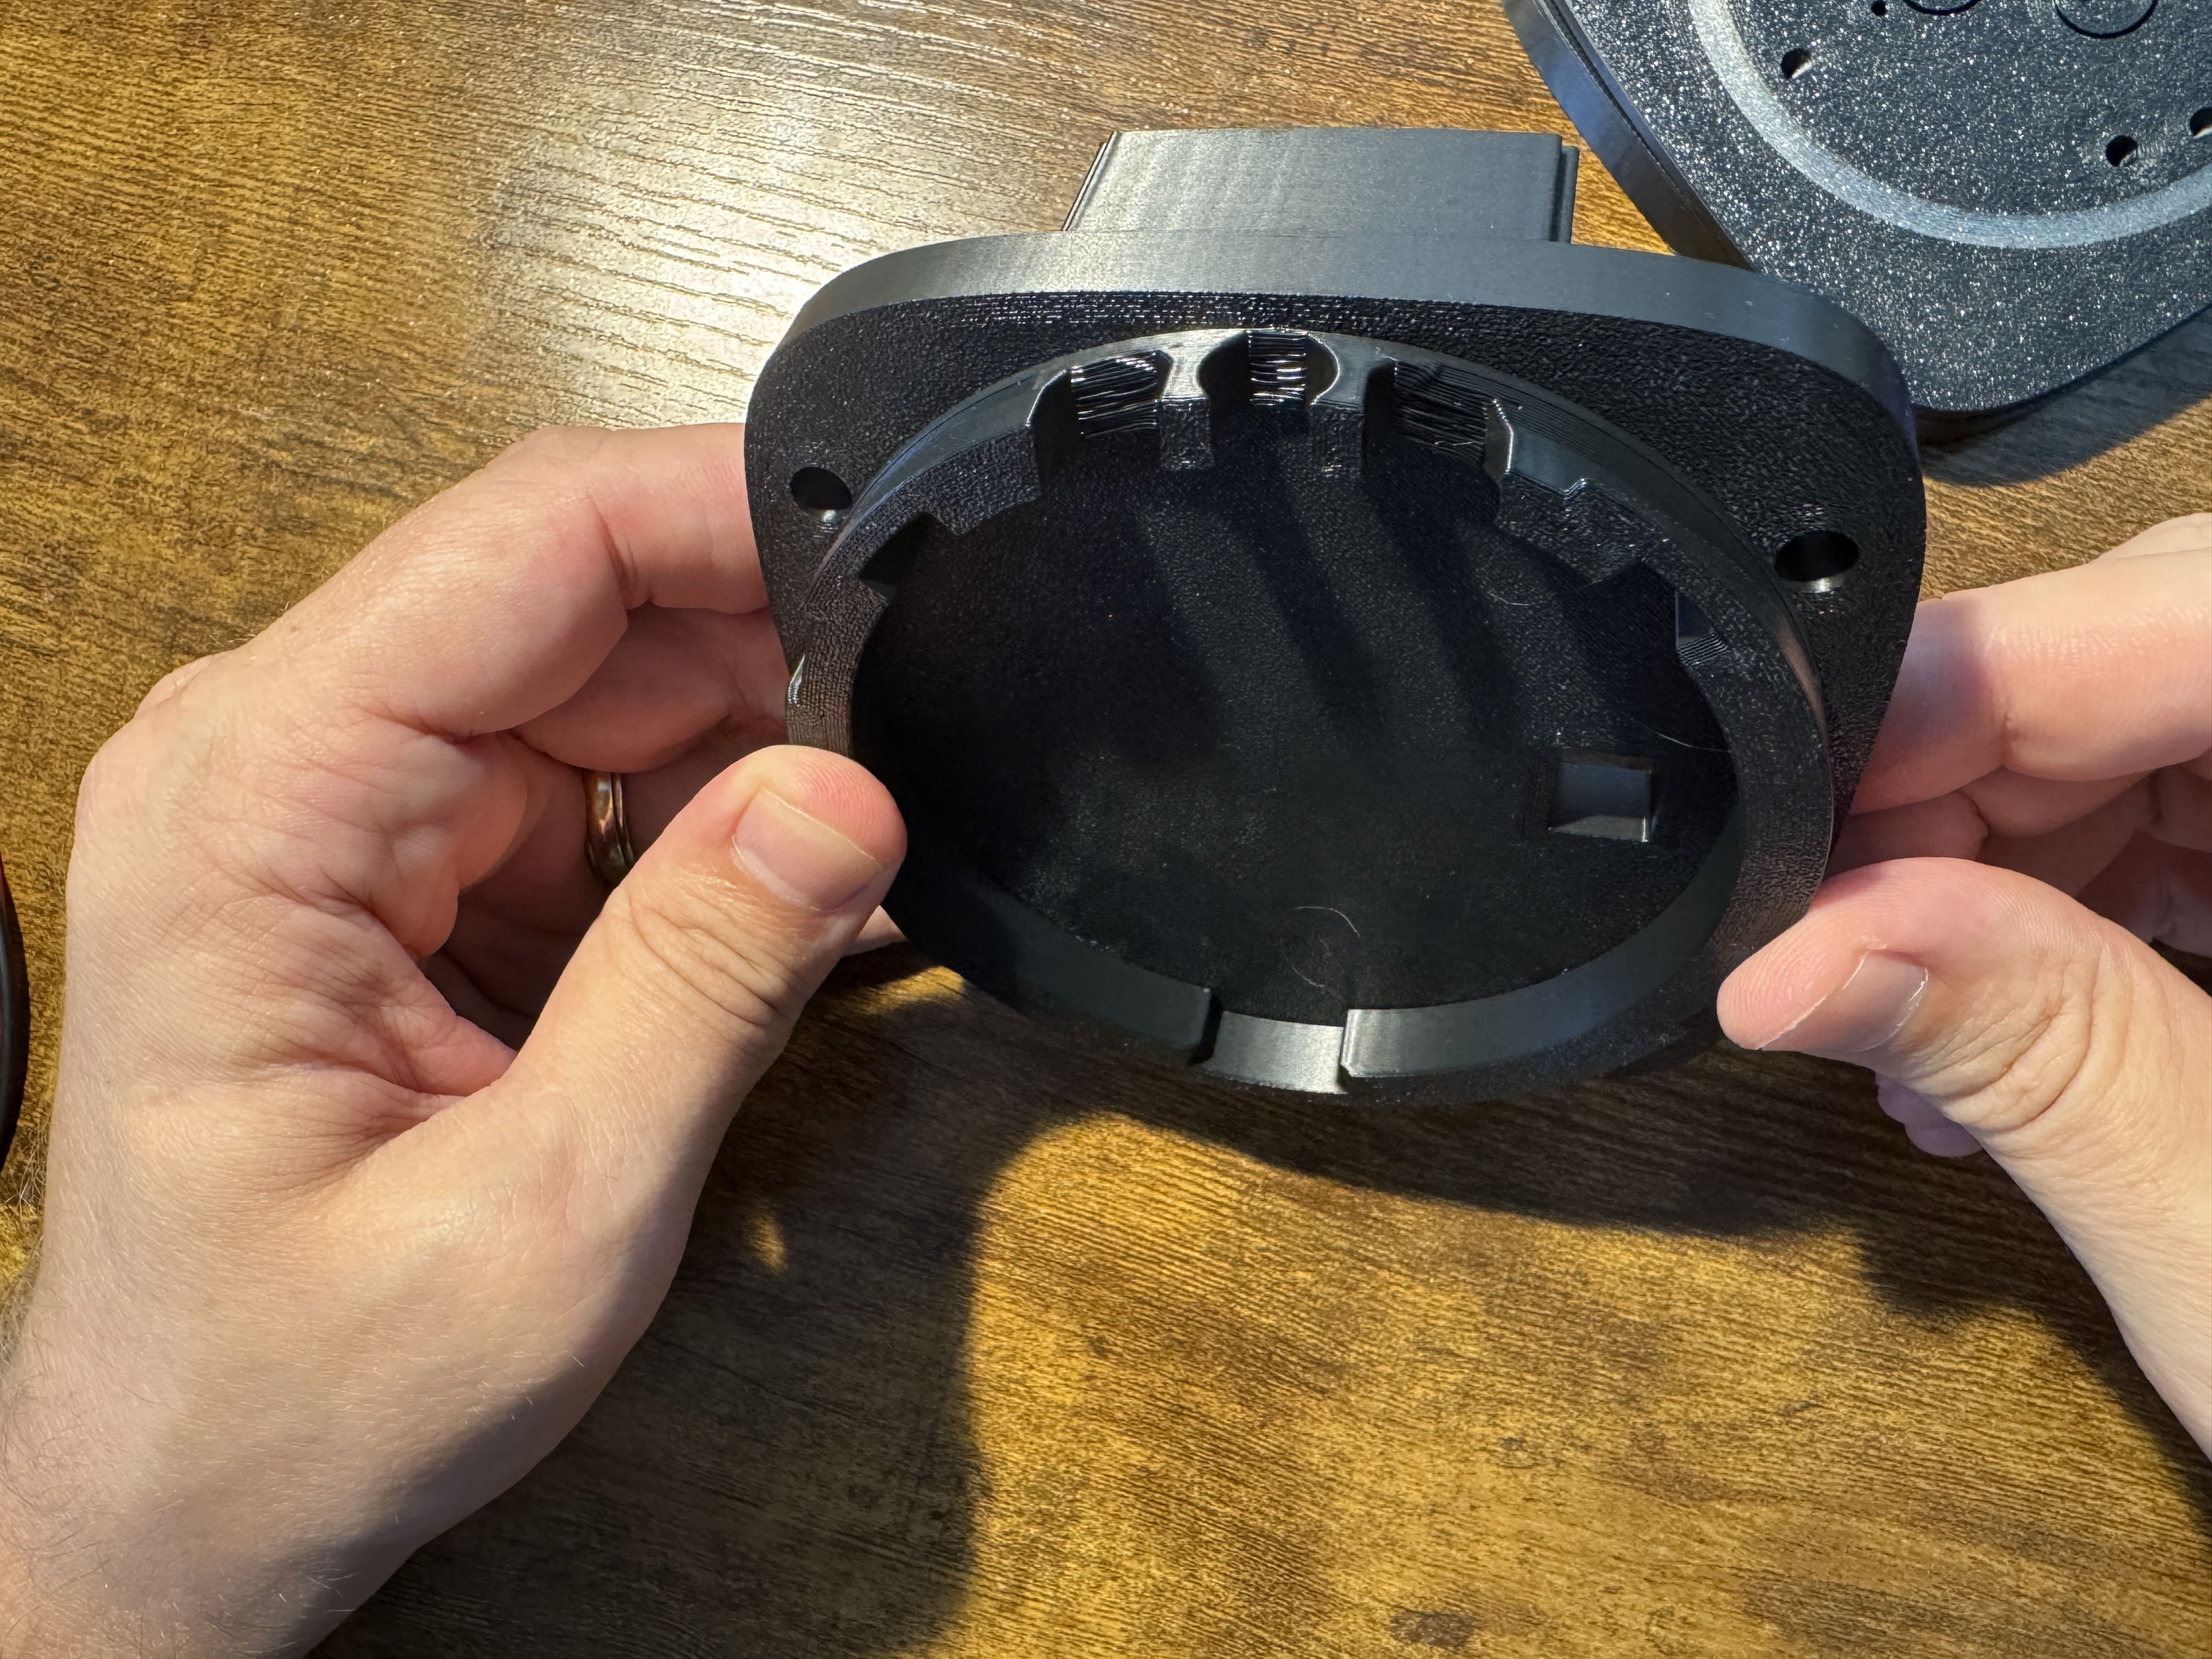
Practice Locking & Unlocking
 Practice rotating the two parts. When the FPH logo is visible, the top plate is unlocked and can be mounted/unmounted from the speaker chamber.
 -
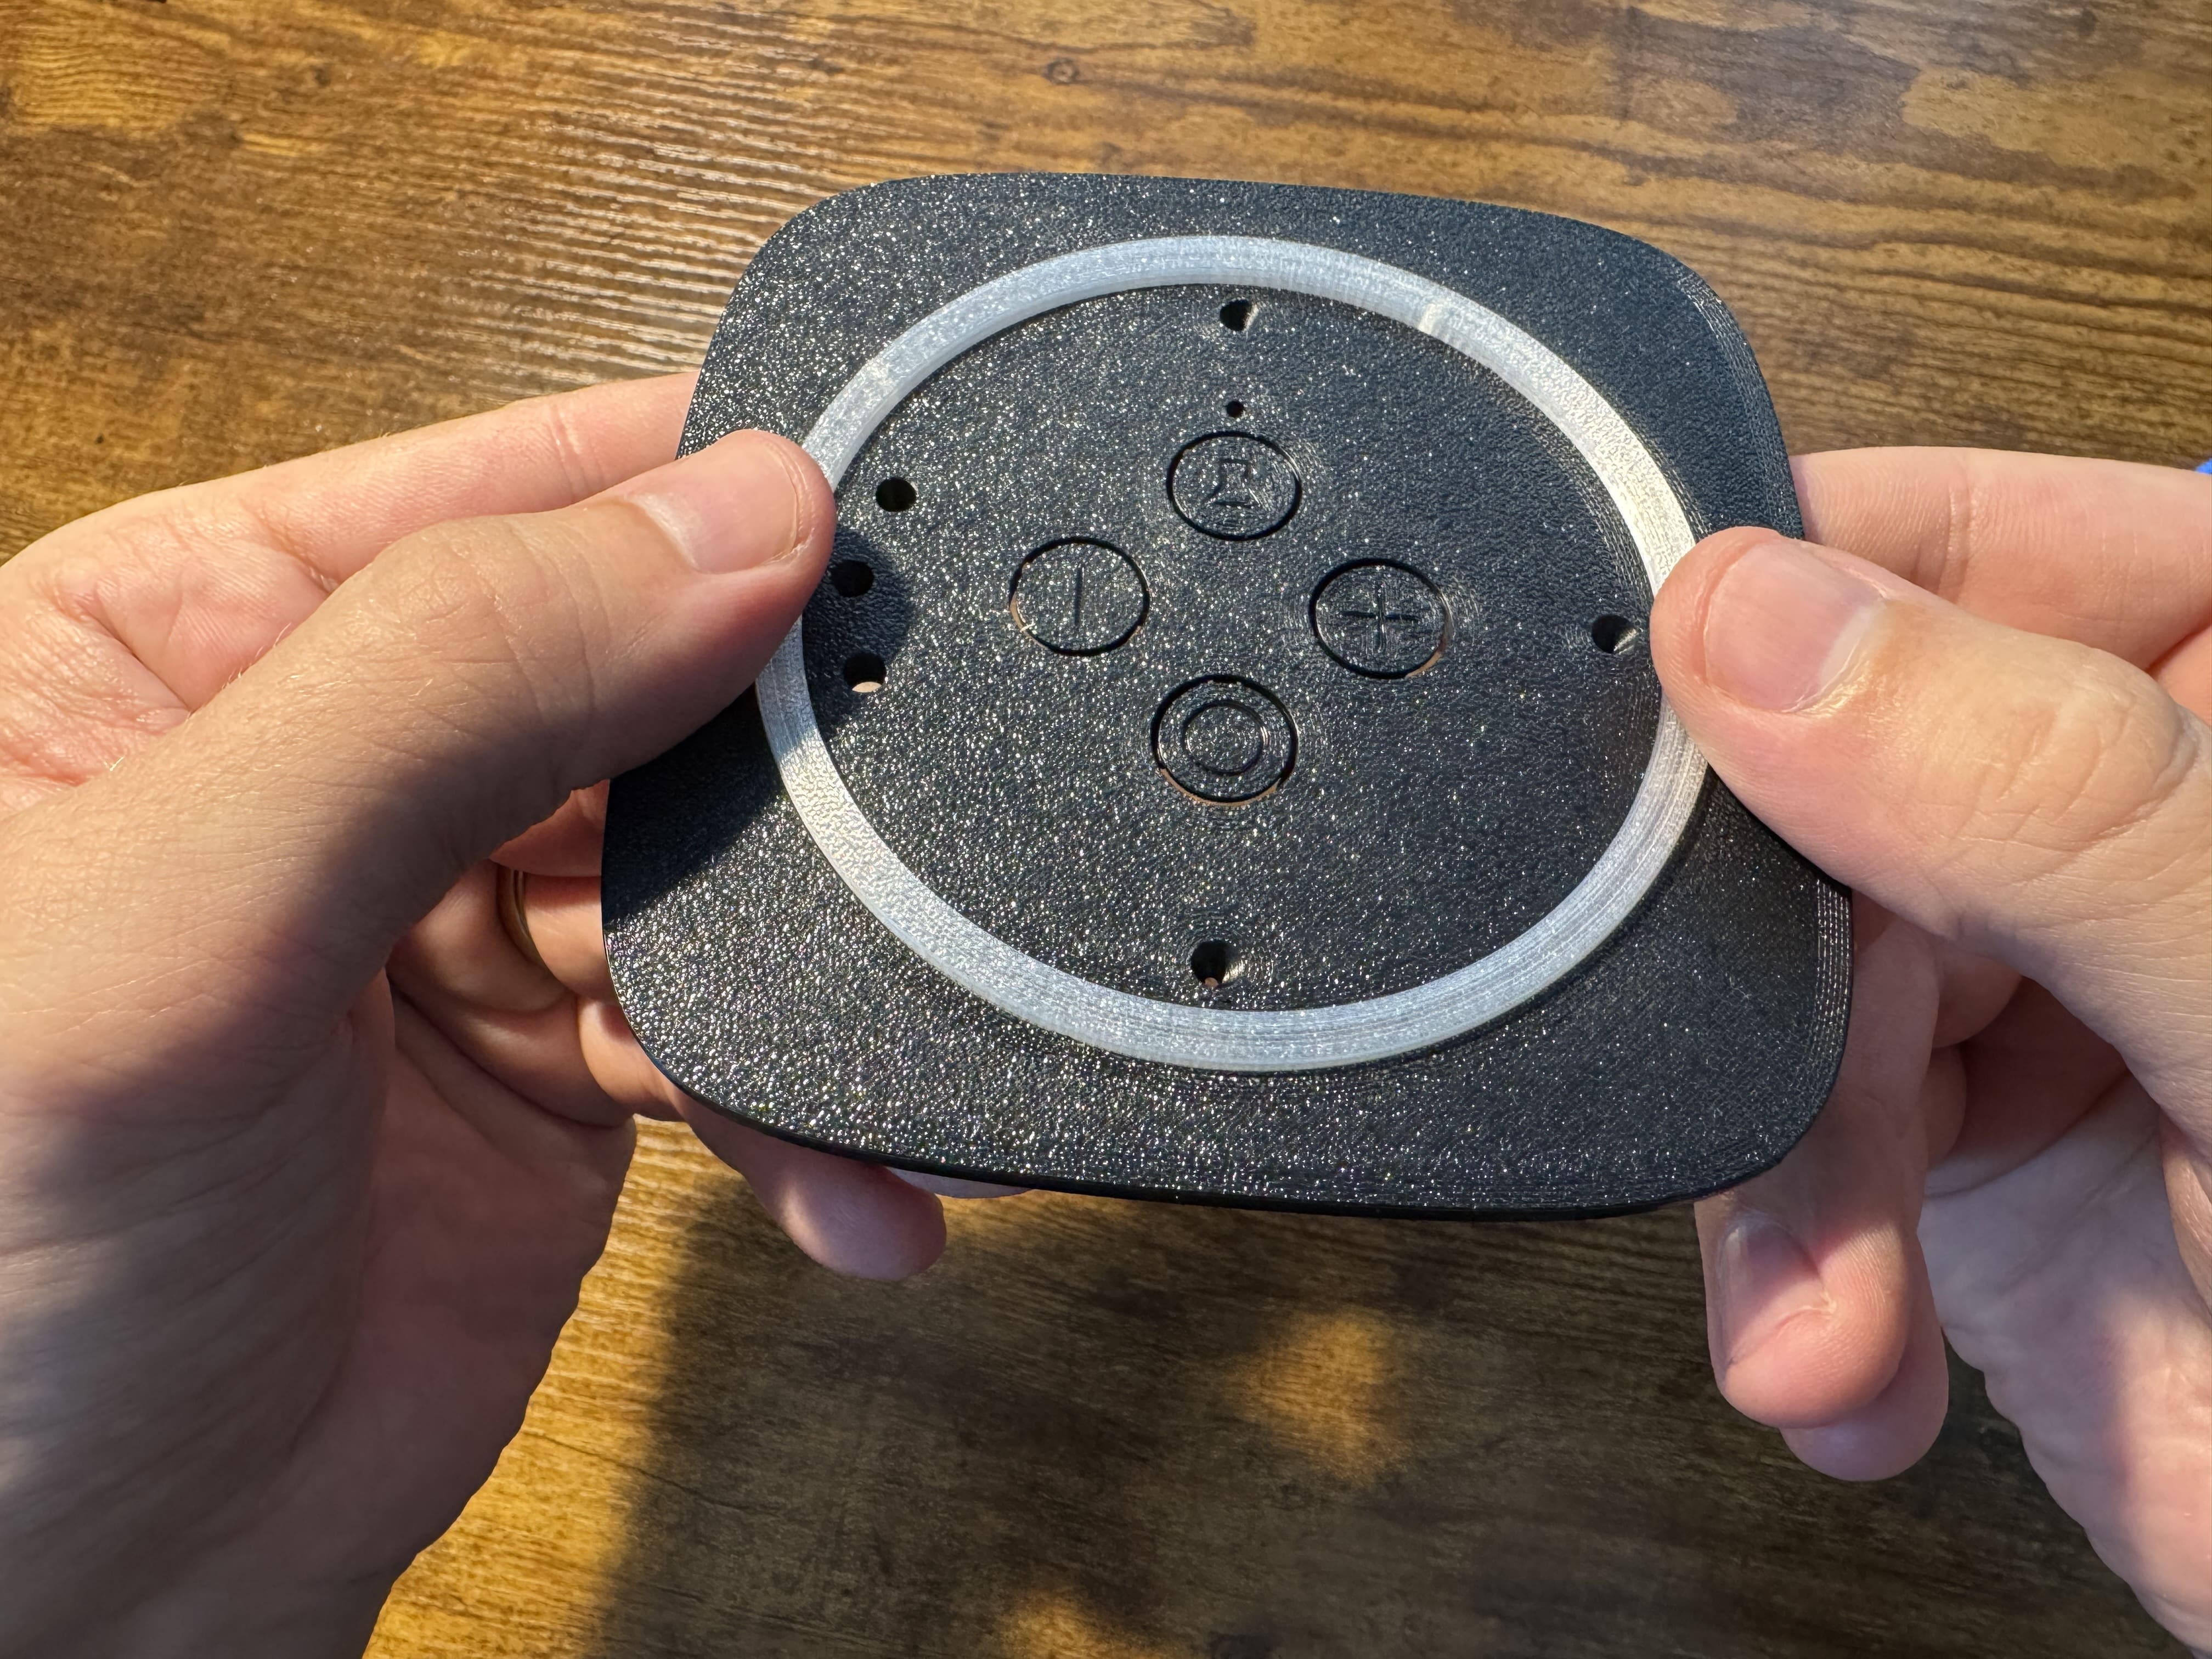
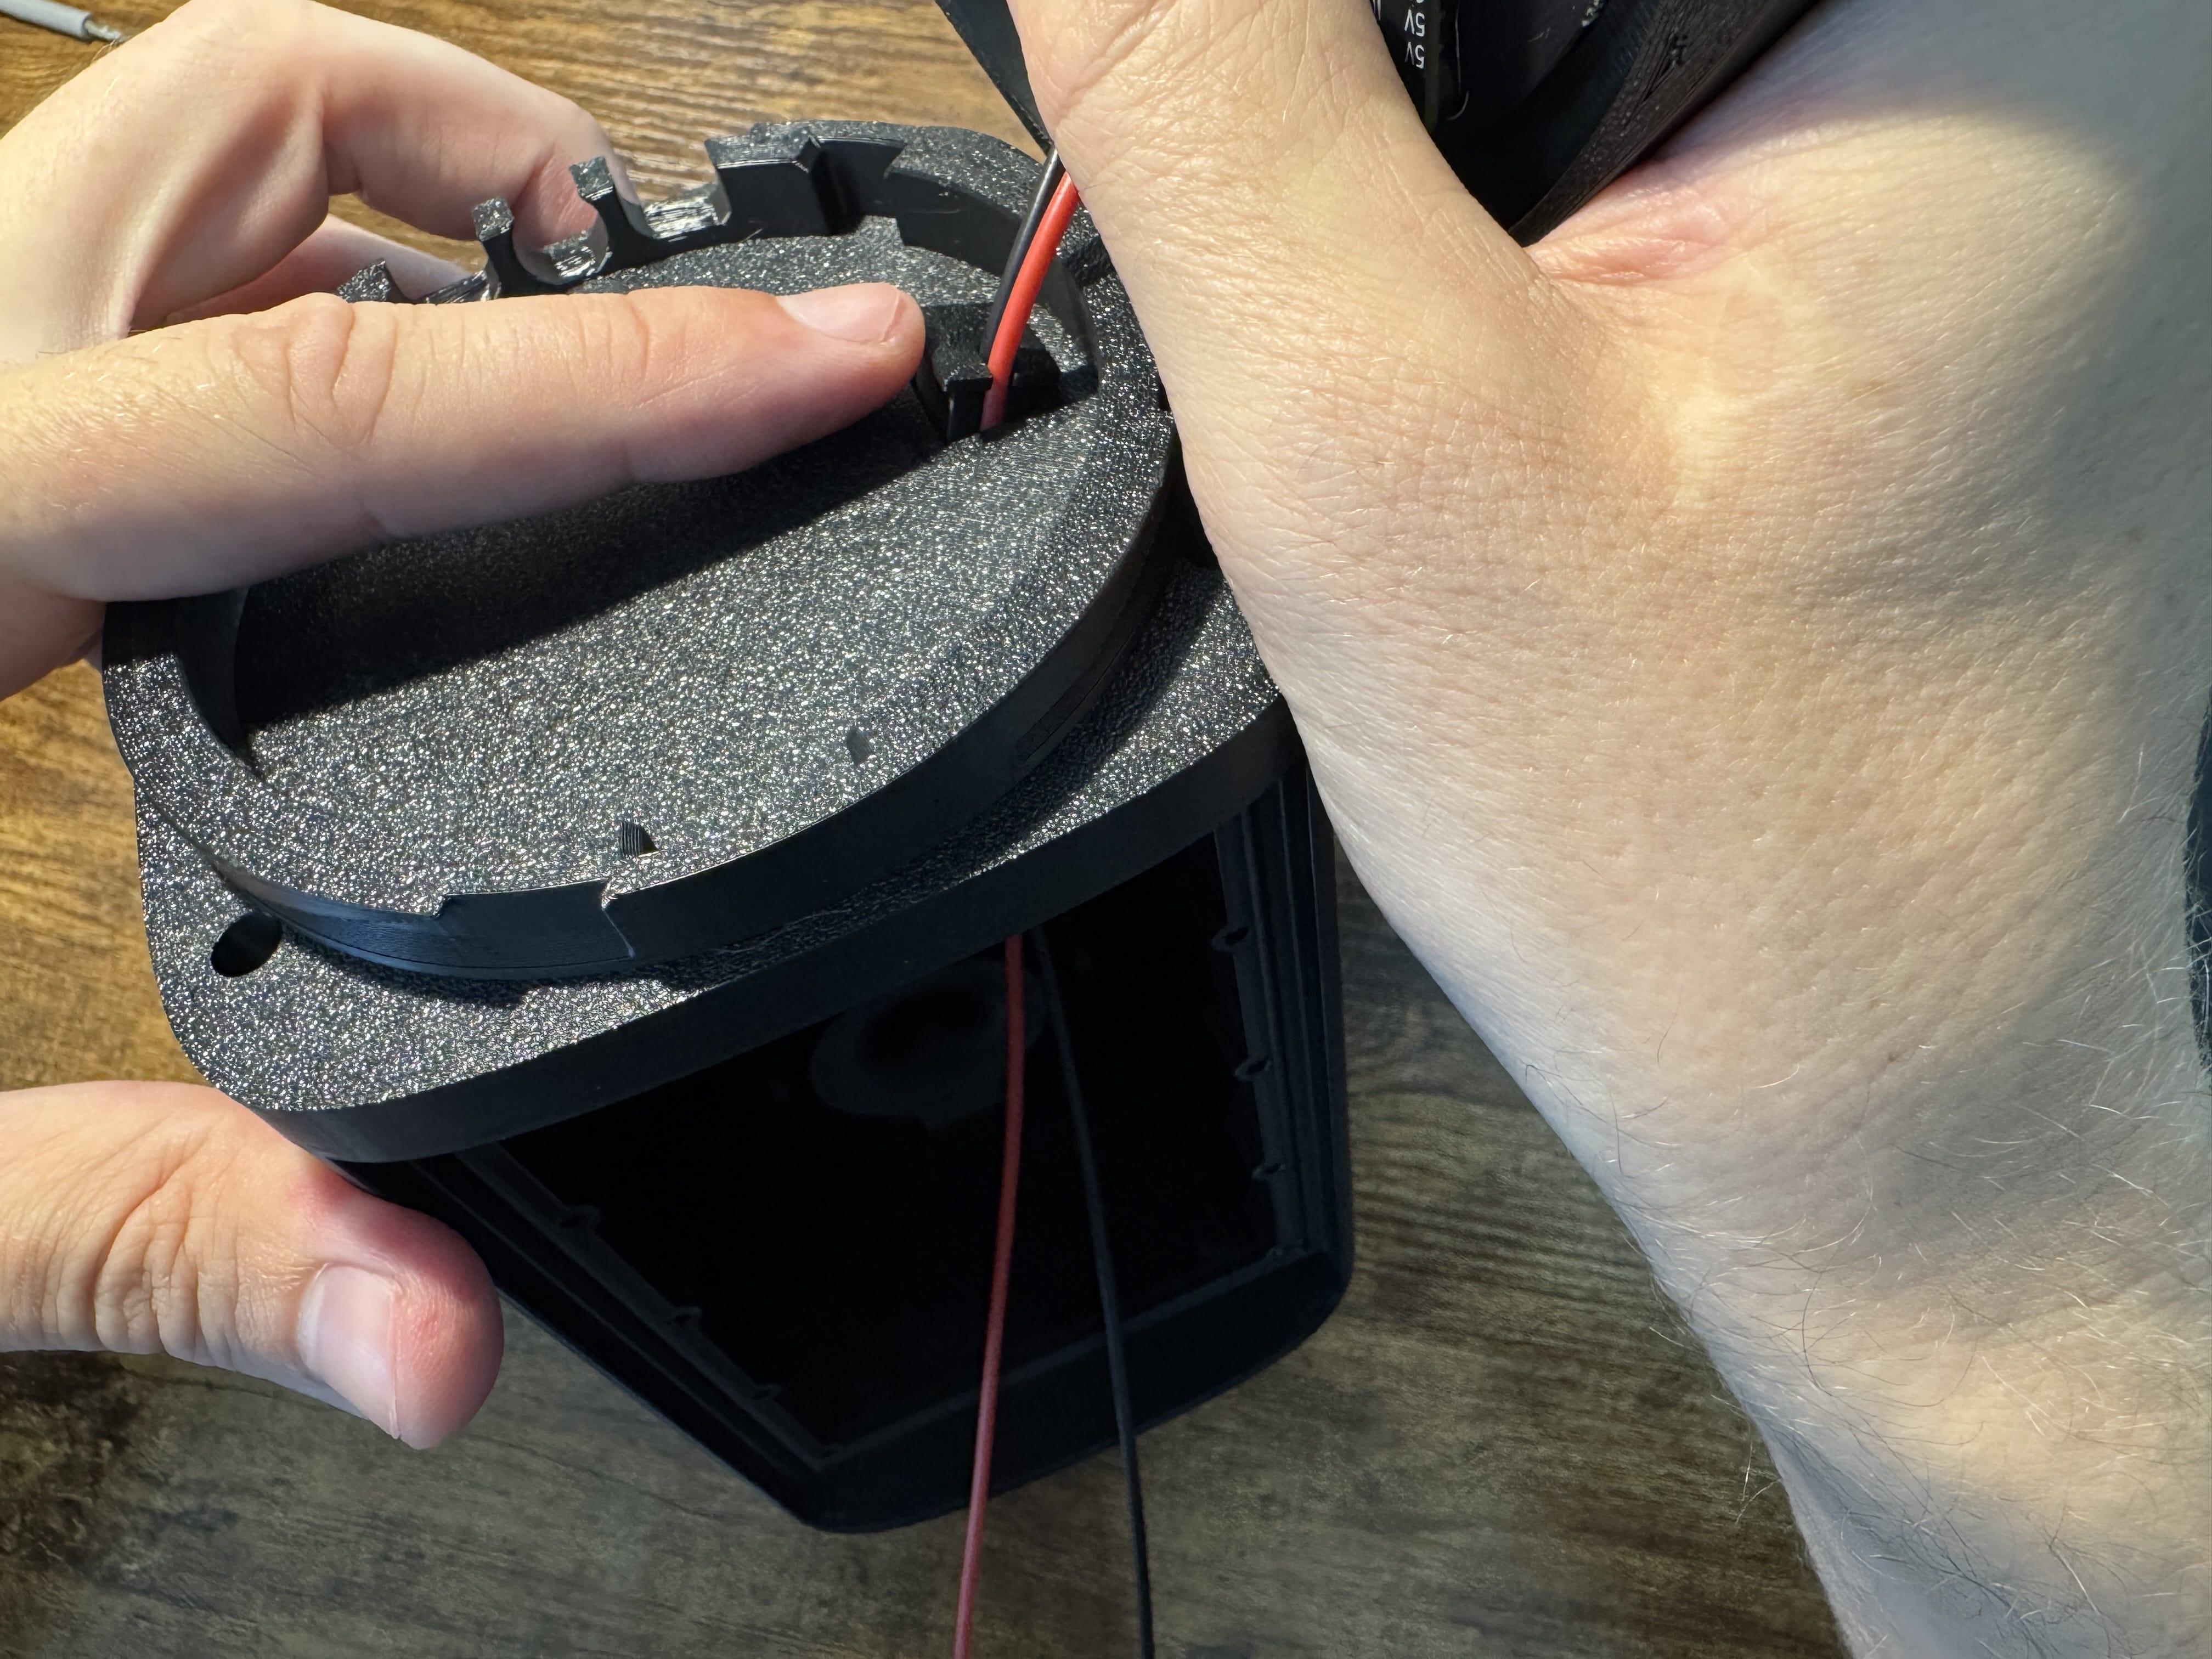
Align PCB Spacer to HAT
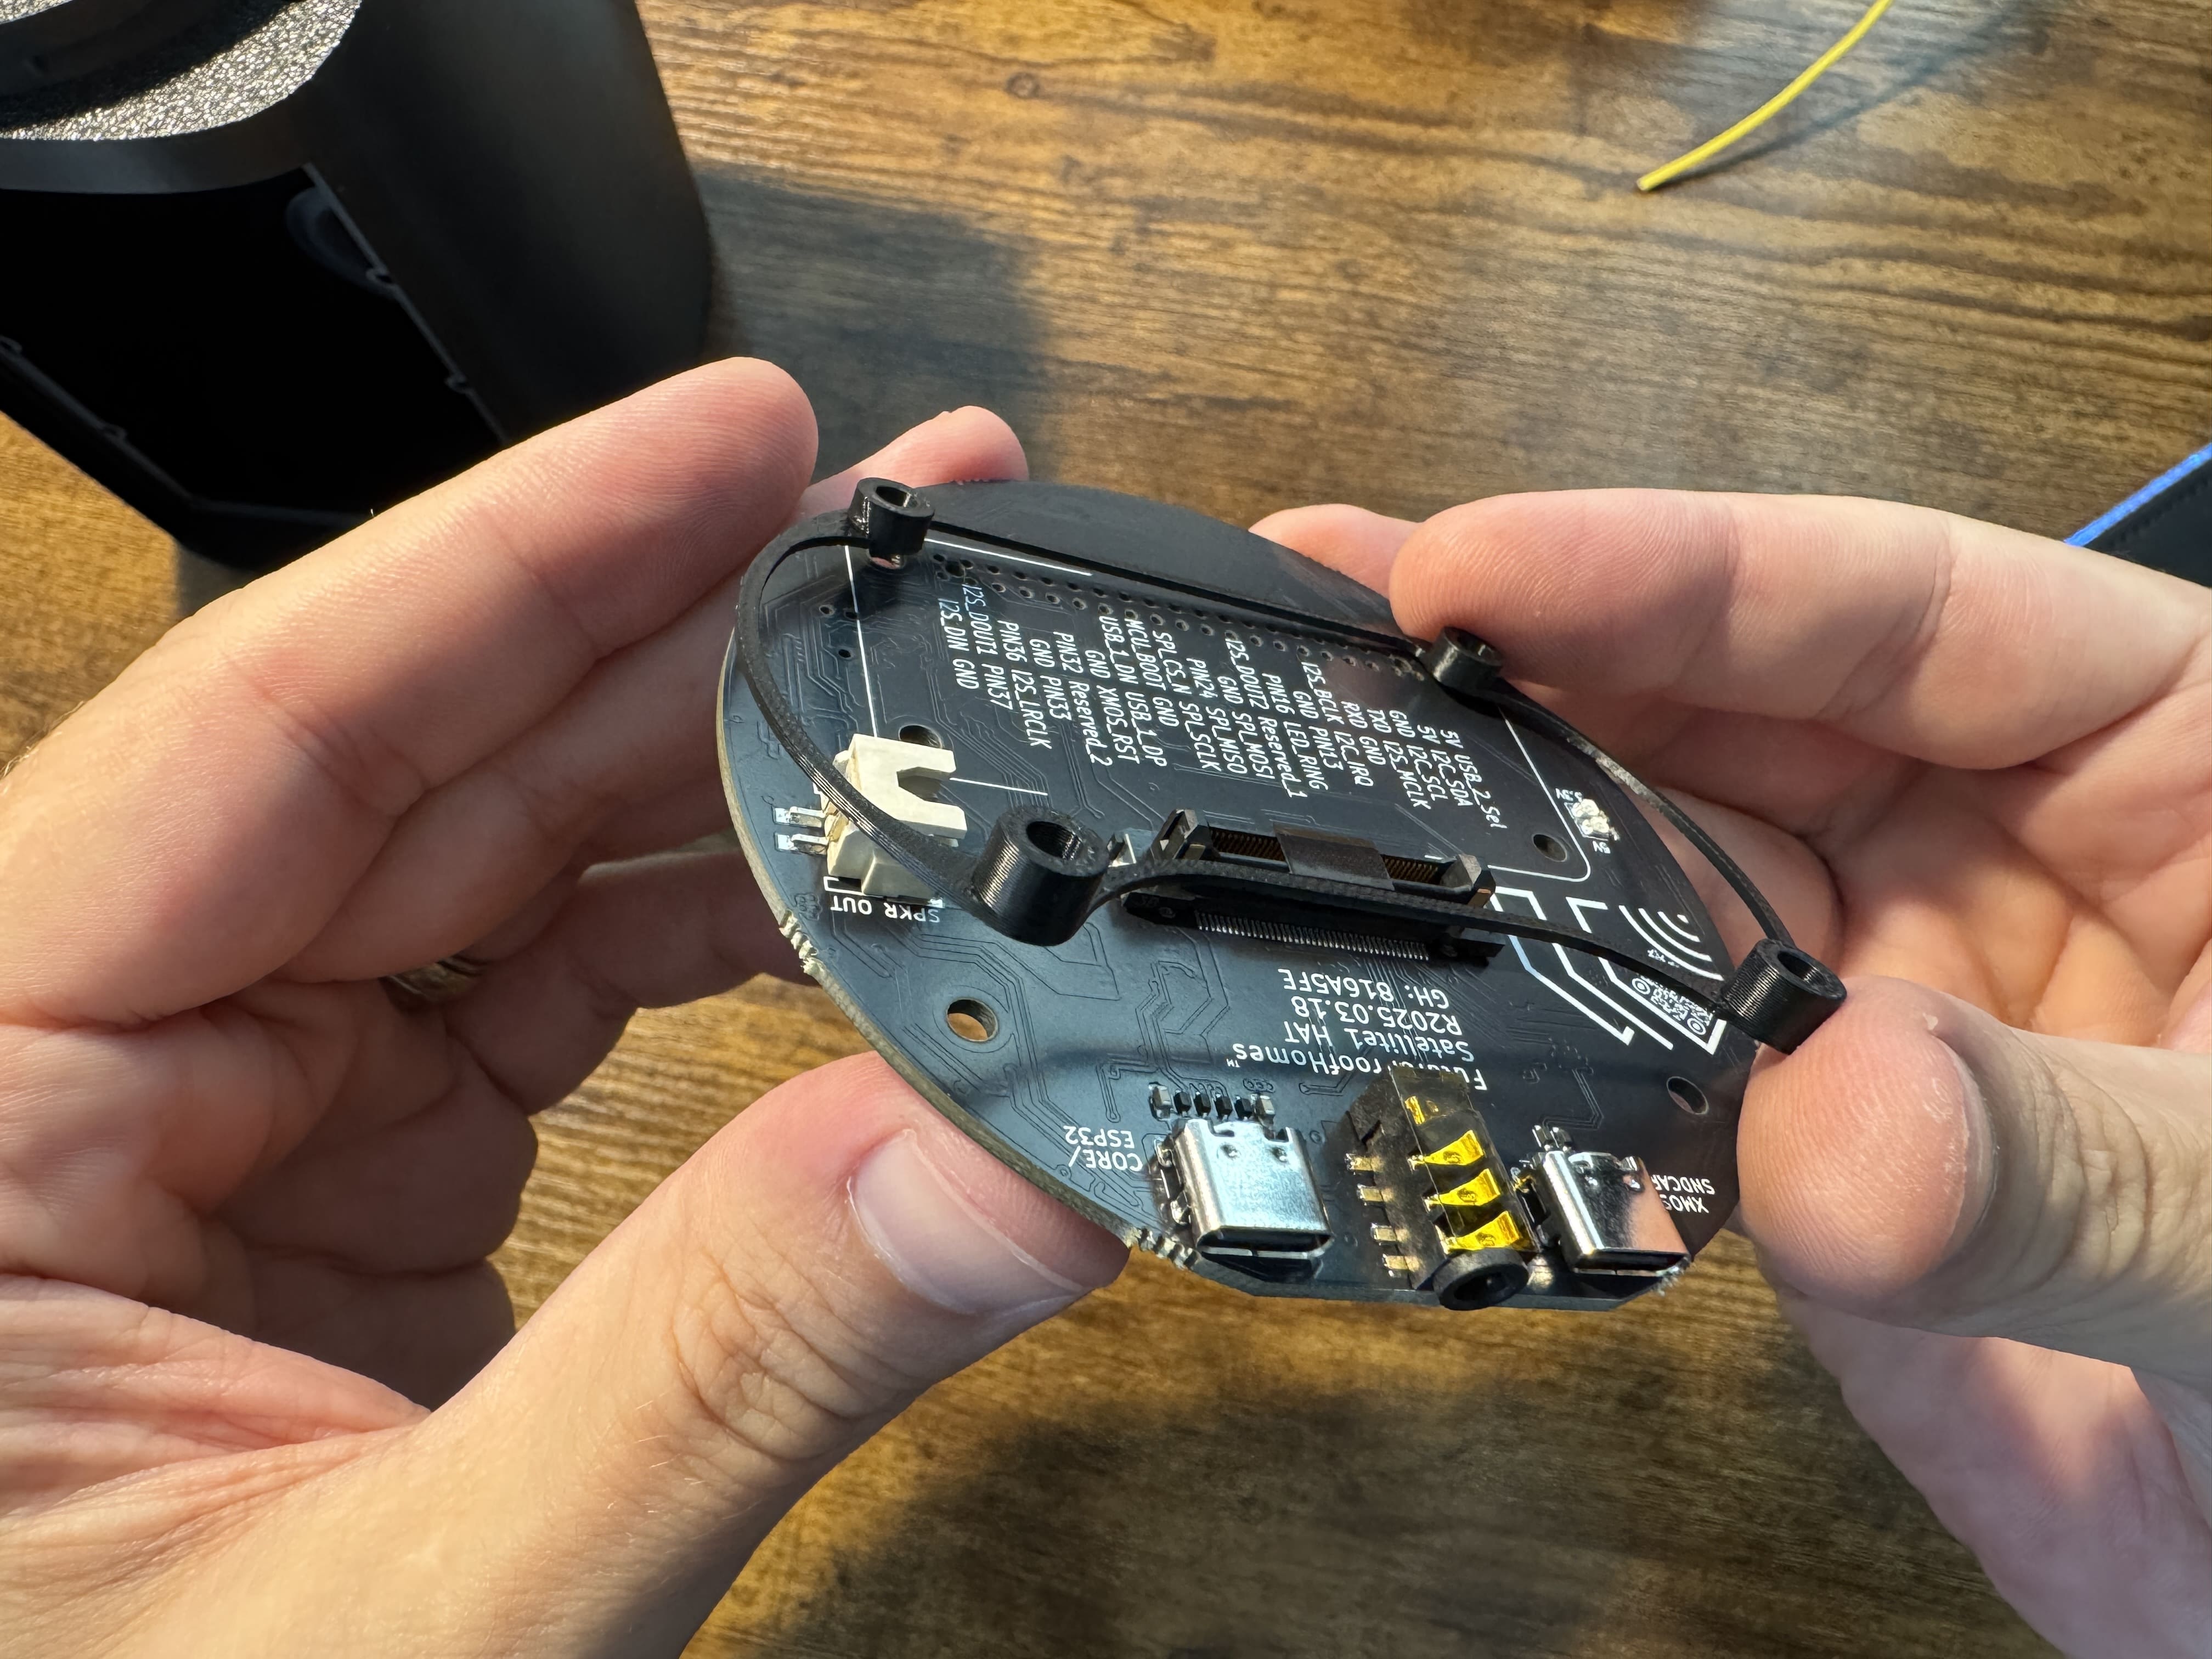 Align all four holes on the PCB spacer to the holes on the HAT. The taller standoffs will be closest to the I/O ports.
 -
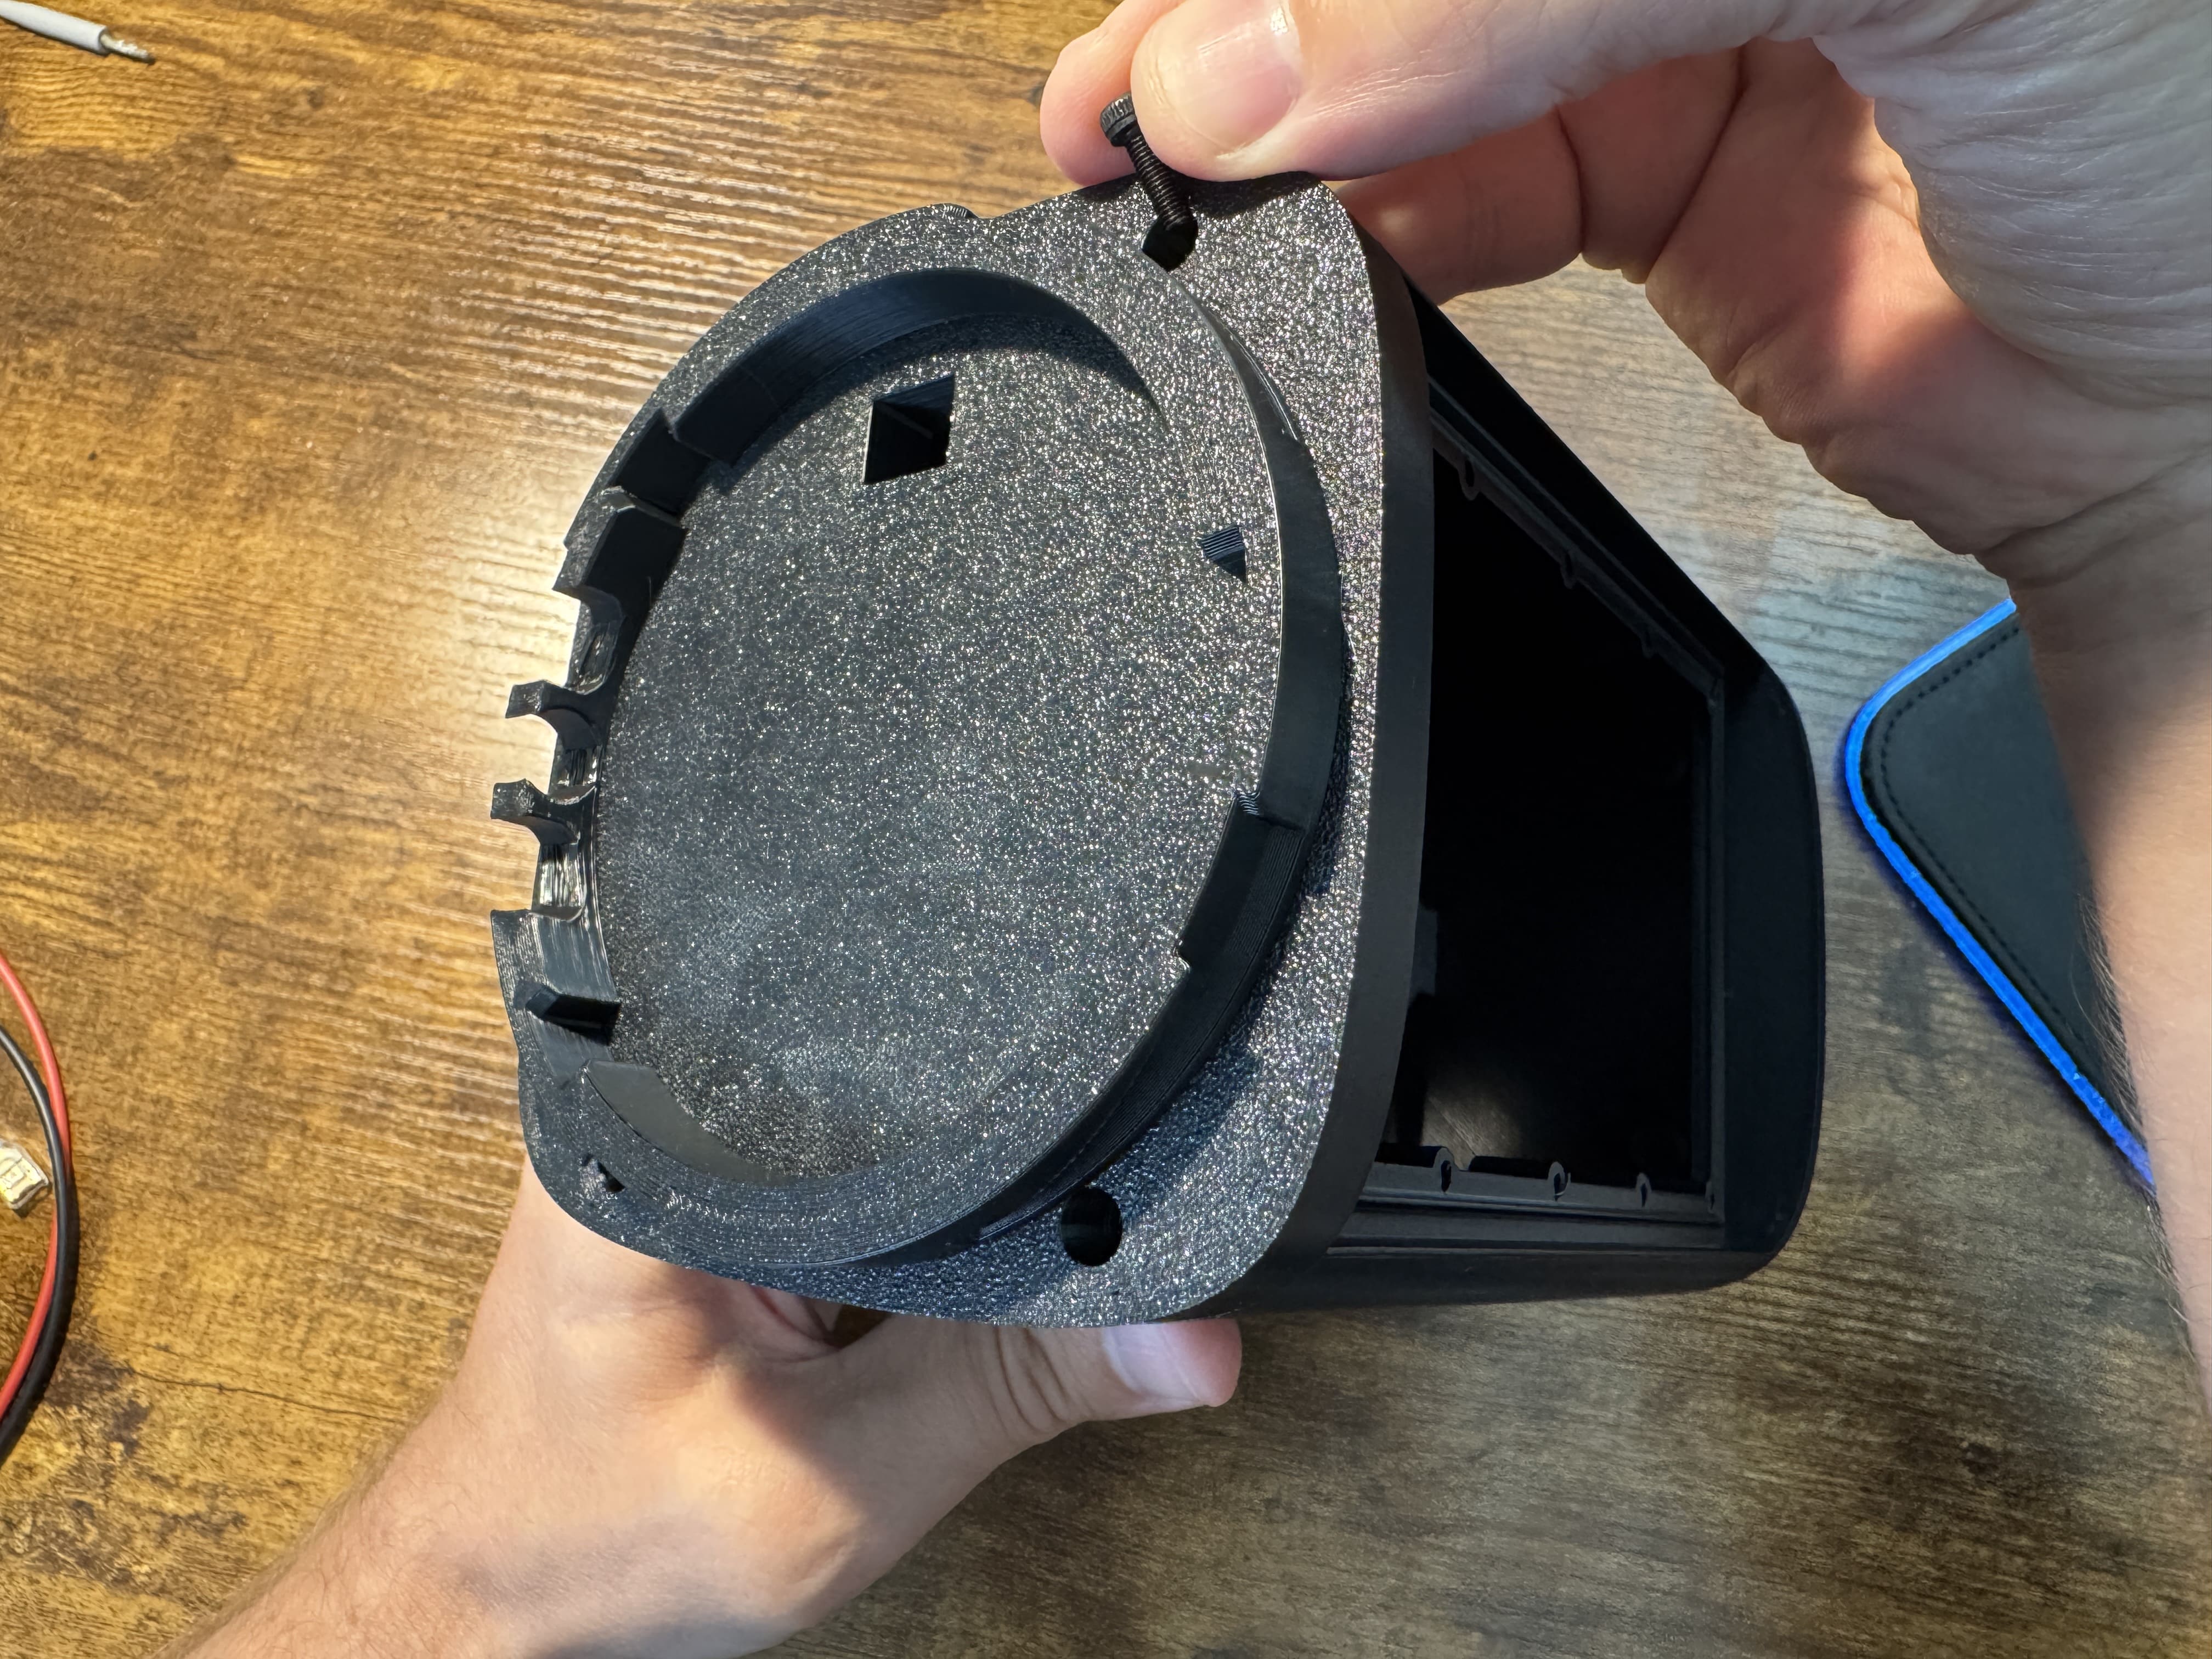
Drop Dev Kit Into Position
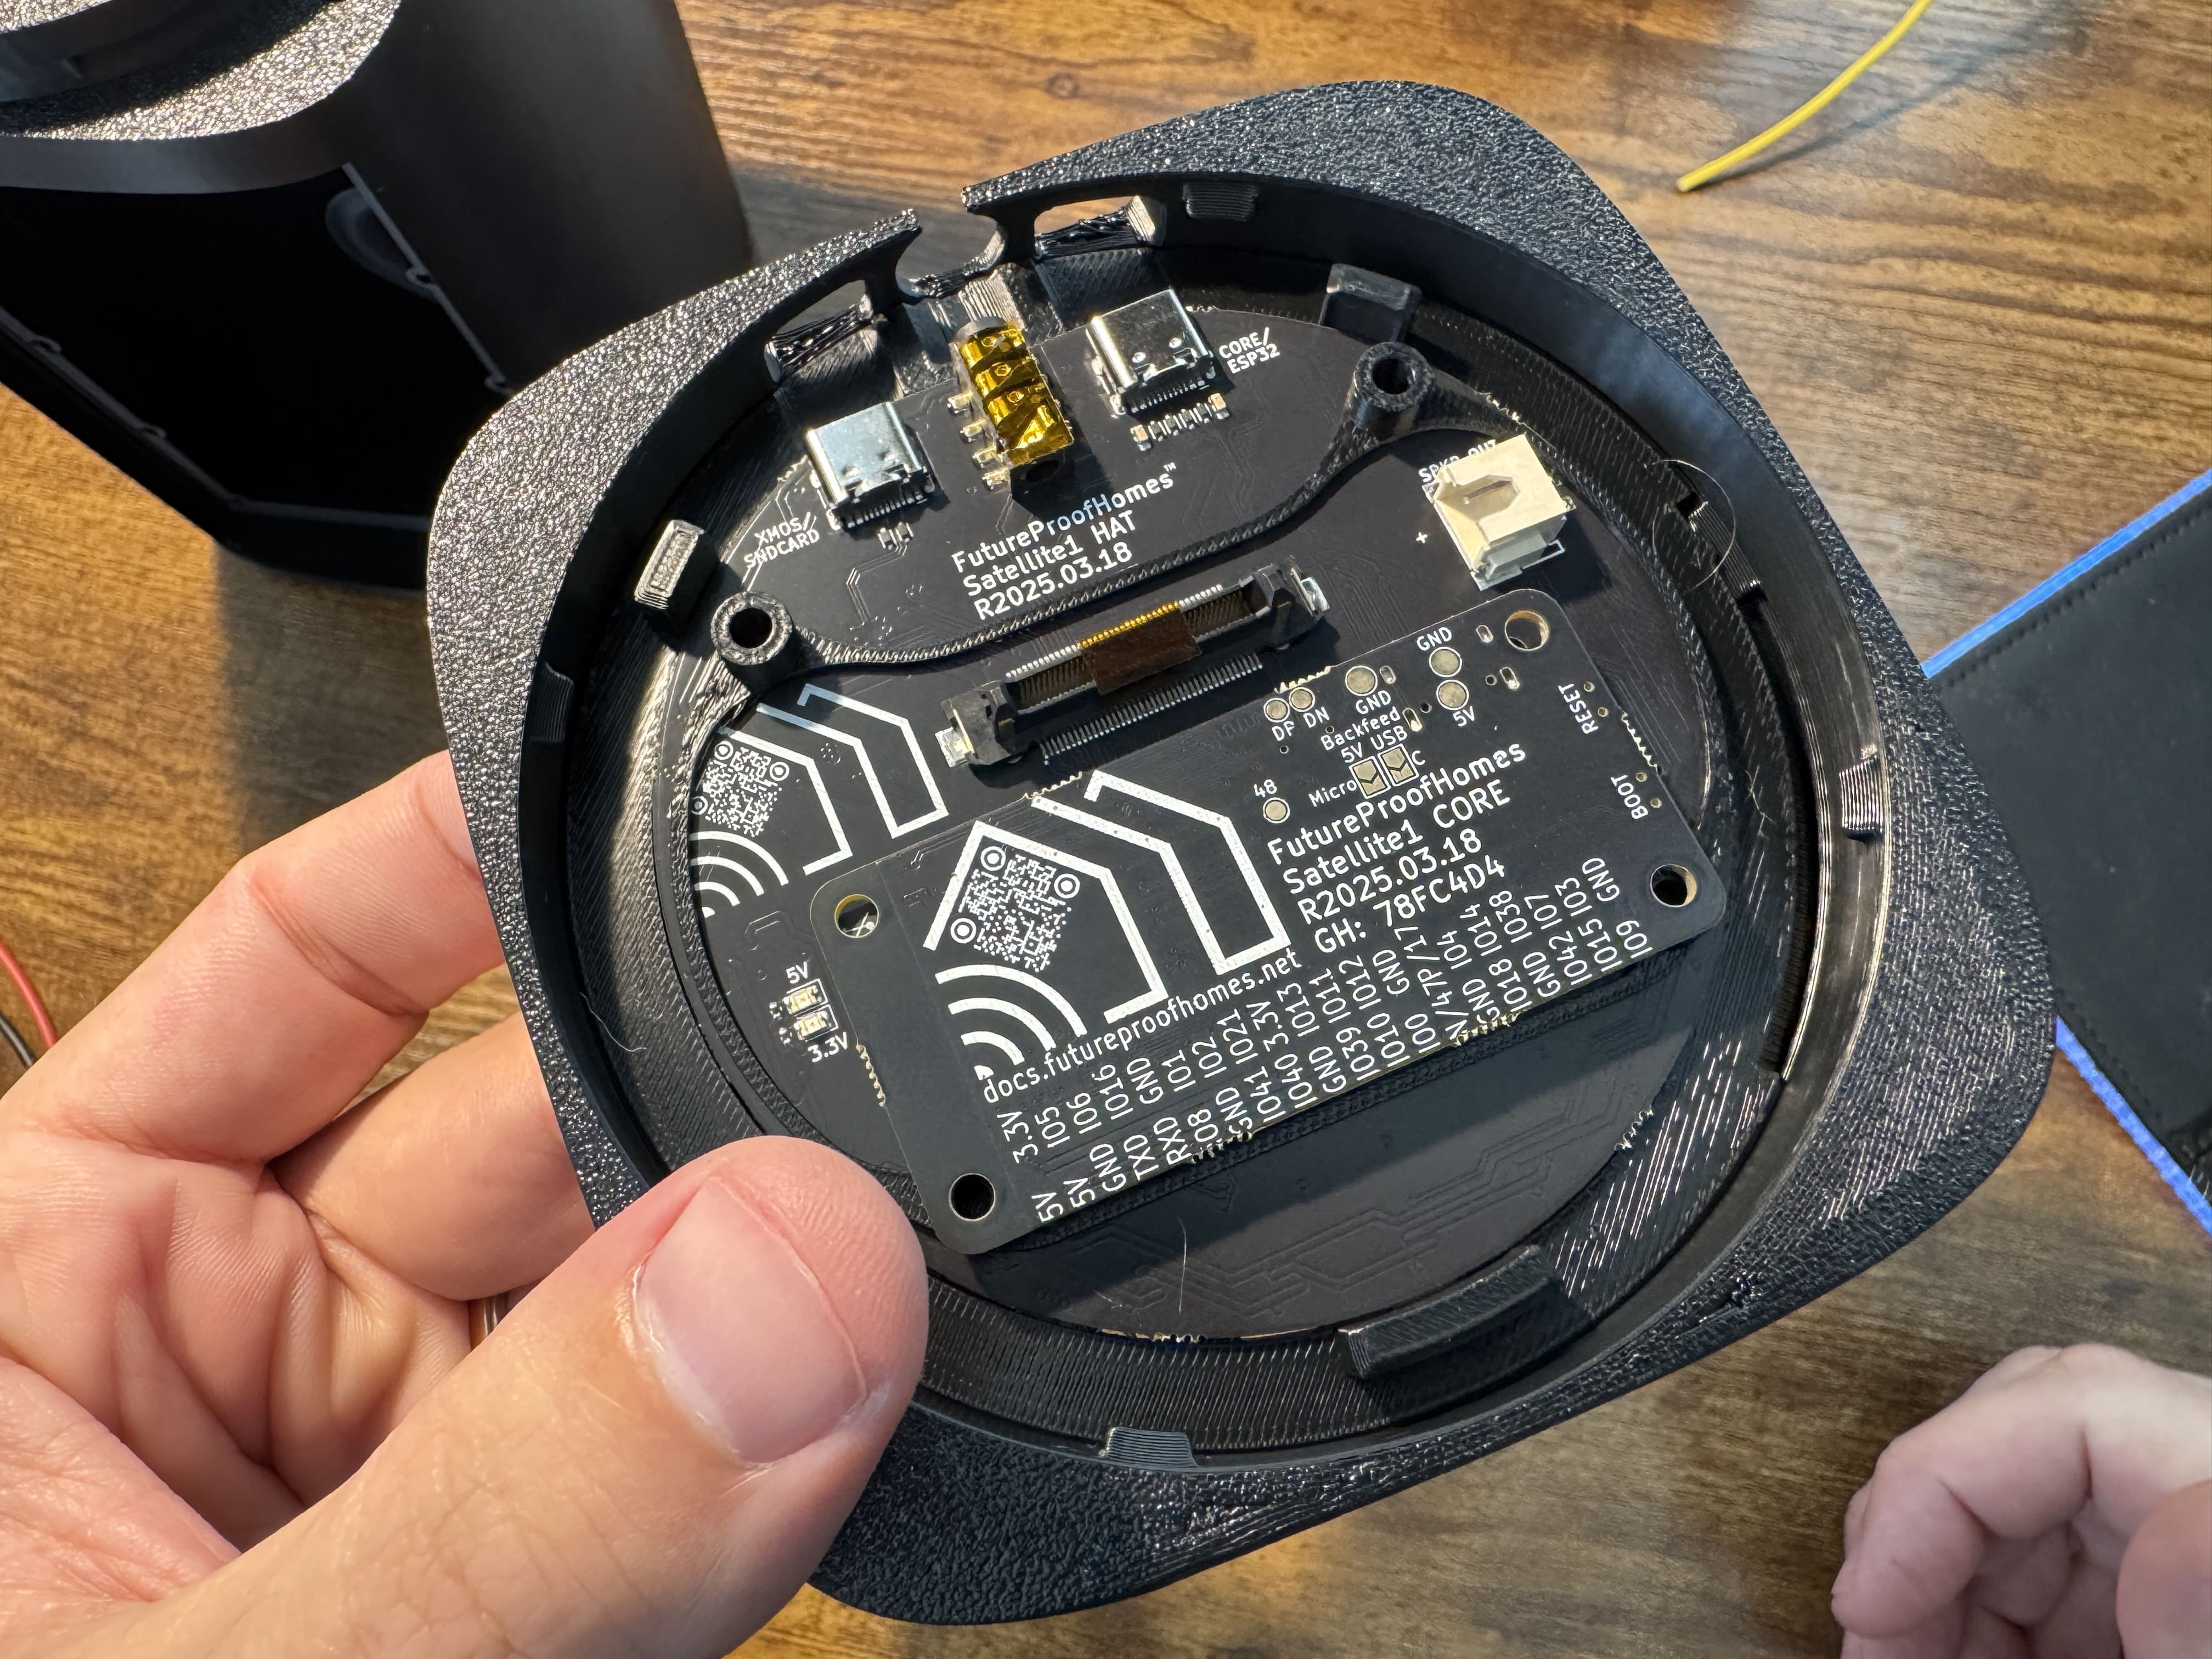 Align the HAT's headphone jack with the round I/O port. Press the CORE board into the HAT board, ensuring the PCB spacer stays in place.
 -
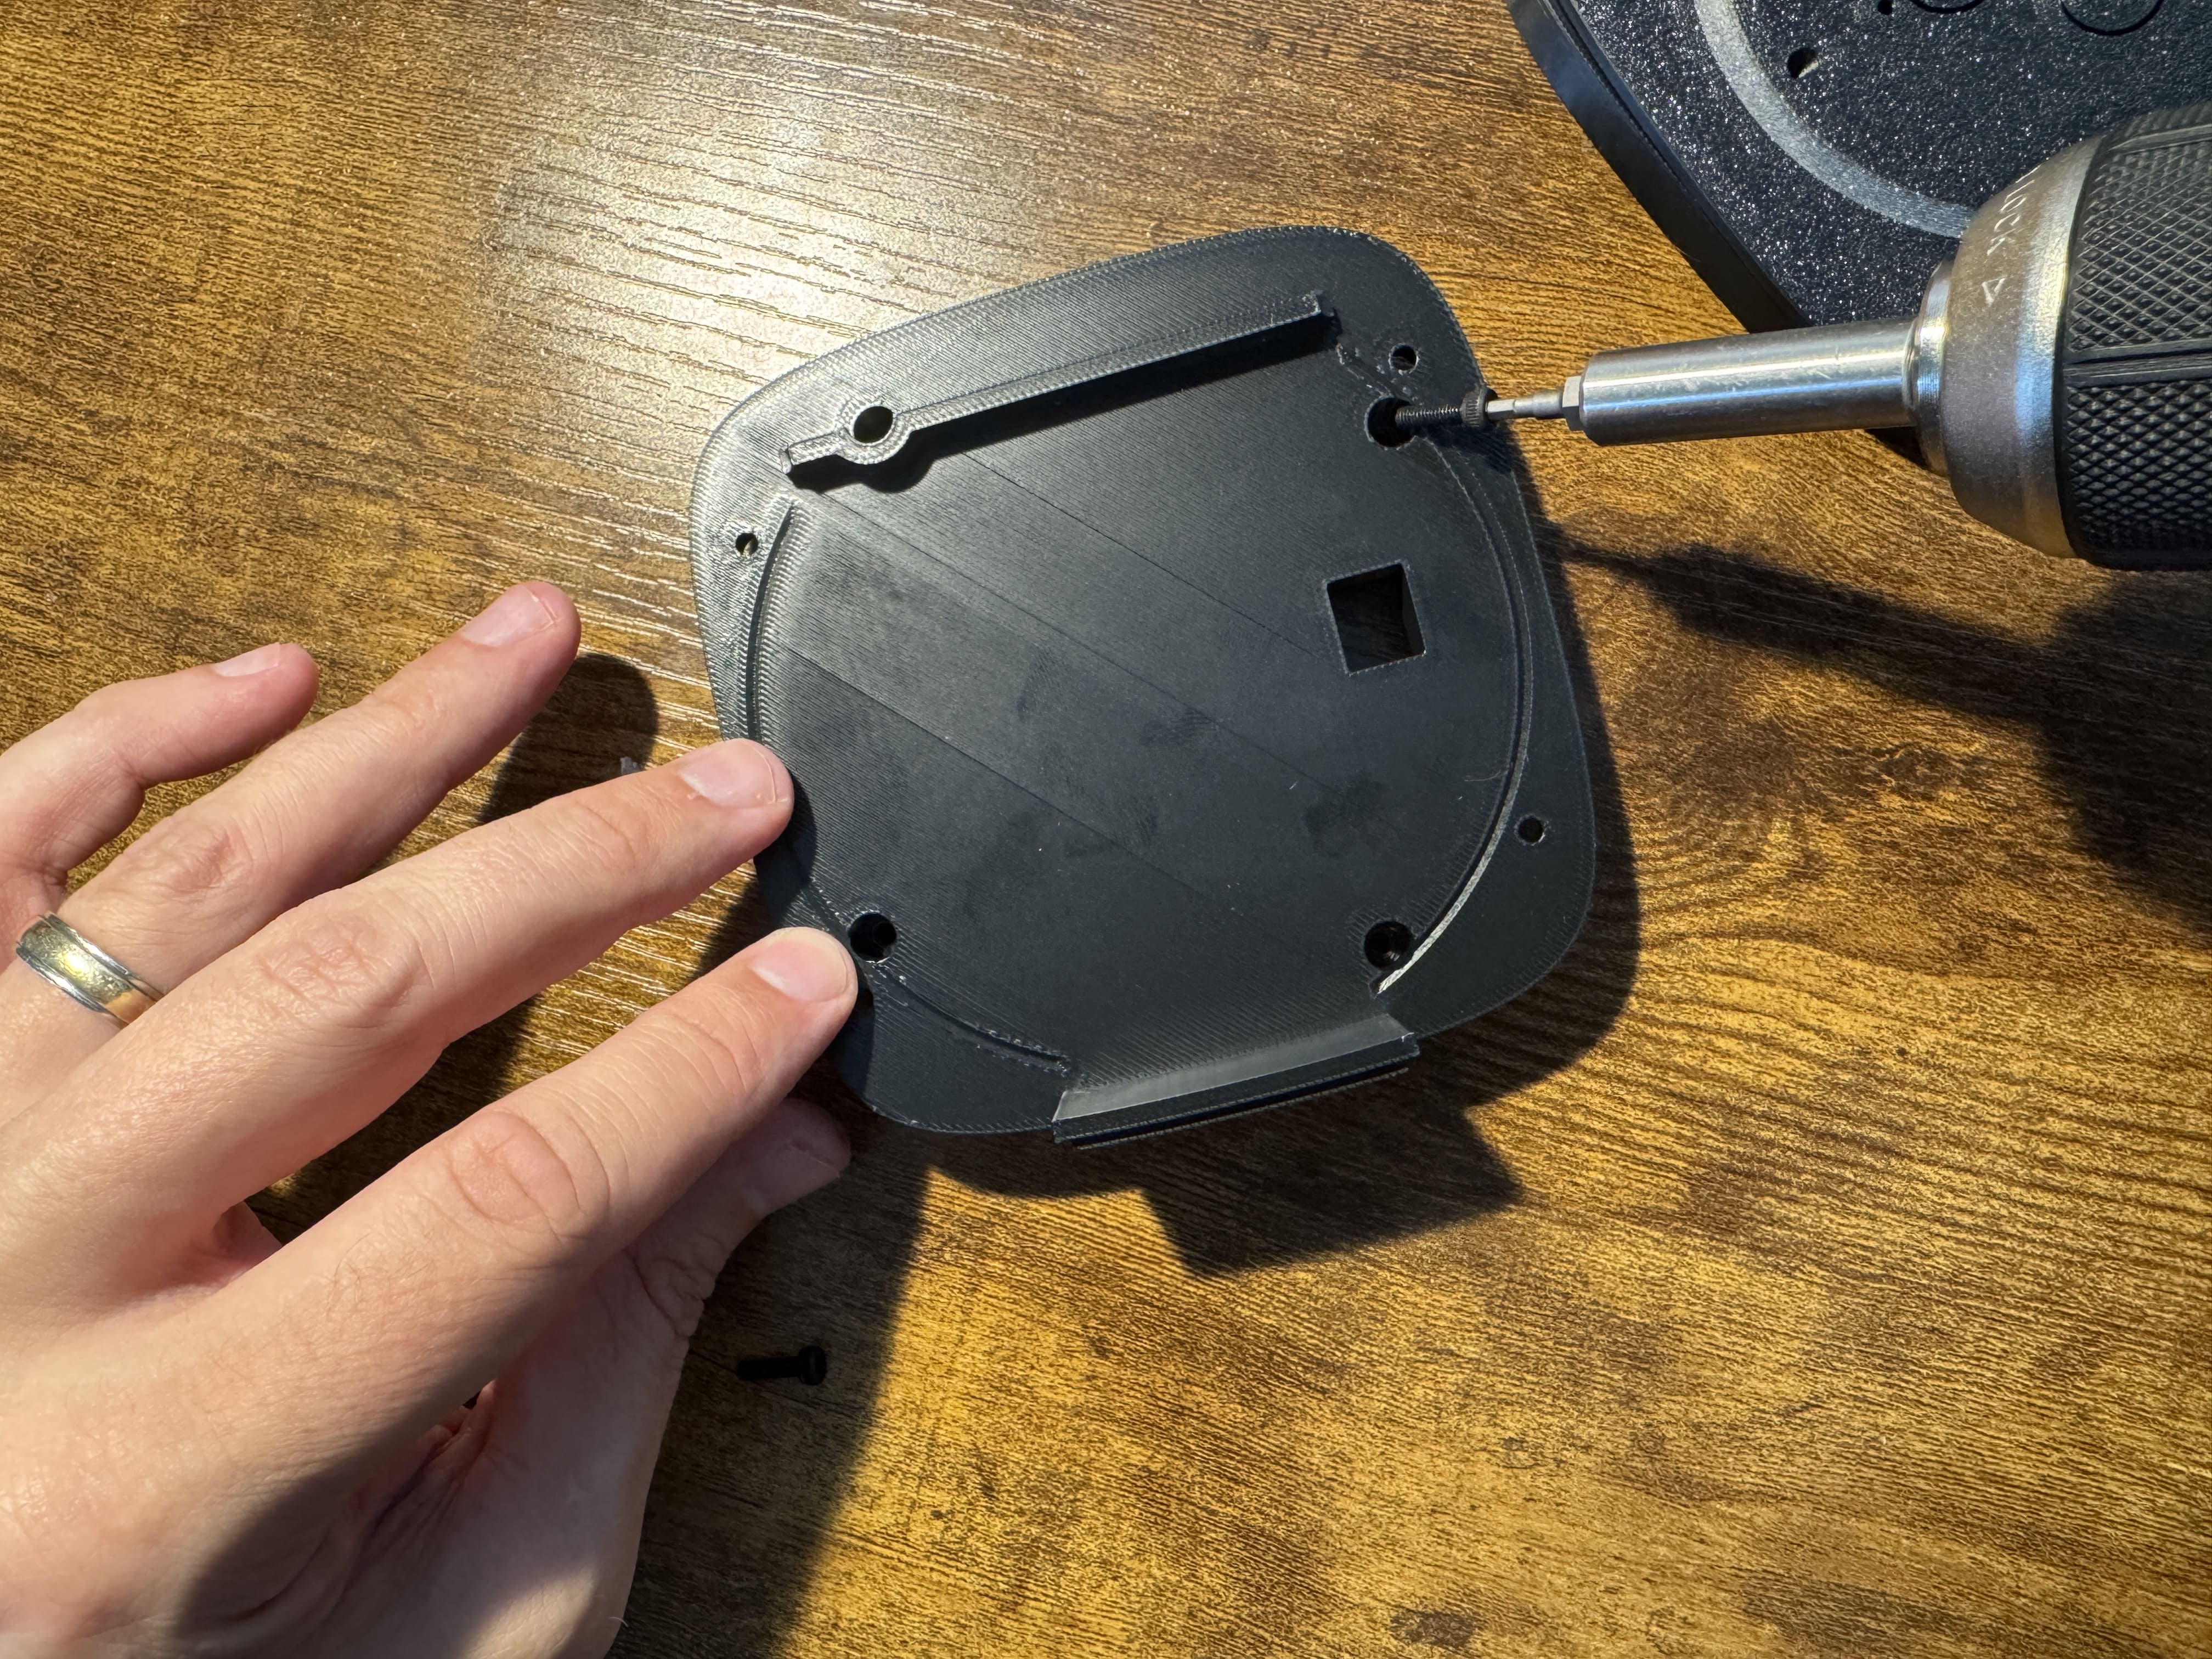
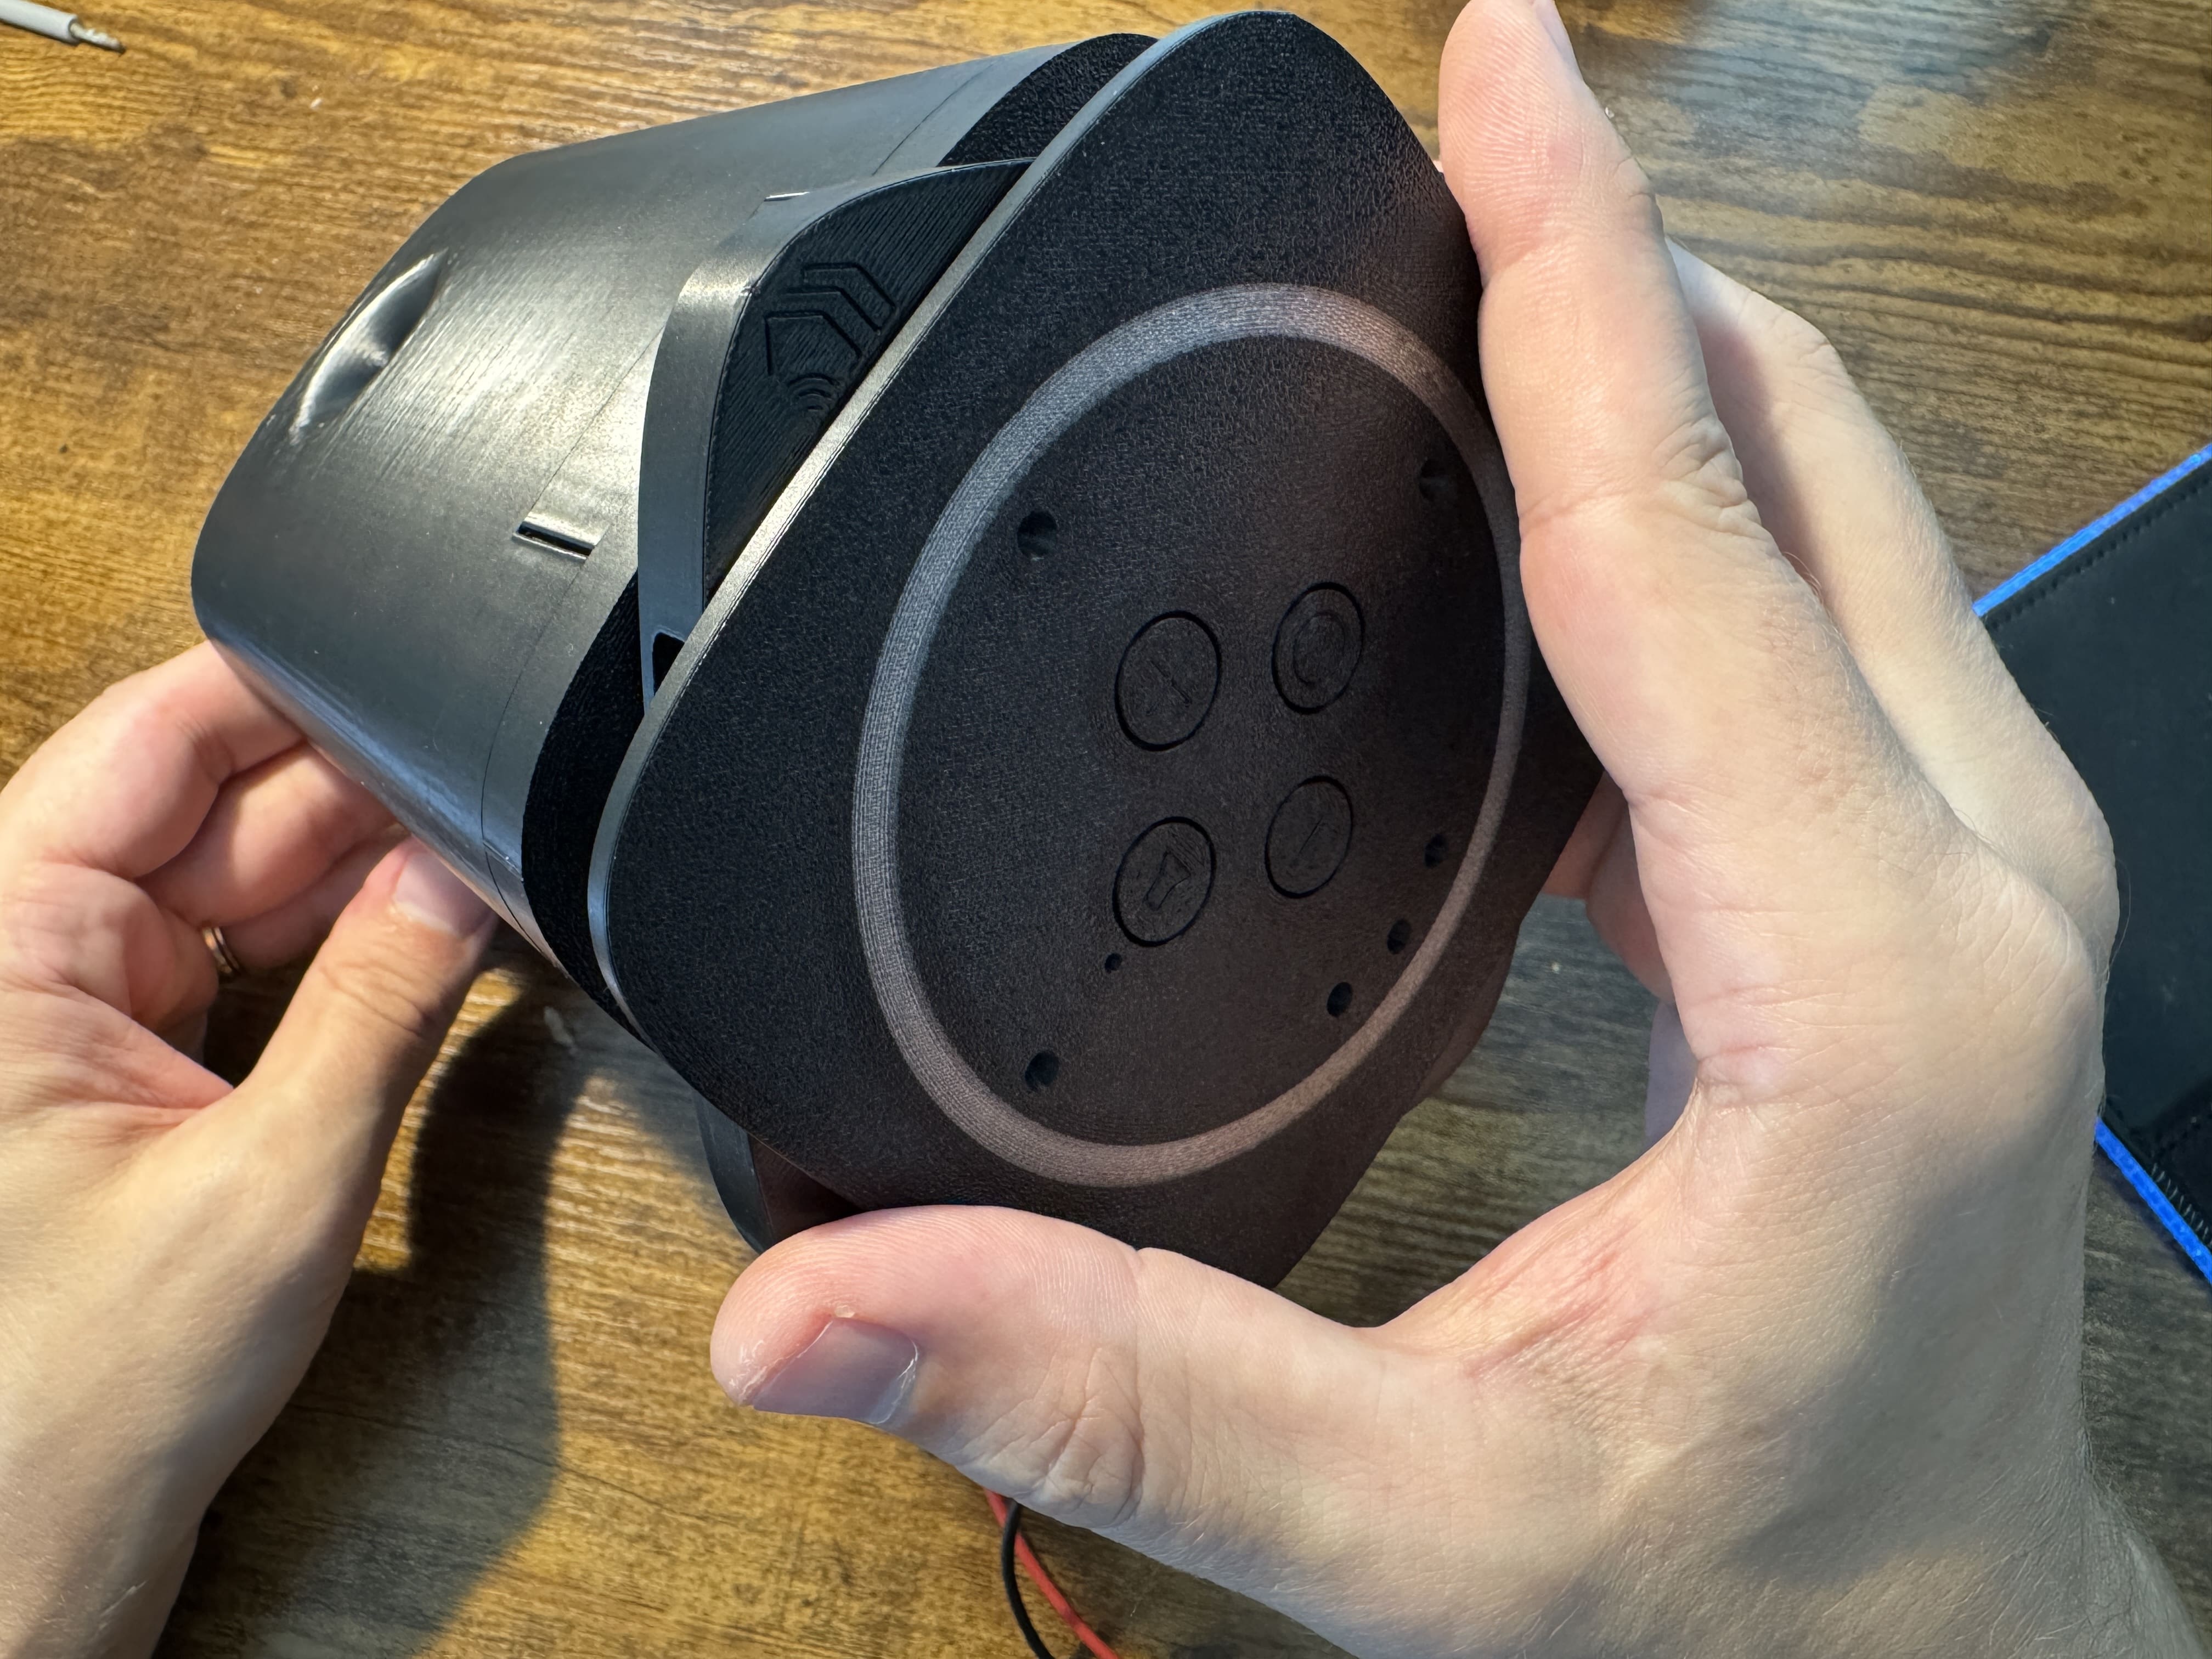
Secure the Dev Kit to the Top Plate
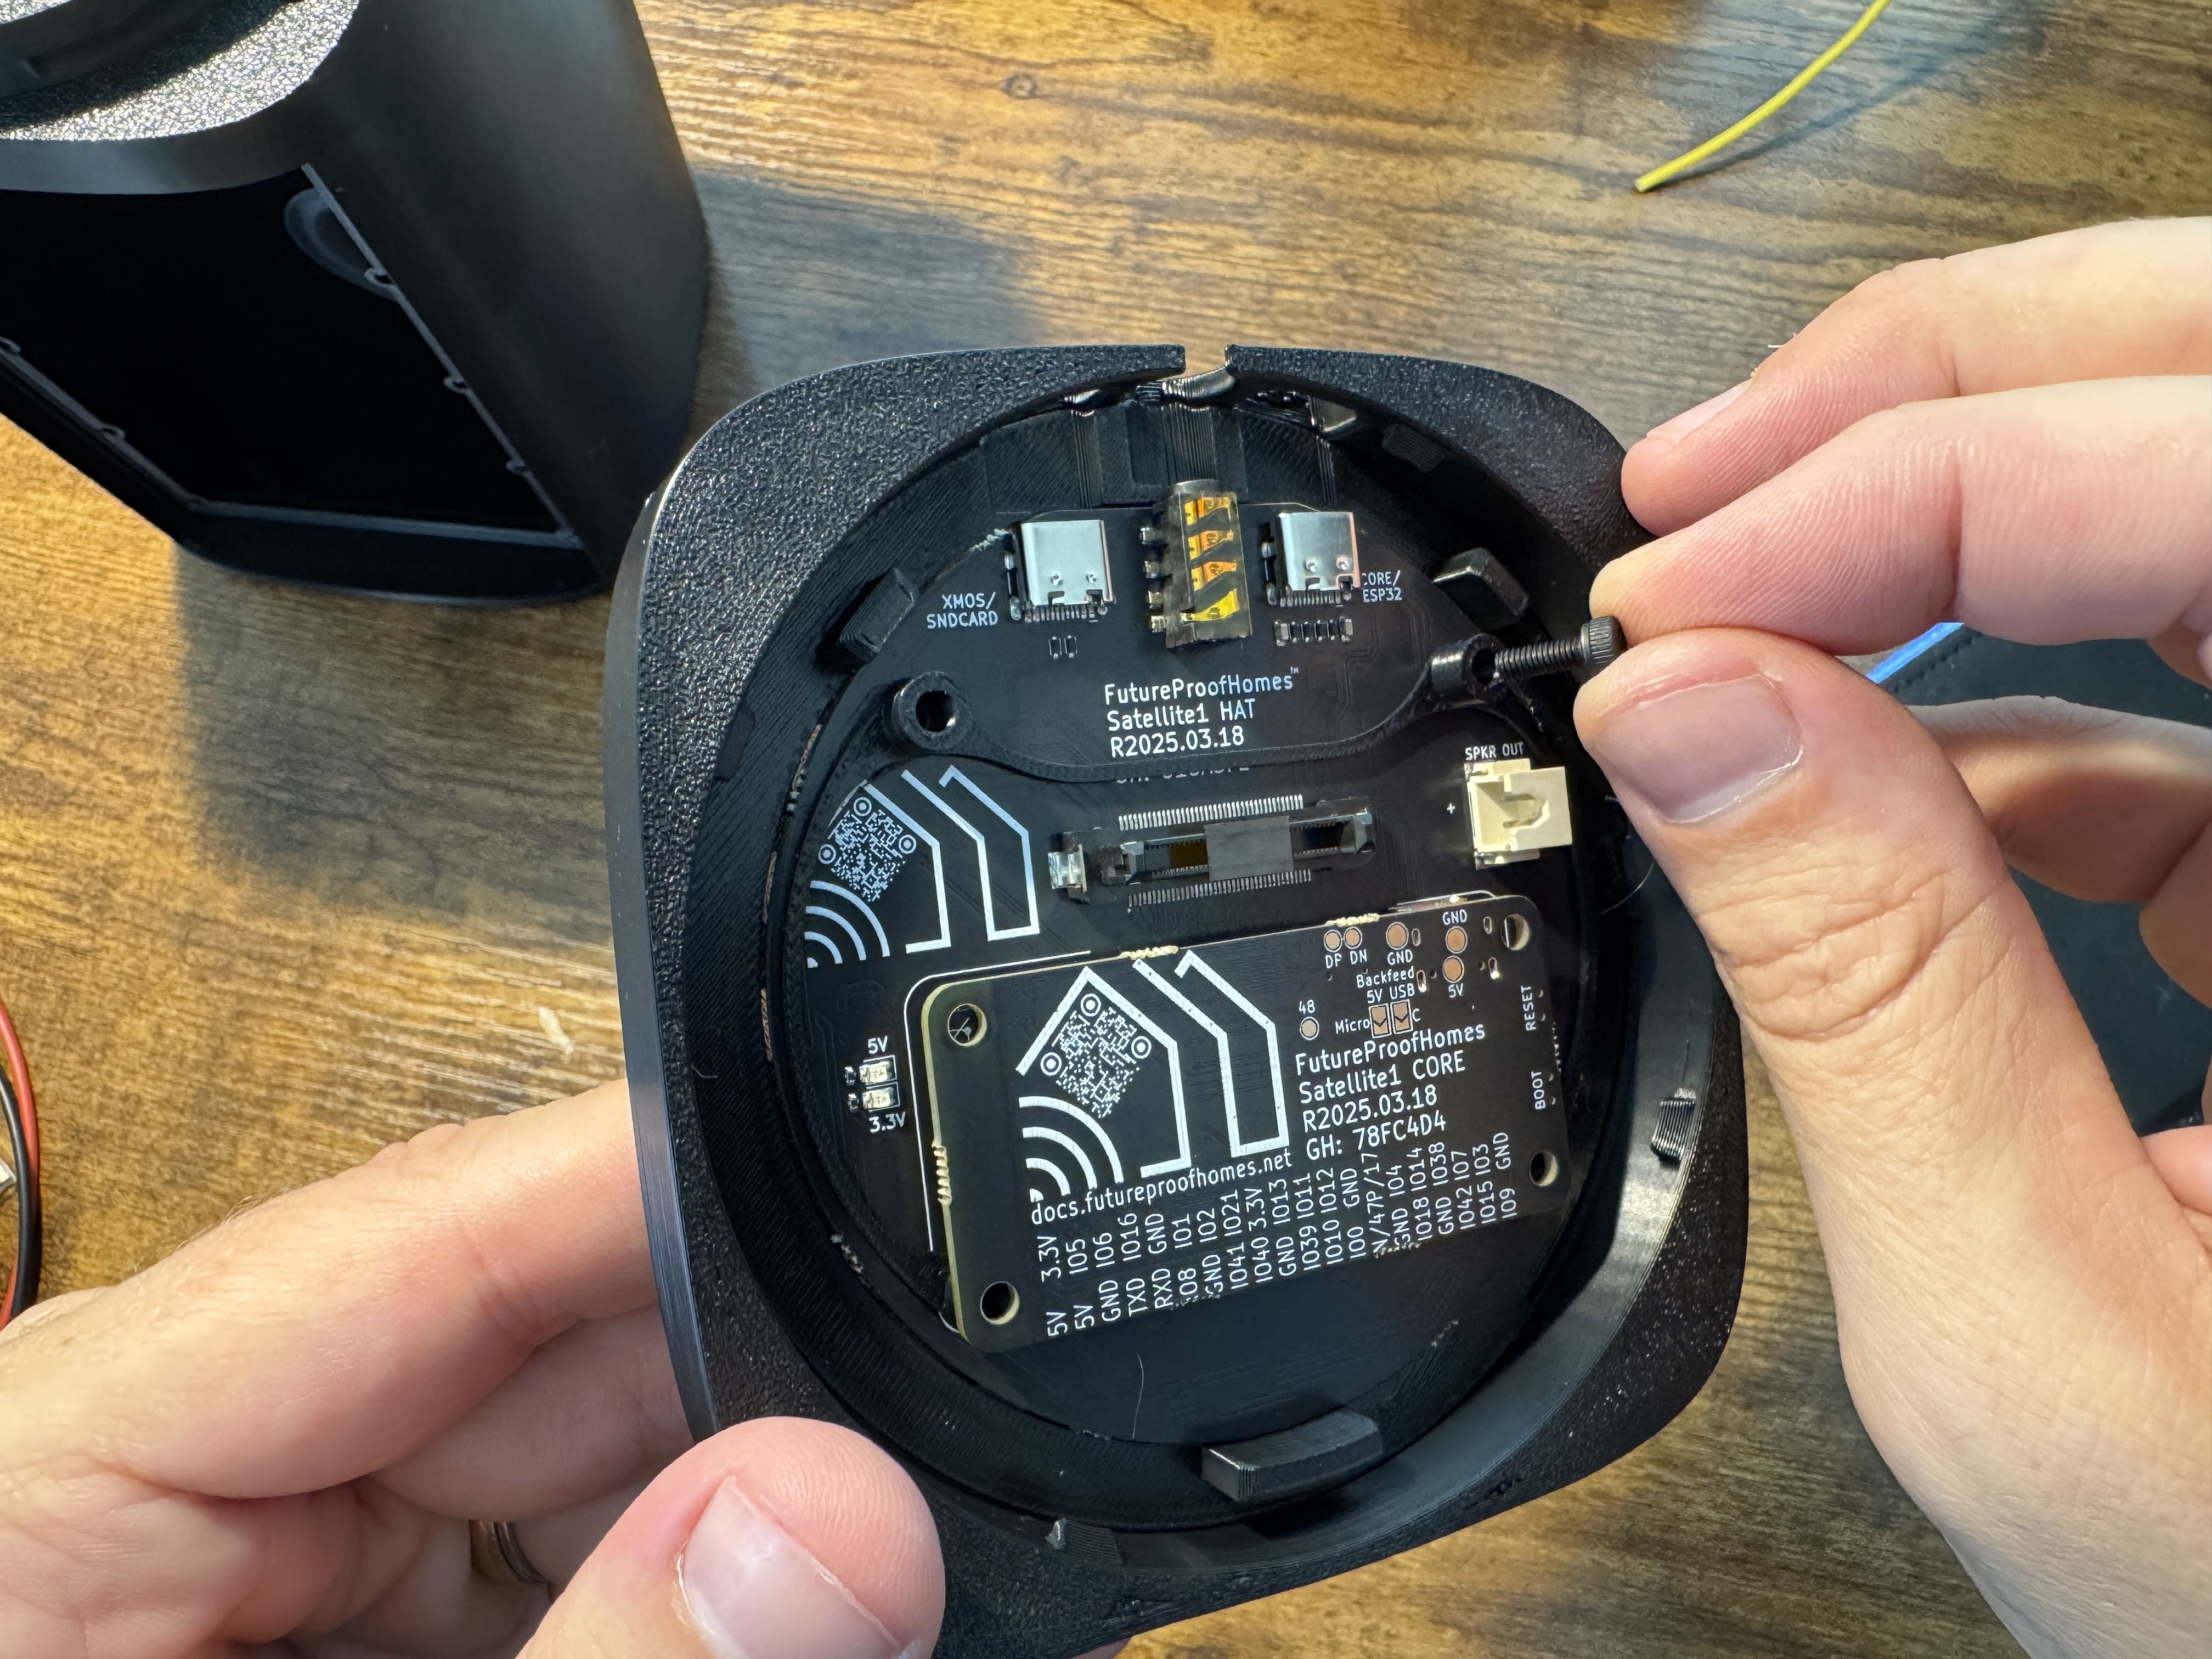 By hand, secure the Dev Kit to the top piece with four M3 x 8mm screws. Do not overtighten the screws.
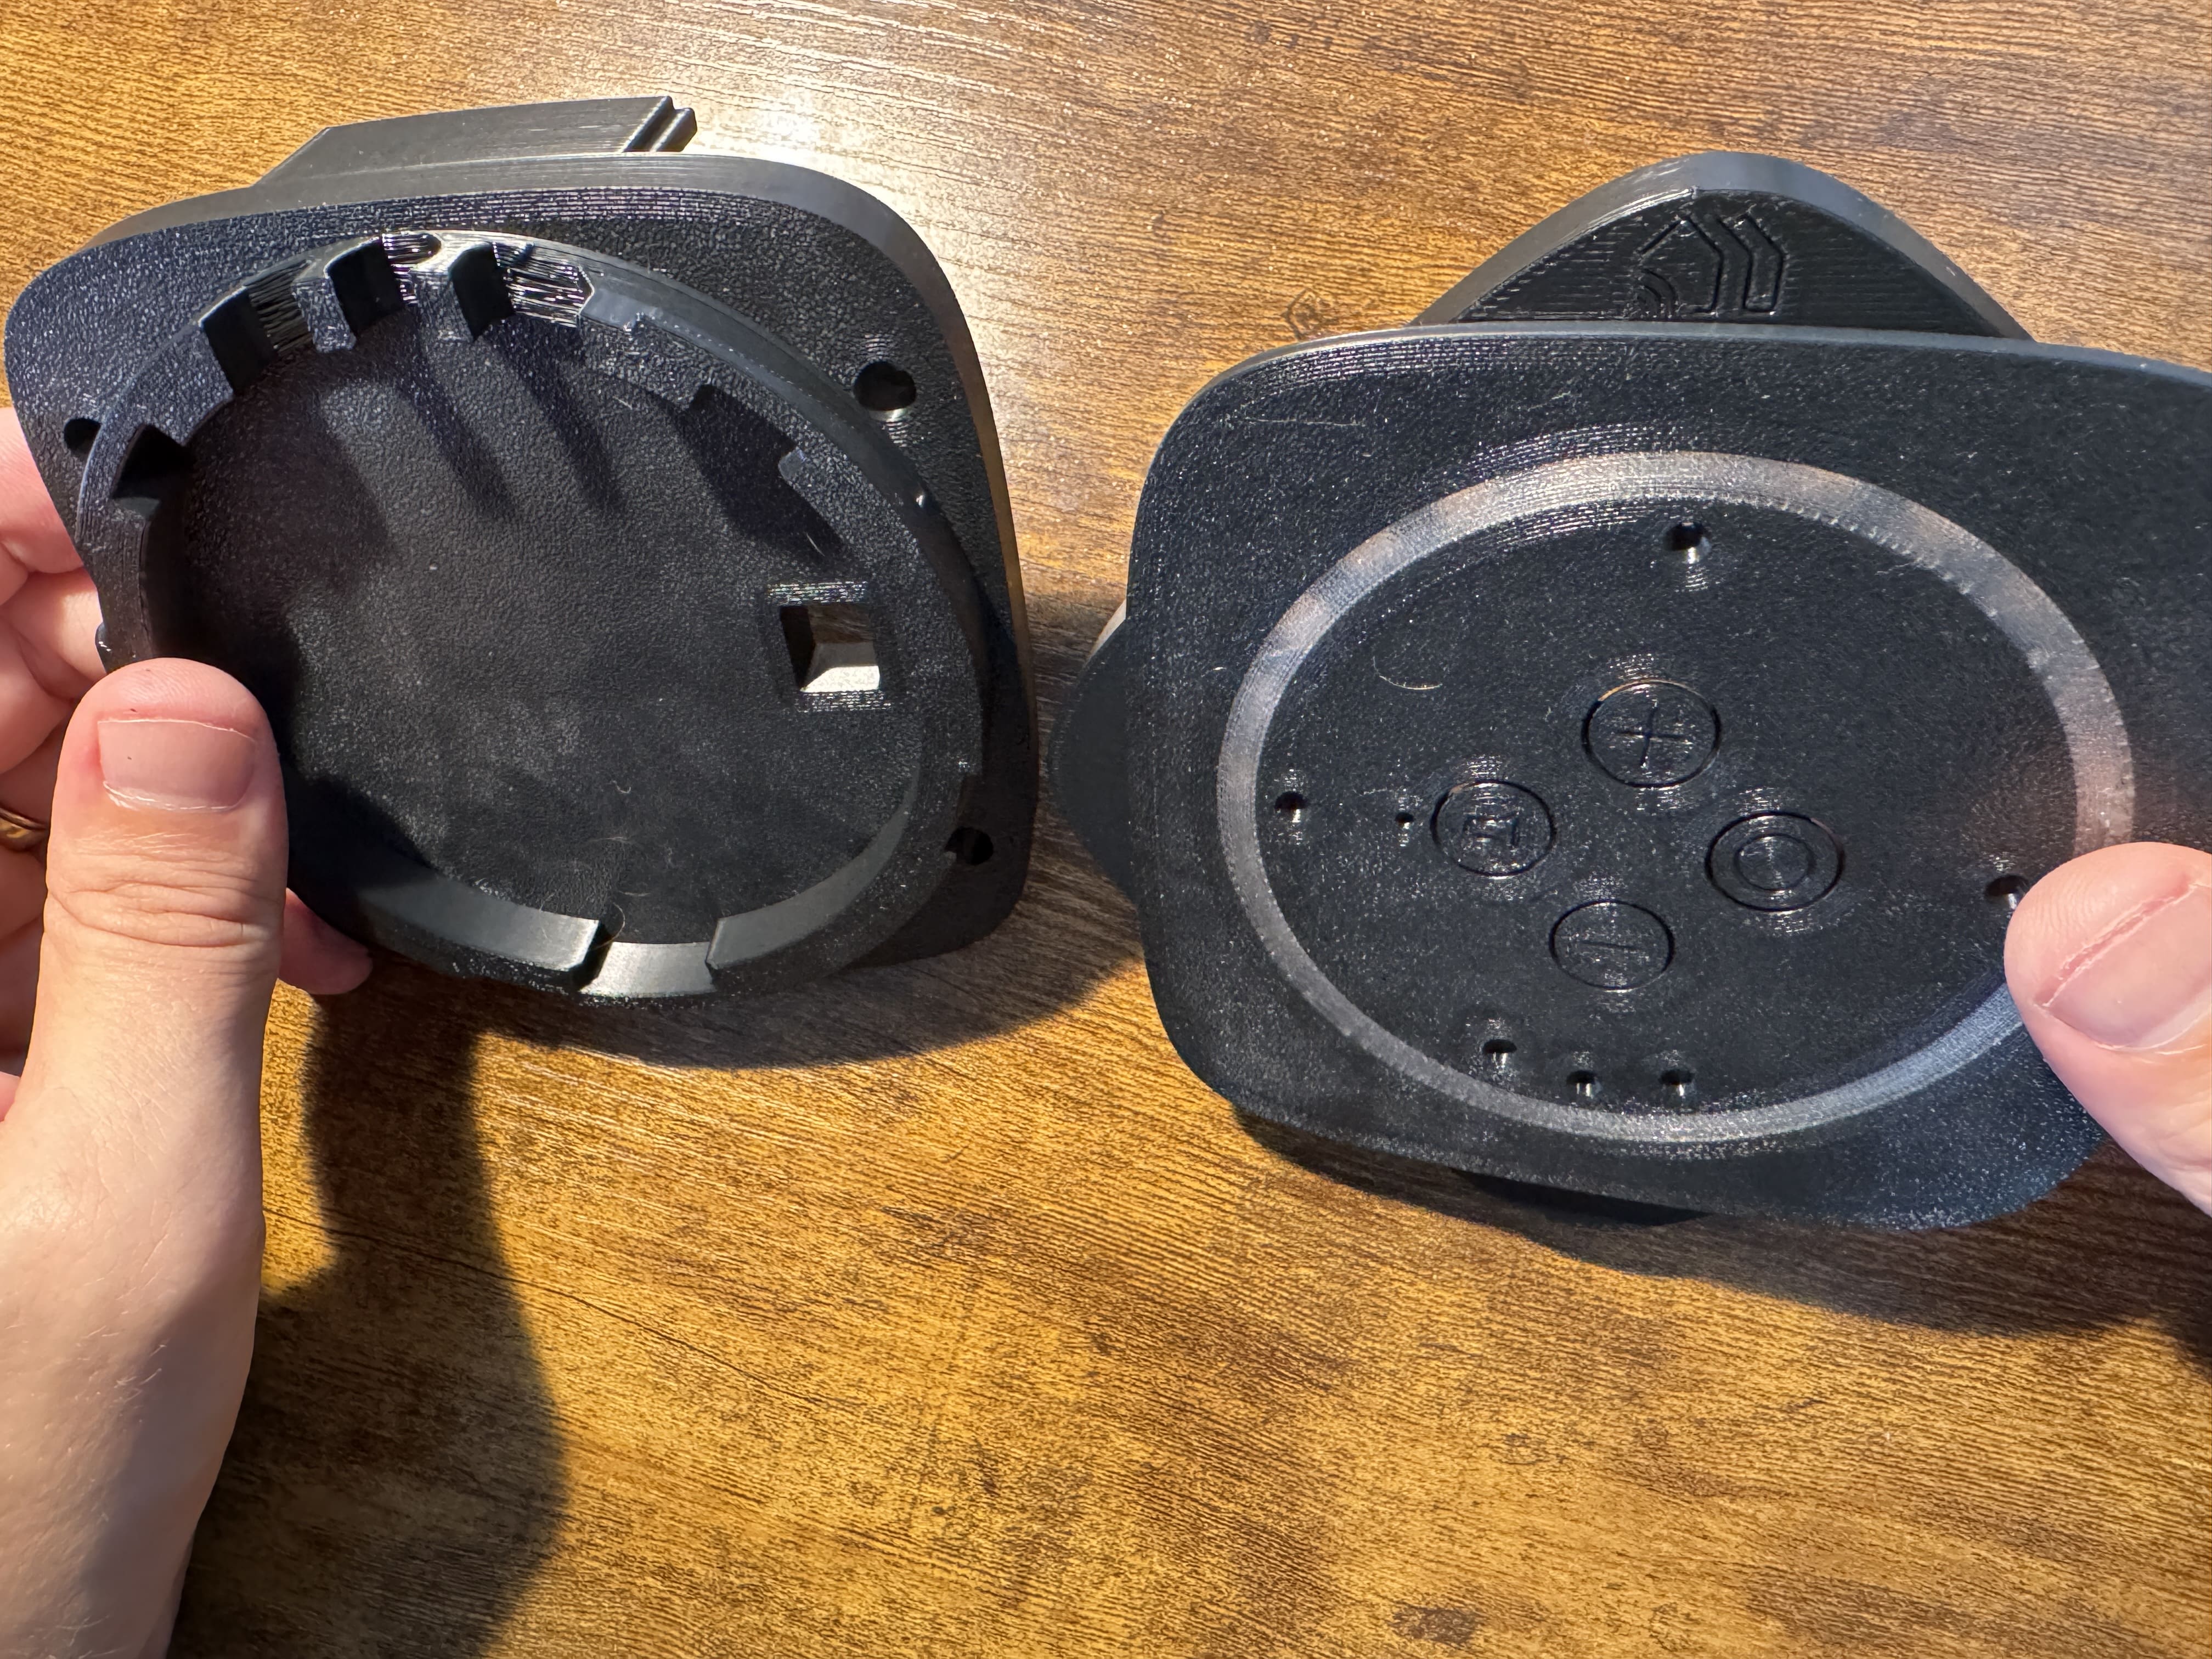
Success
You have built your Satellite1 Squircle Top Plate!
Mid-Plate Assembly
-
Find Nubs
 Look closely at the mid-plate and feel the bottom side of the threads. You'll find four little nubs and holes that should align.
 -
Align Mid-Plate & Threads
 Align the two parts using the nubs so that the I/O ports point north, toward the back of the enclosure.
 -
Screw Mid-Plate & Threads Together
 Flip the mid-plate over and screw the two parts together with four M3 x 8mm screws.
 -
Unlock Top Piece
 Unlock the top piece and ensure the FPH logo is pointing north.
 -
Mount Top Piece to Mid-Plate
 Place the unlocked top piece over the threads so the FPH logo is pointing north, over the back of the enclosure.
 -
Practice Locking & Unlocking
 Rotate the lock ring clockwise to lock the top piece in place. Practice locking and unlocking the top piece.
Success
You have built your Satellite1 Squircle Mid-Plate!
Speaker Chamber Assembly
-
Slide Mid-Plate Into Position
 Slide the mid-plate into the speaker chamber.
 -
Screw Down Mid-Plate
 Secure the mid-plate with four M3 x 8mm screws.
 -
Connect Speaker Cable
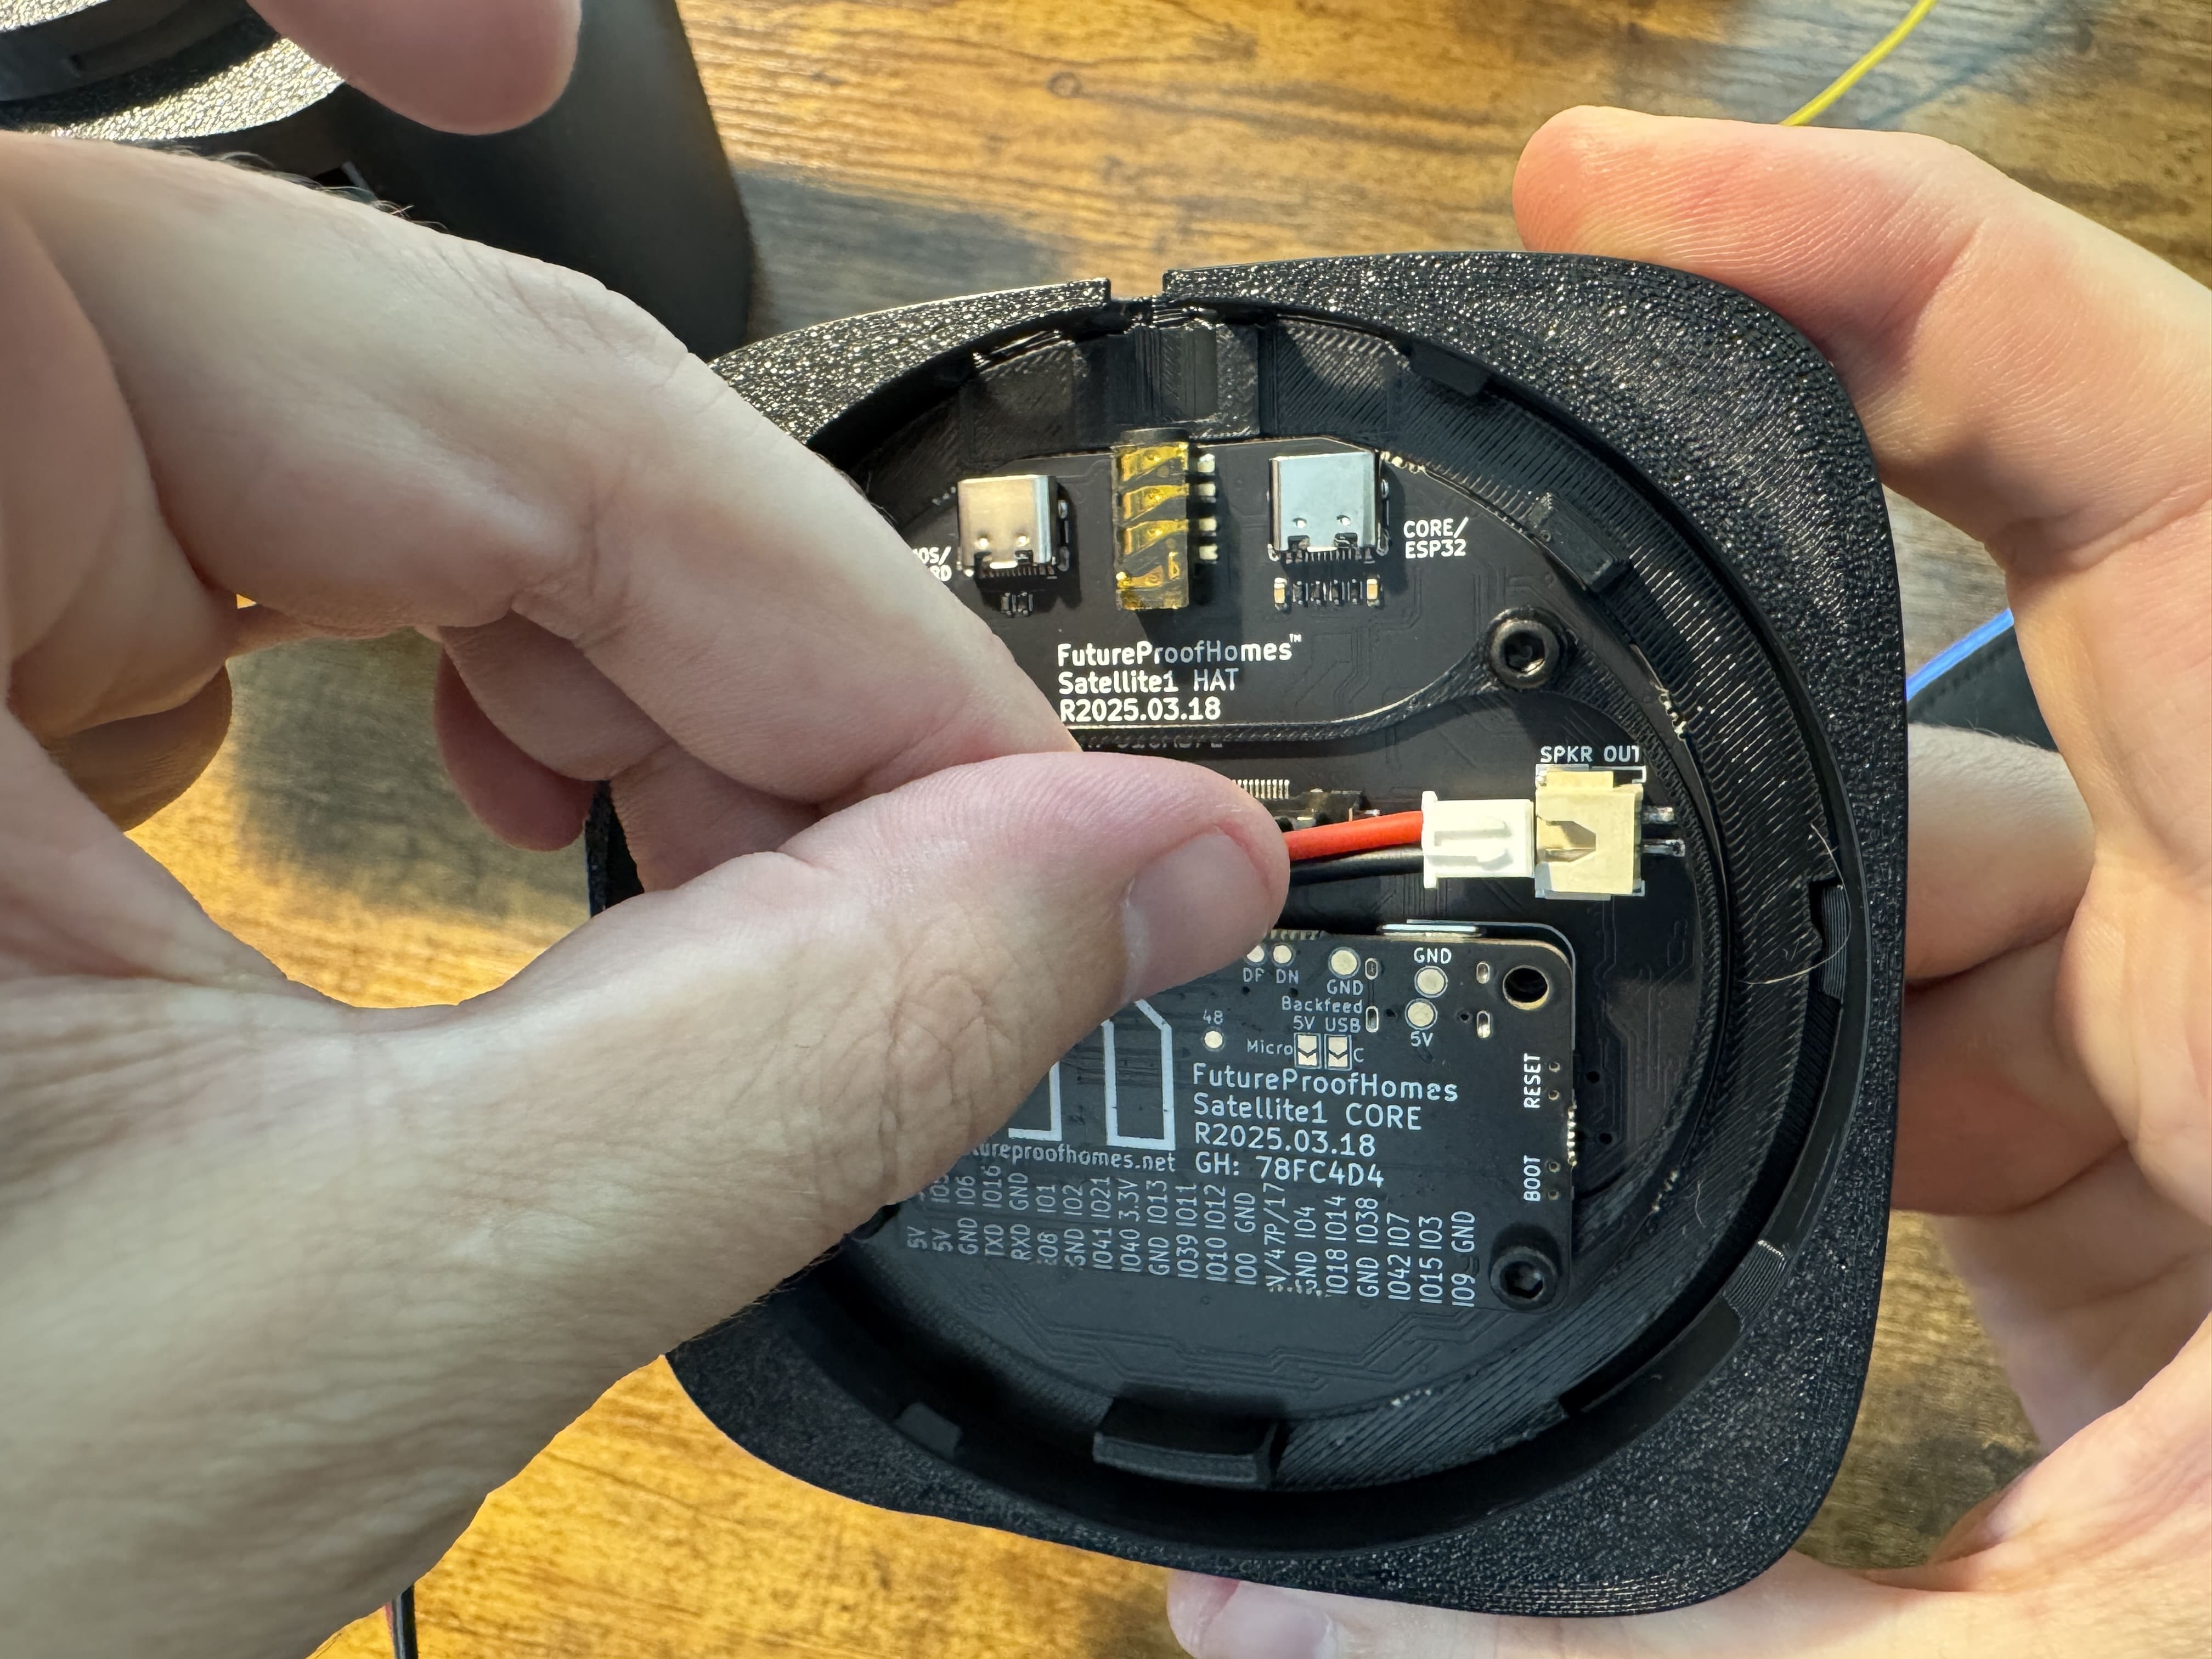 Connect the JST-XH 2.54 mm speaker cable connector to the HAT. (NOTE: You can also use Dupont cables if absolutely necessary.)
 -
Install Speaker Plug
 Drop the speaker cable down through the mid-plate, leaving enough length to assemble easily. Use the speaker chamber plug and optional Blu-Tack reusable adhesive to create an airtight seal.
 -
Lock Top Piece
 Position the unlocked top piece over the mid-plate threads with the FPH logo facing north, toward the back of the enclosure. Twist the lock ring clockwise to secure it.
 -
Add Polyfill
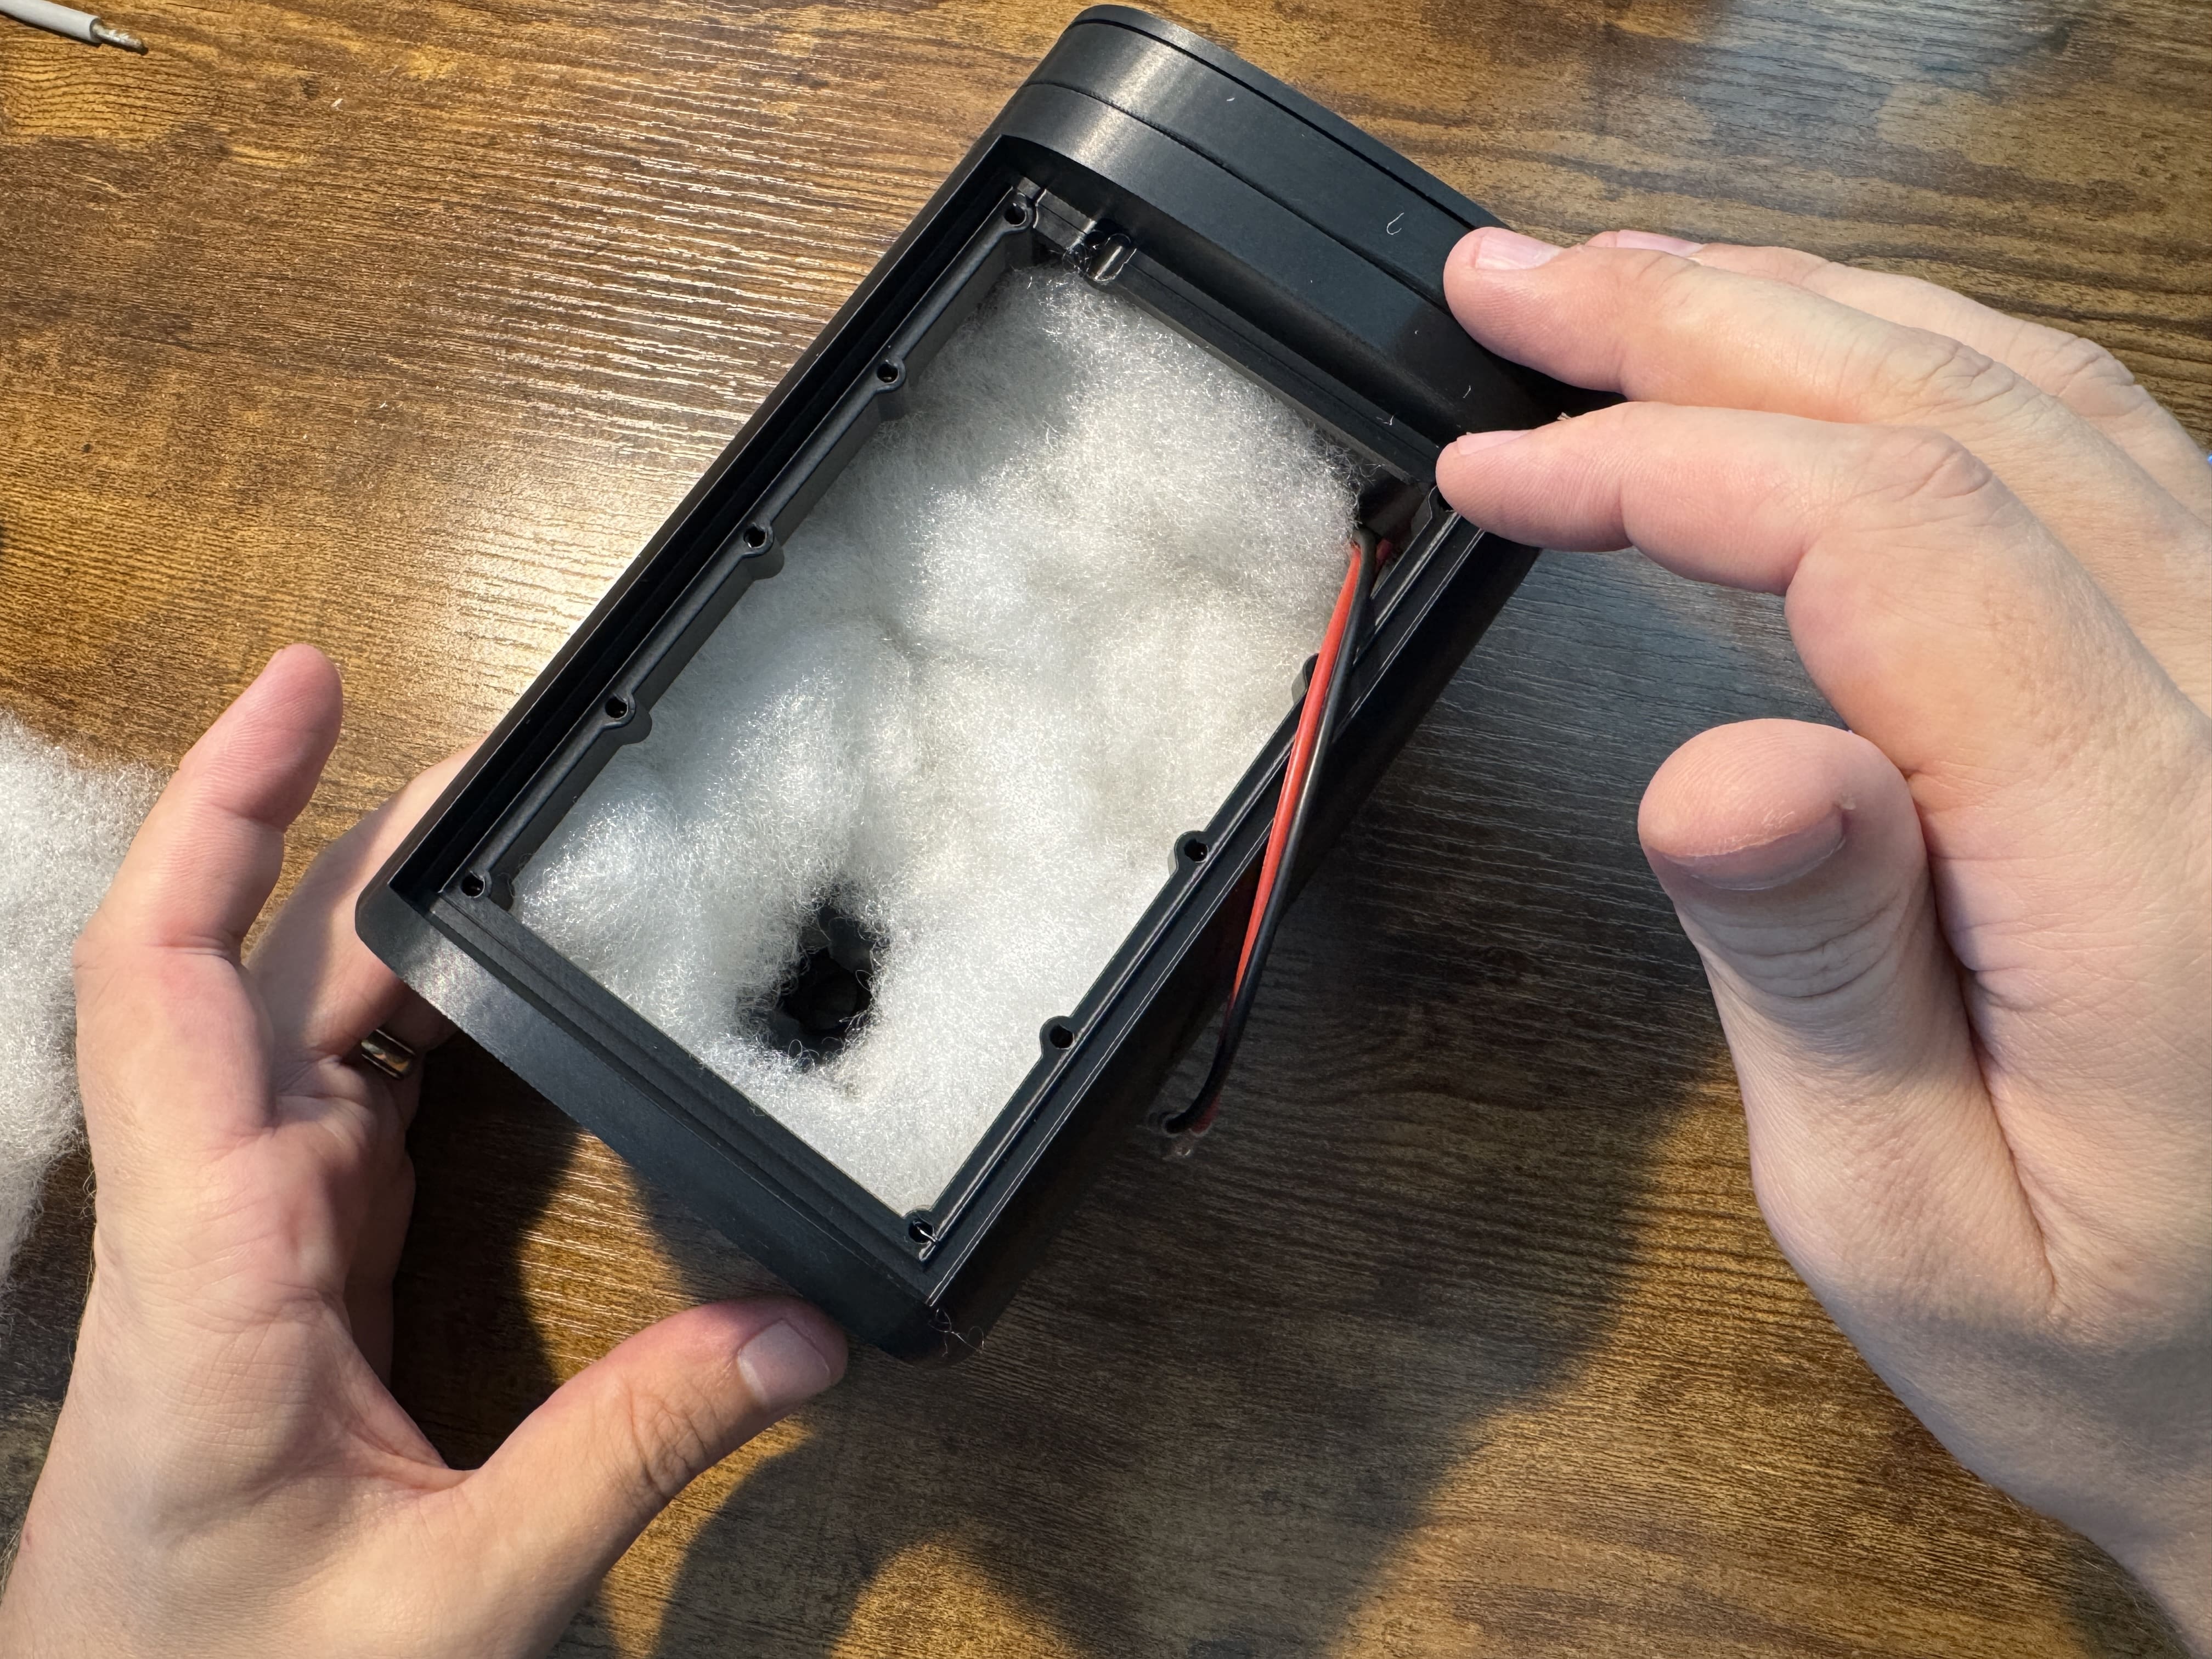 Add a generous amount of polyfill to the speaker chamber, leaving some room for air to flow through the ported vent.
 -
Secure & Connect Speaker
 Screw your chosen speaker to its corresponding faceplate with four M3 x 8mm screws. Connect the speaker cable to the speaker. (NOTE: You can solder or wrap the speaker cables if absolutely necessary.)
Rotate Speaker to Fit
If you are building the medium-size speaker enclosure with the "Triple Plate", rotate the speaker 10° clockwise or counterclockwise until the mounting holes align.
-
Screw Down Faceplate
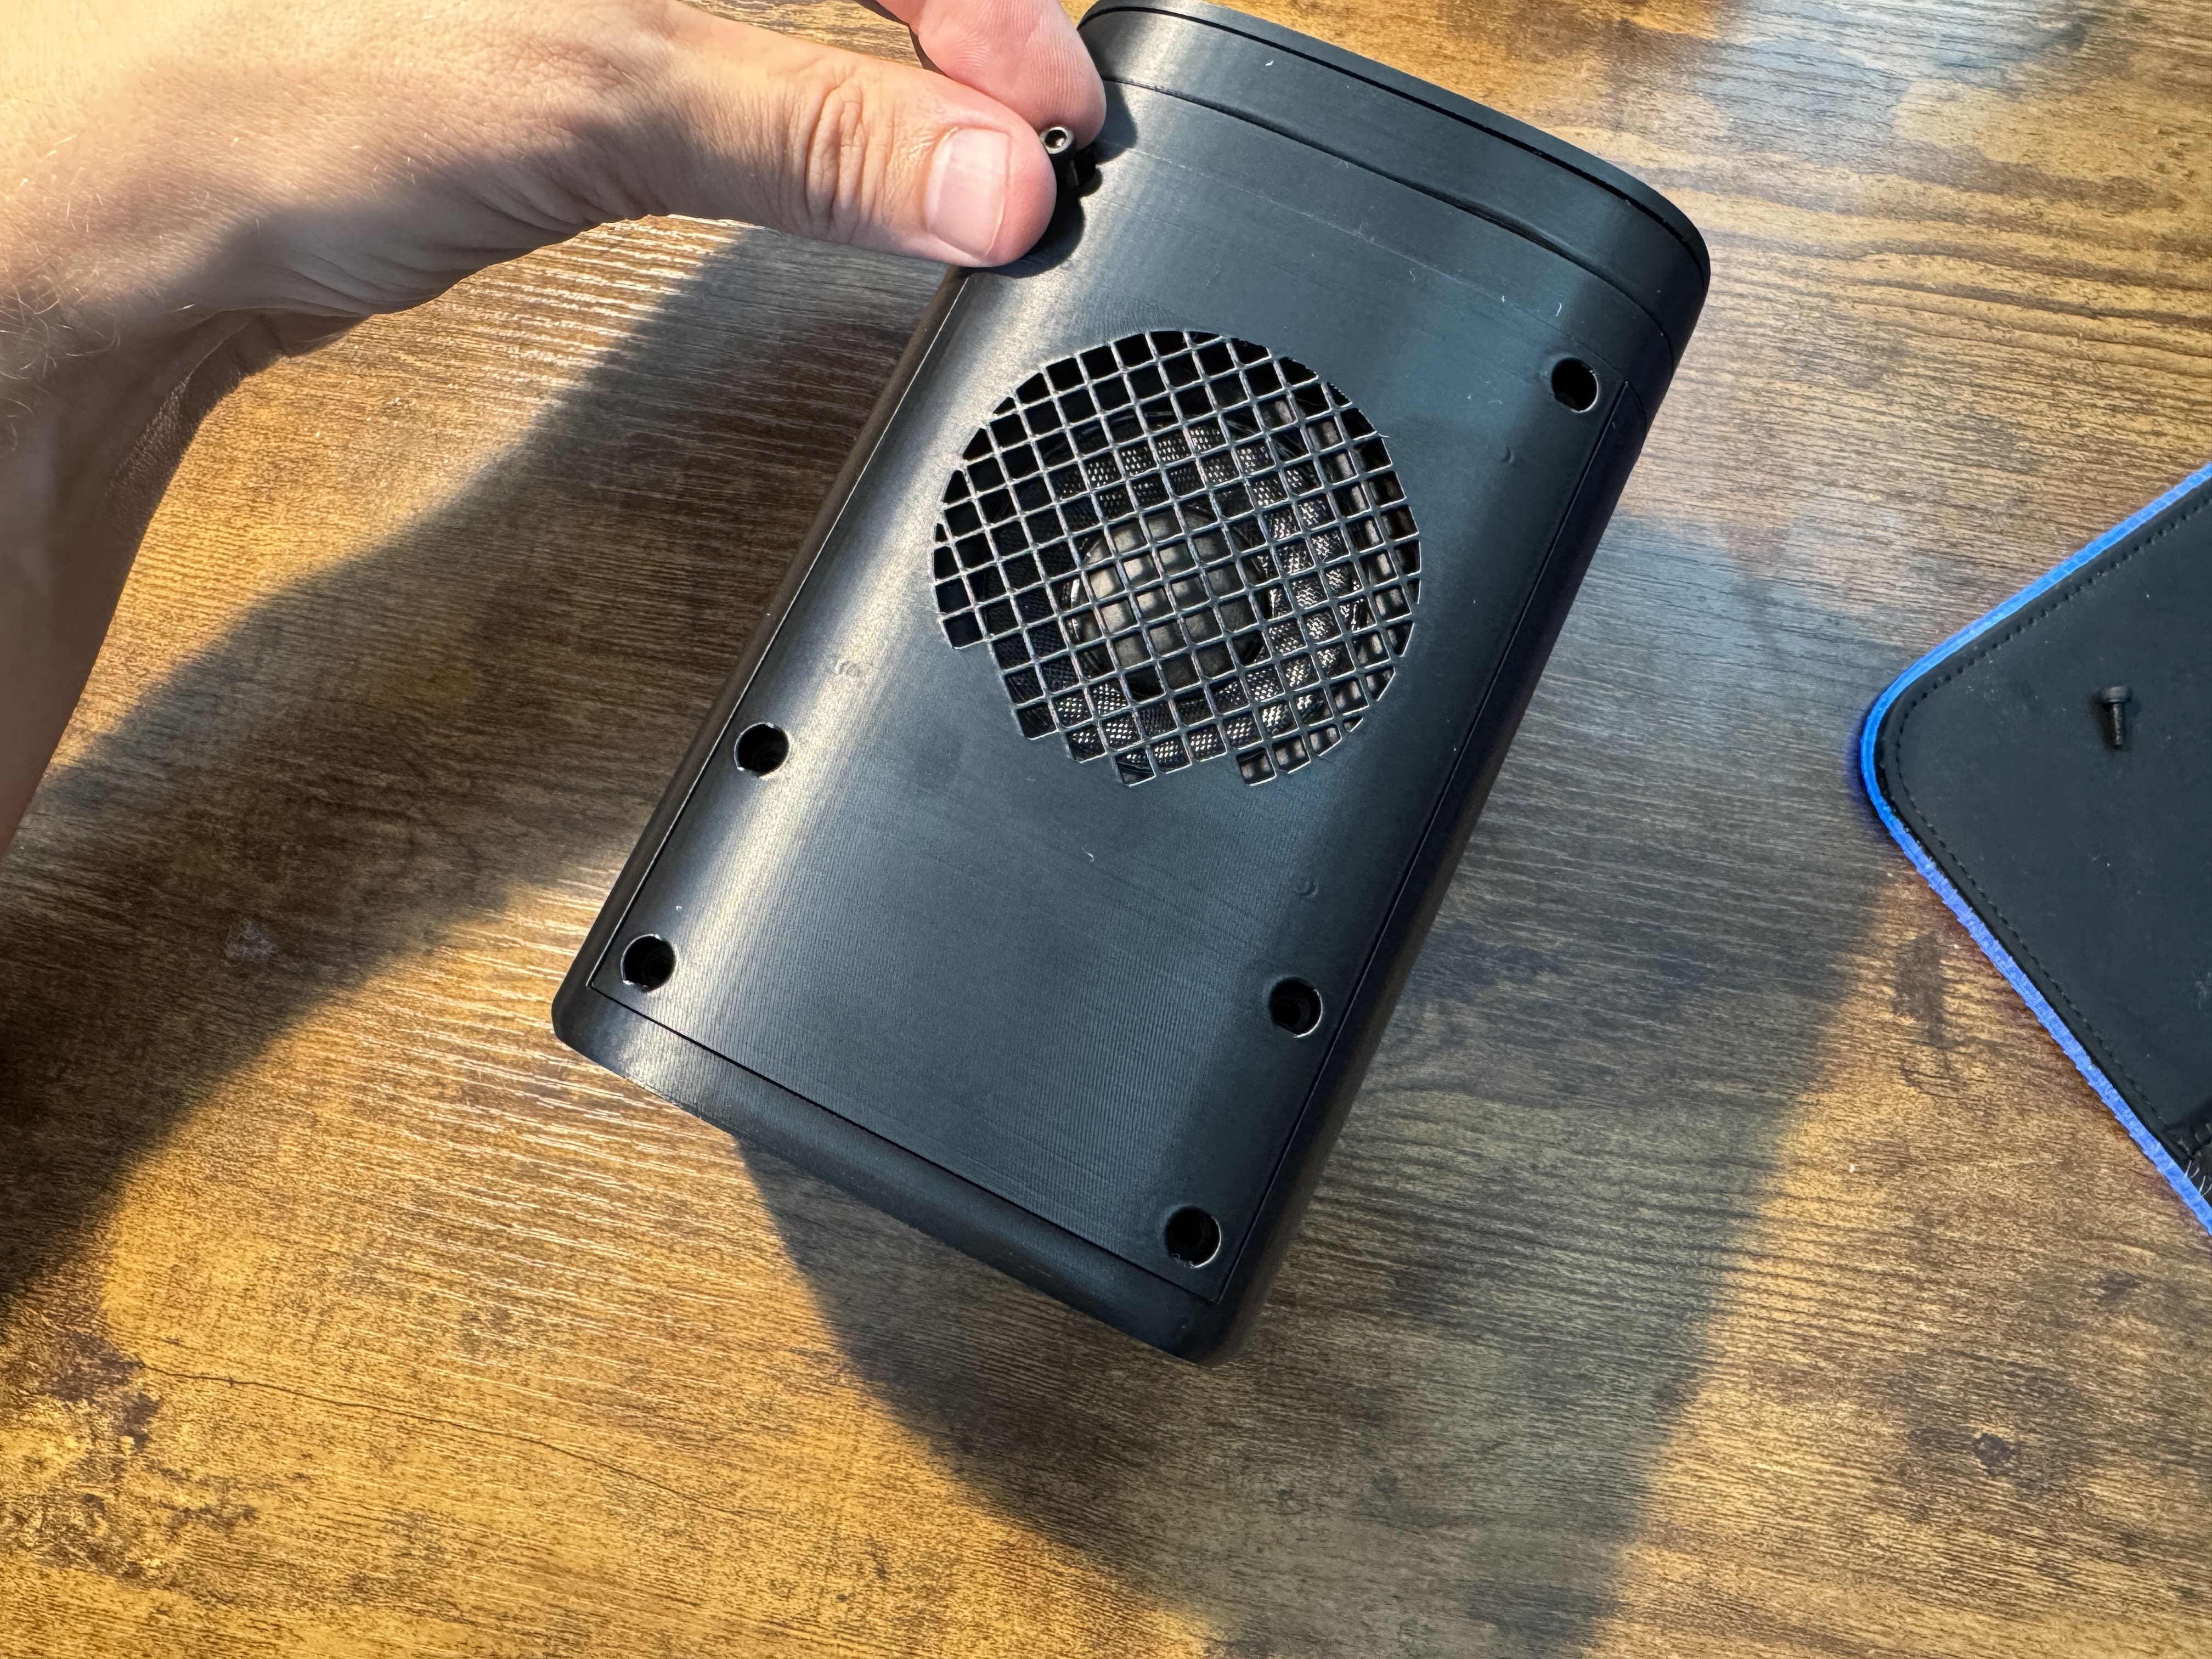 Screw down the faceplate with six M3 x 8mm screws. Optionally use Blu-Tack reusable adhesive behind the faceplate to create an airtight seal.
 -
Push in Anti-Slip Ring
 If you printed the TPU anti-slip ring, feel free to push it in now.
 -
Connect USB-C Power
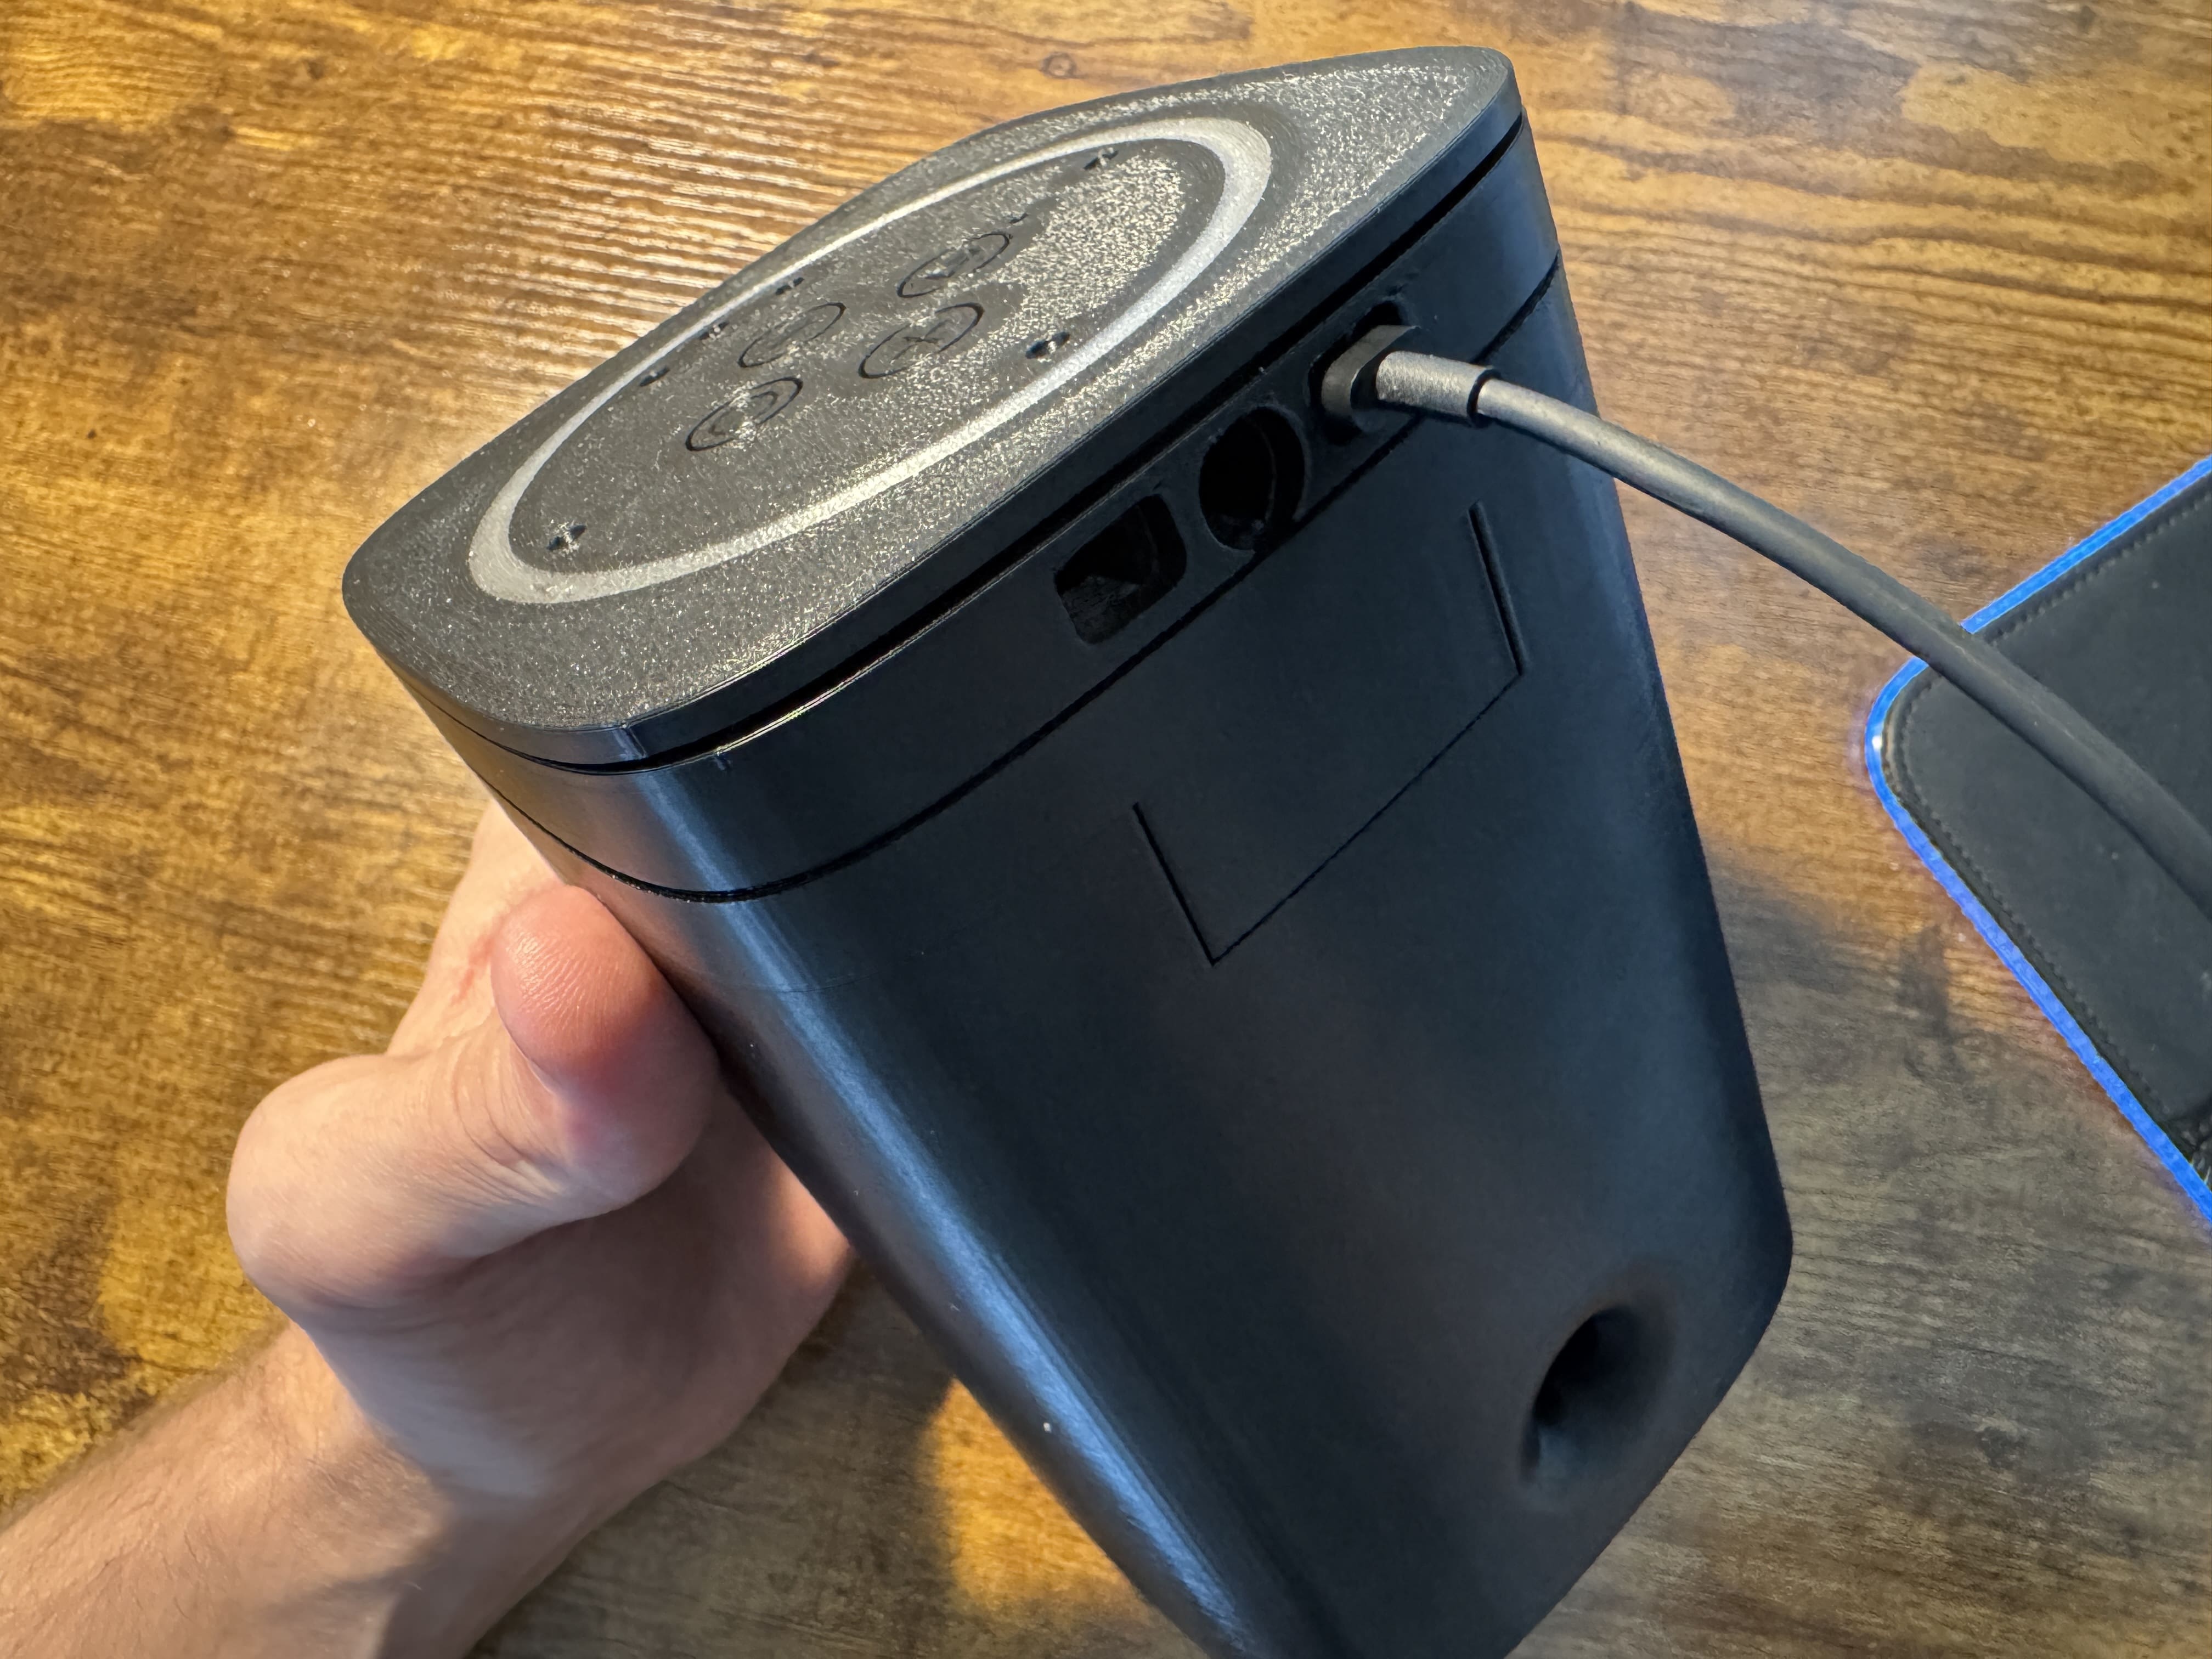 Connect the USB-C cable to the receptacle to the right of the headphone jack.
Success
You have built your Satellite1 Squircle Enclosure! Time to go play some music.