Connect to Home Assistant
Your Satellite1 arrives pre-flashed from the factory and will boot into BLE improv mode with white sparkling LEDs. Follow the steps below to connect to Home Assistant via Bluetooth.
-
Open Home Assistant App
 Open Home Assistant on your iPhone or Android device with Bluetooth enabled. Navigate to "Settings -> Devices & Services" and tap "Add" next to your discovered Sat1 device.
 -
Configure WiFi credentials
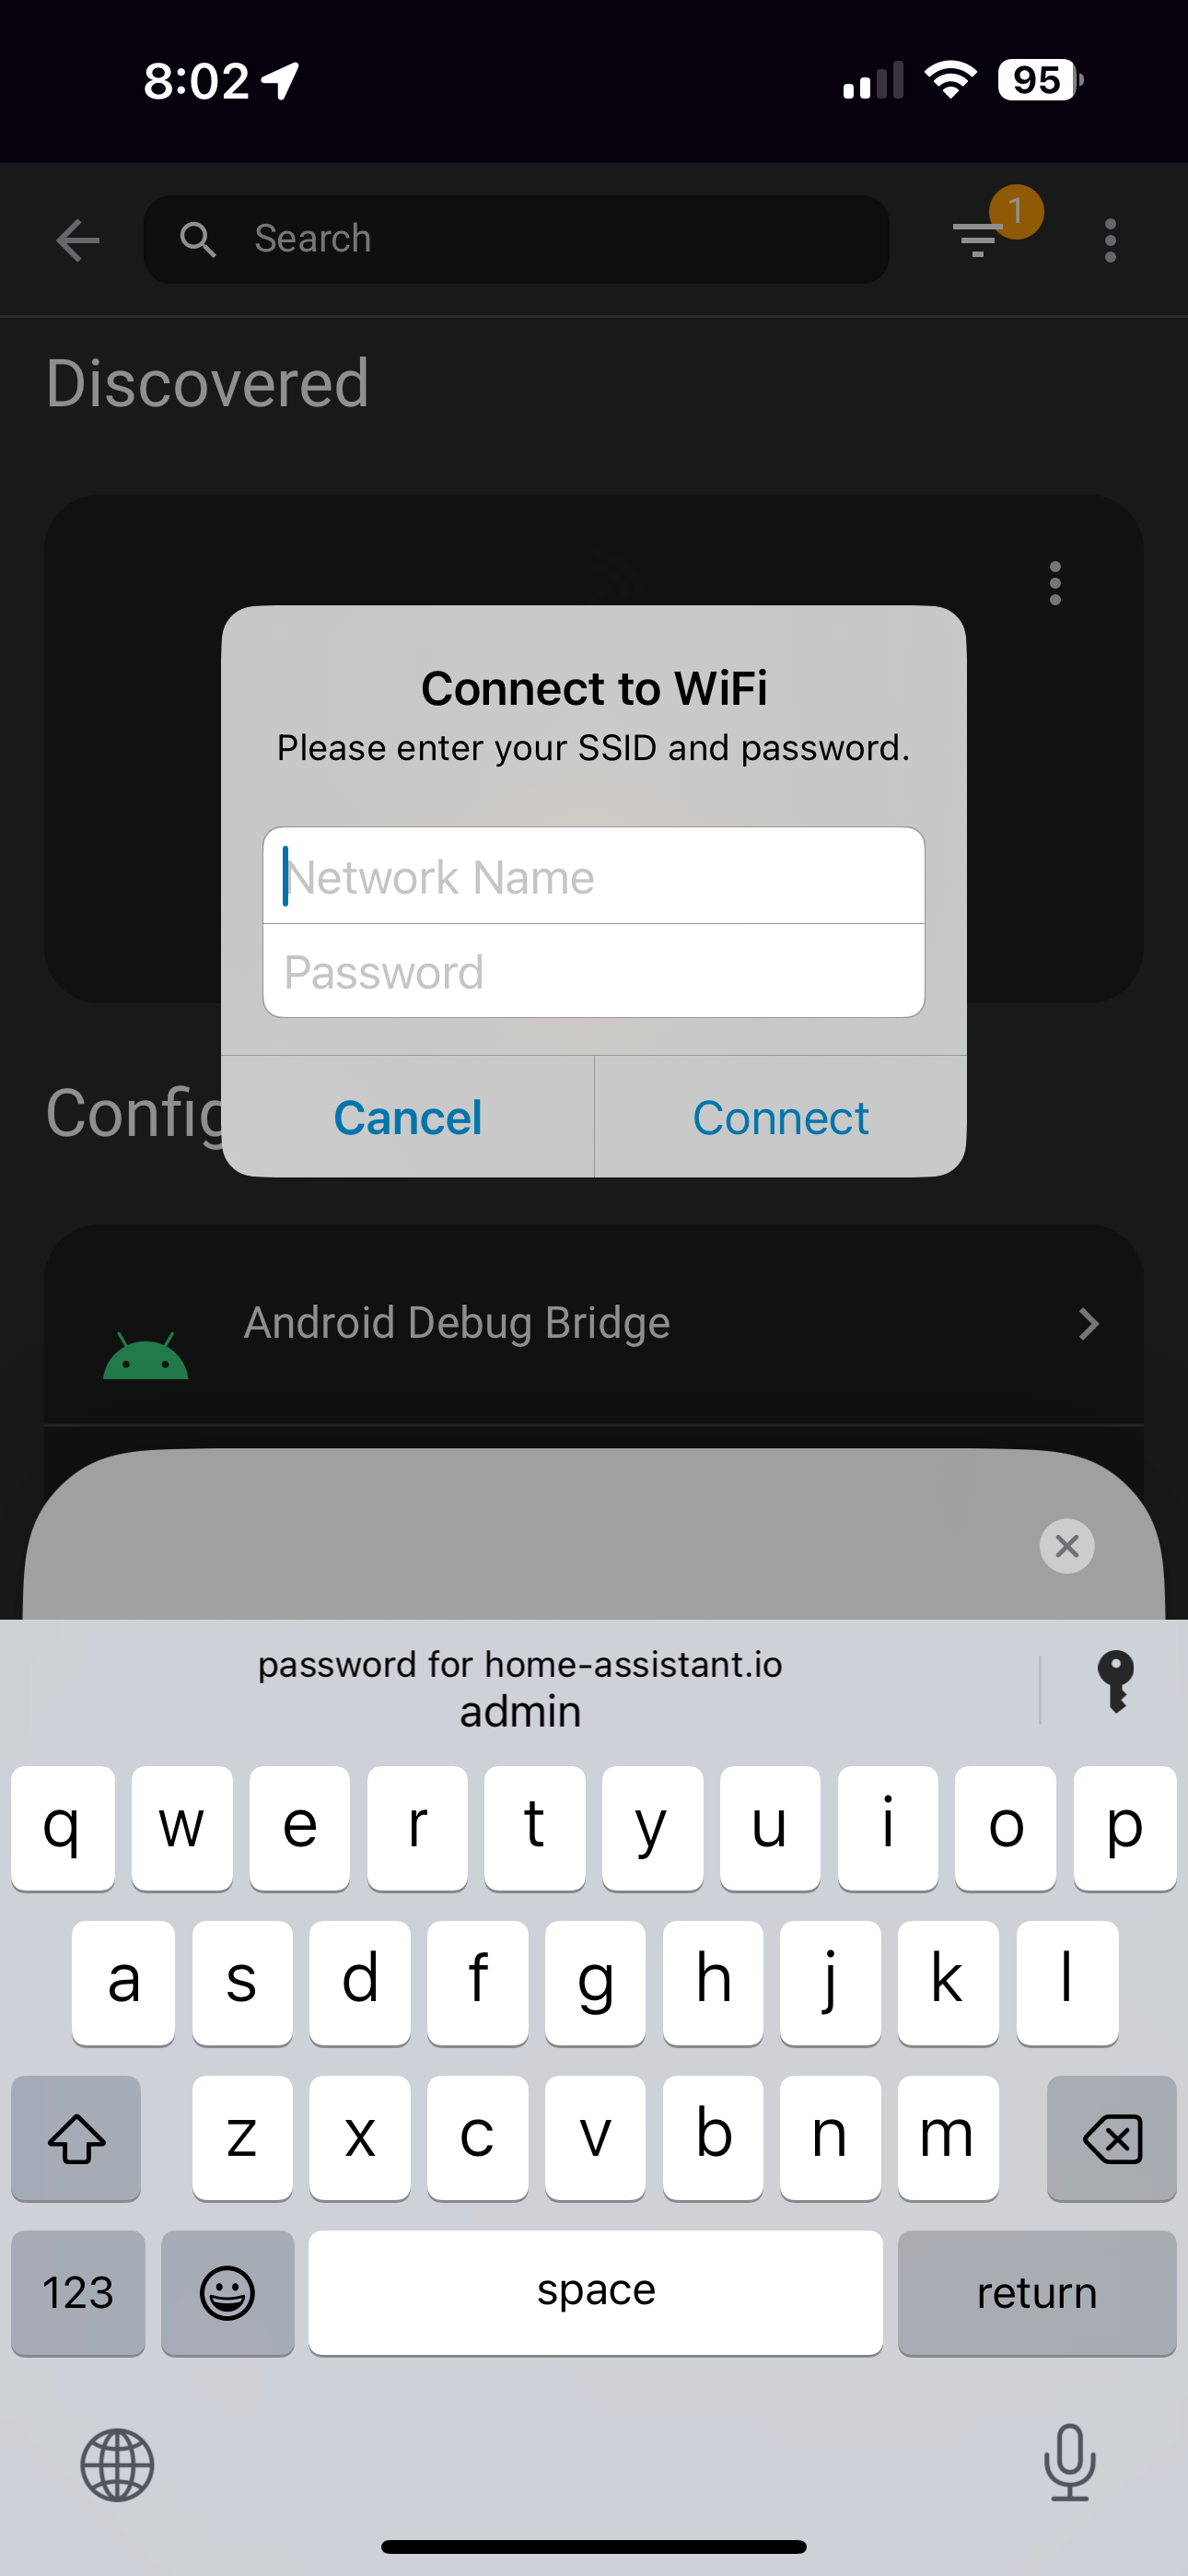 Type in your 2.4 GHz WiFi credentials and click "Connect".
 -
Authorize the WiFi connection
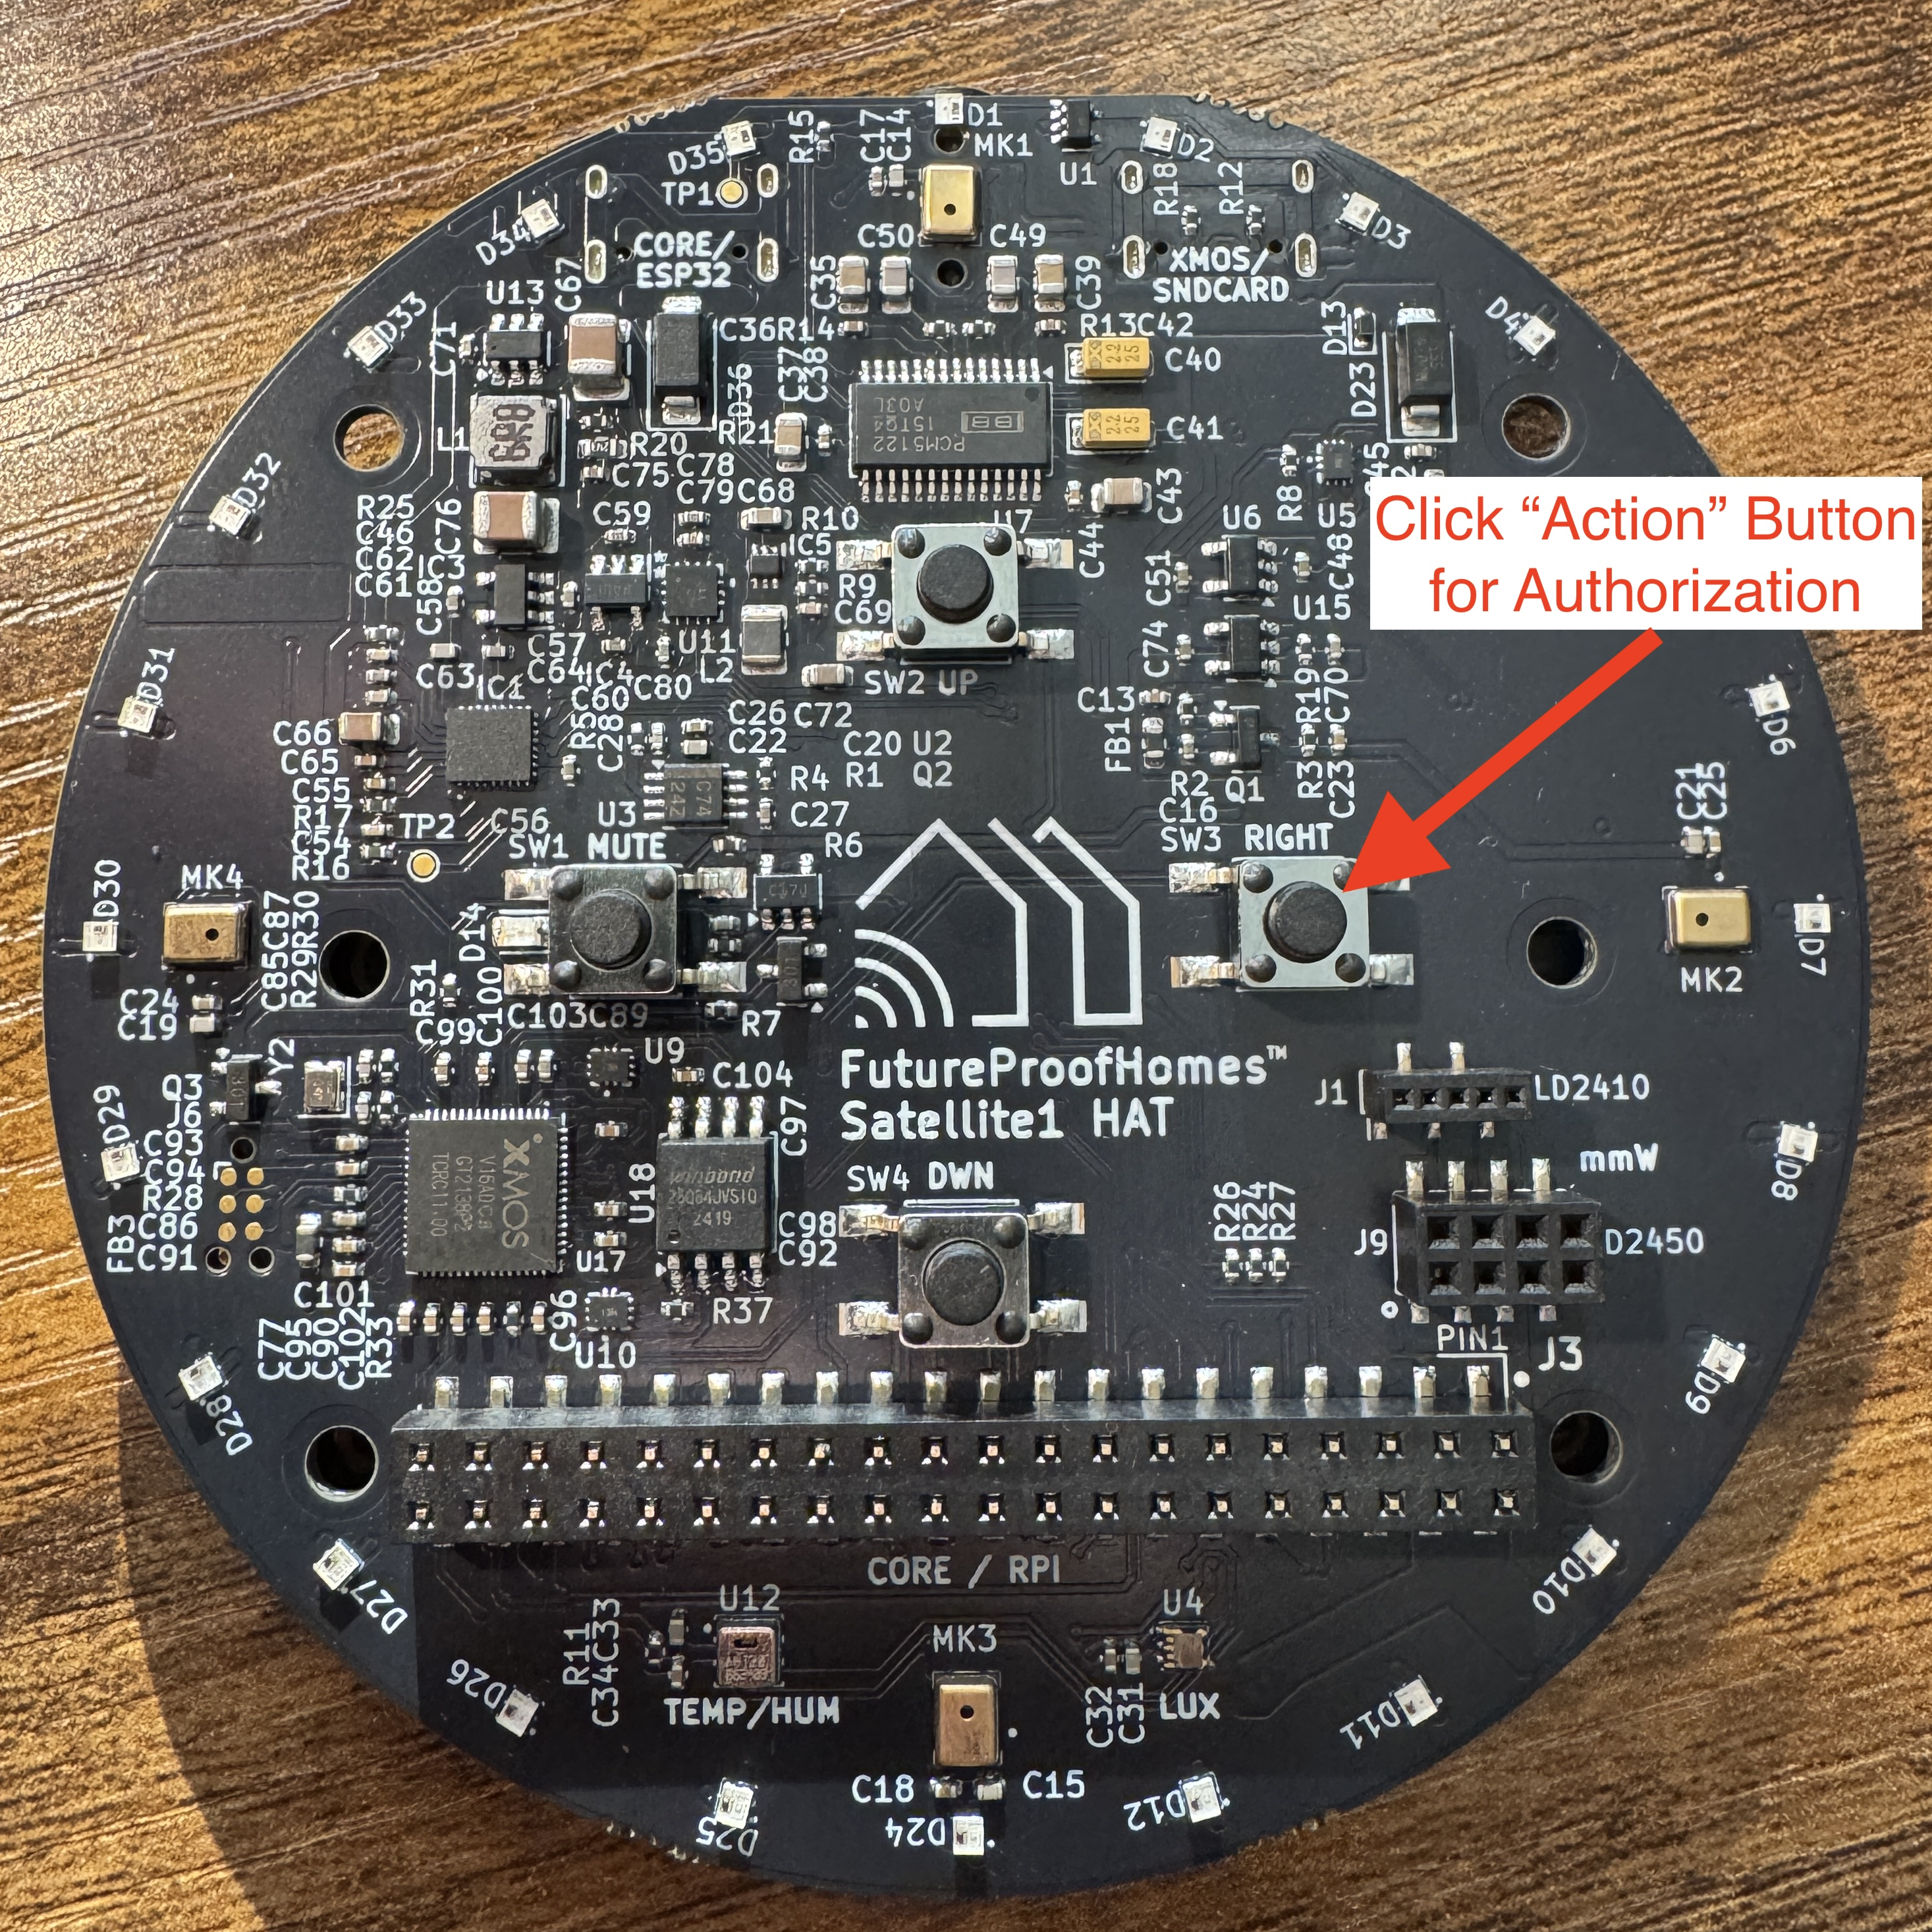 On the Sat1 HAT, press the right "Action button" to give authorization.
 -
Continue to next steps
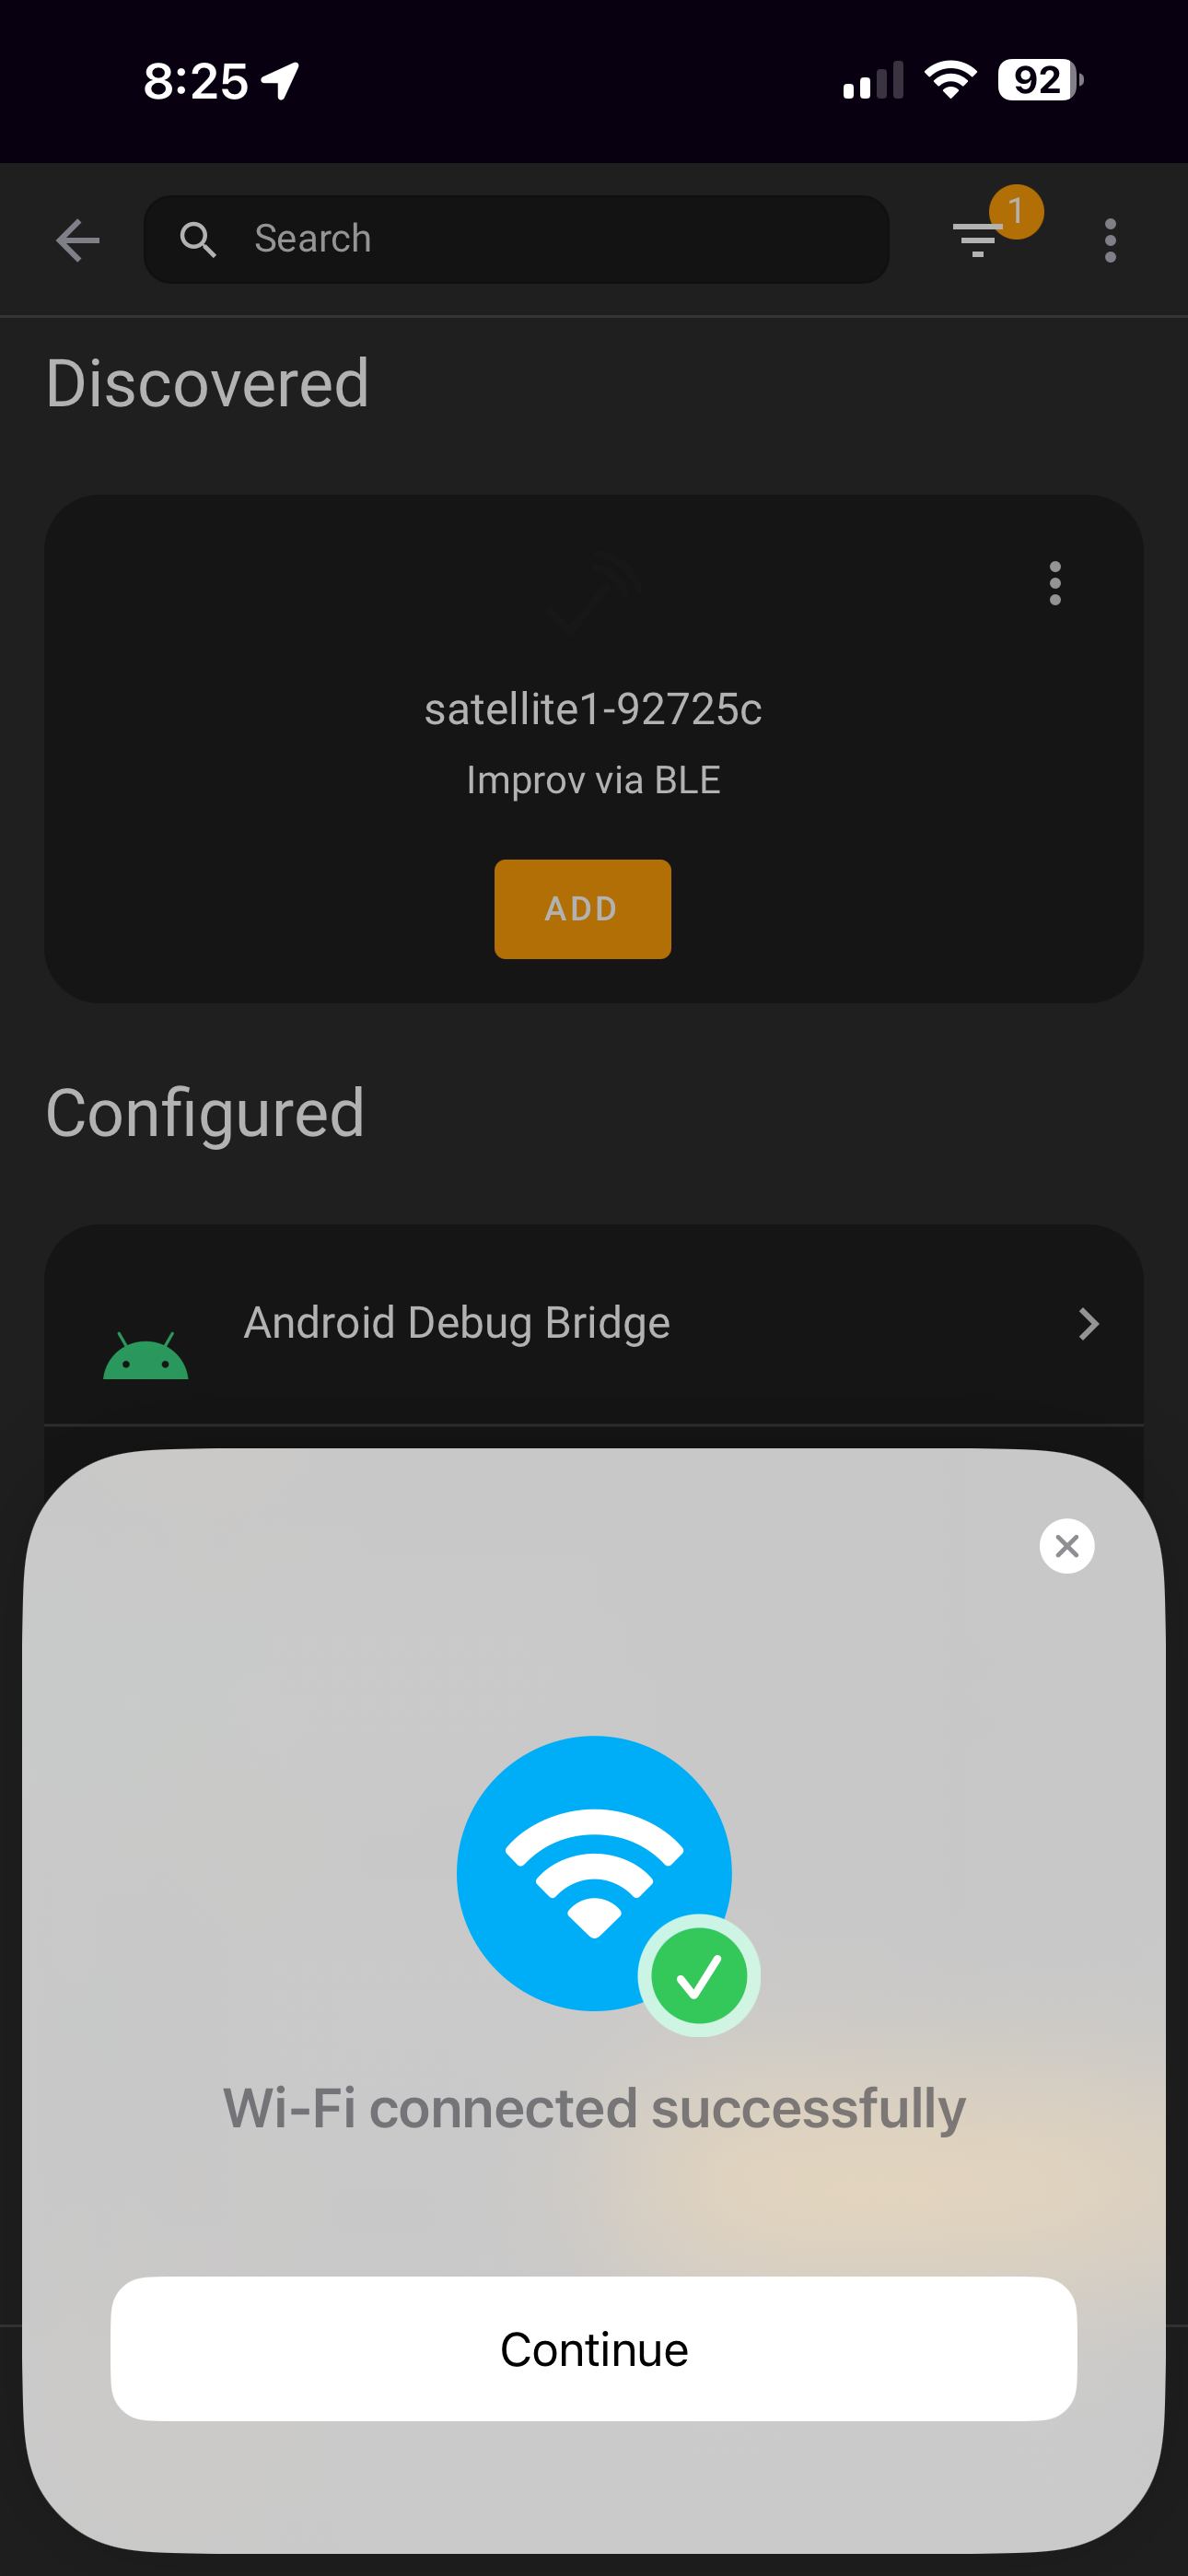 Tap "Continue" after successful Wifi connection.
 -
Add the Sat1 to ESPHome
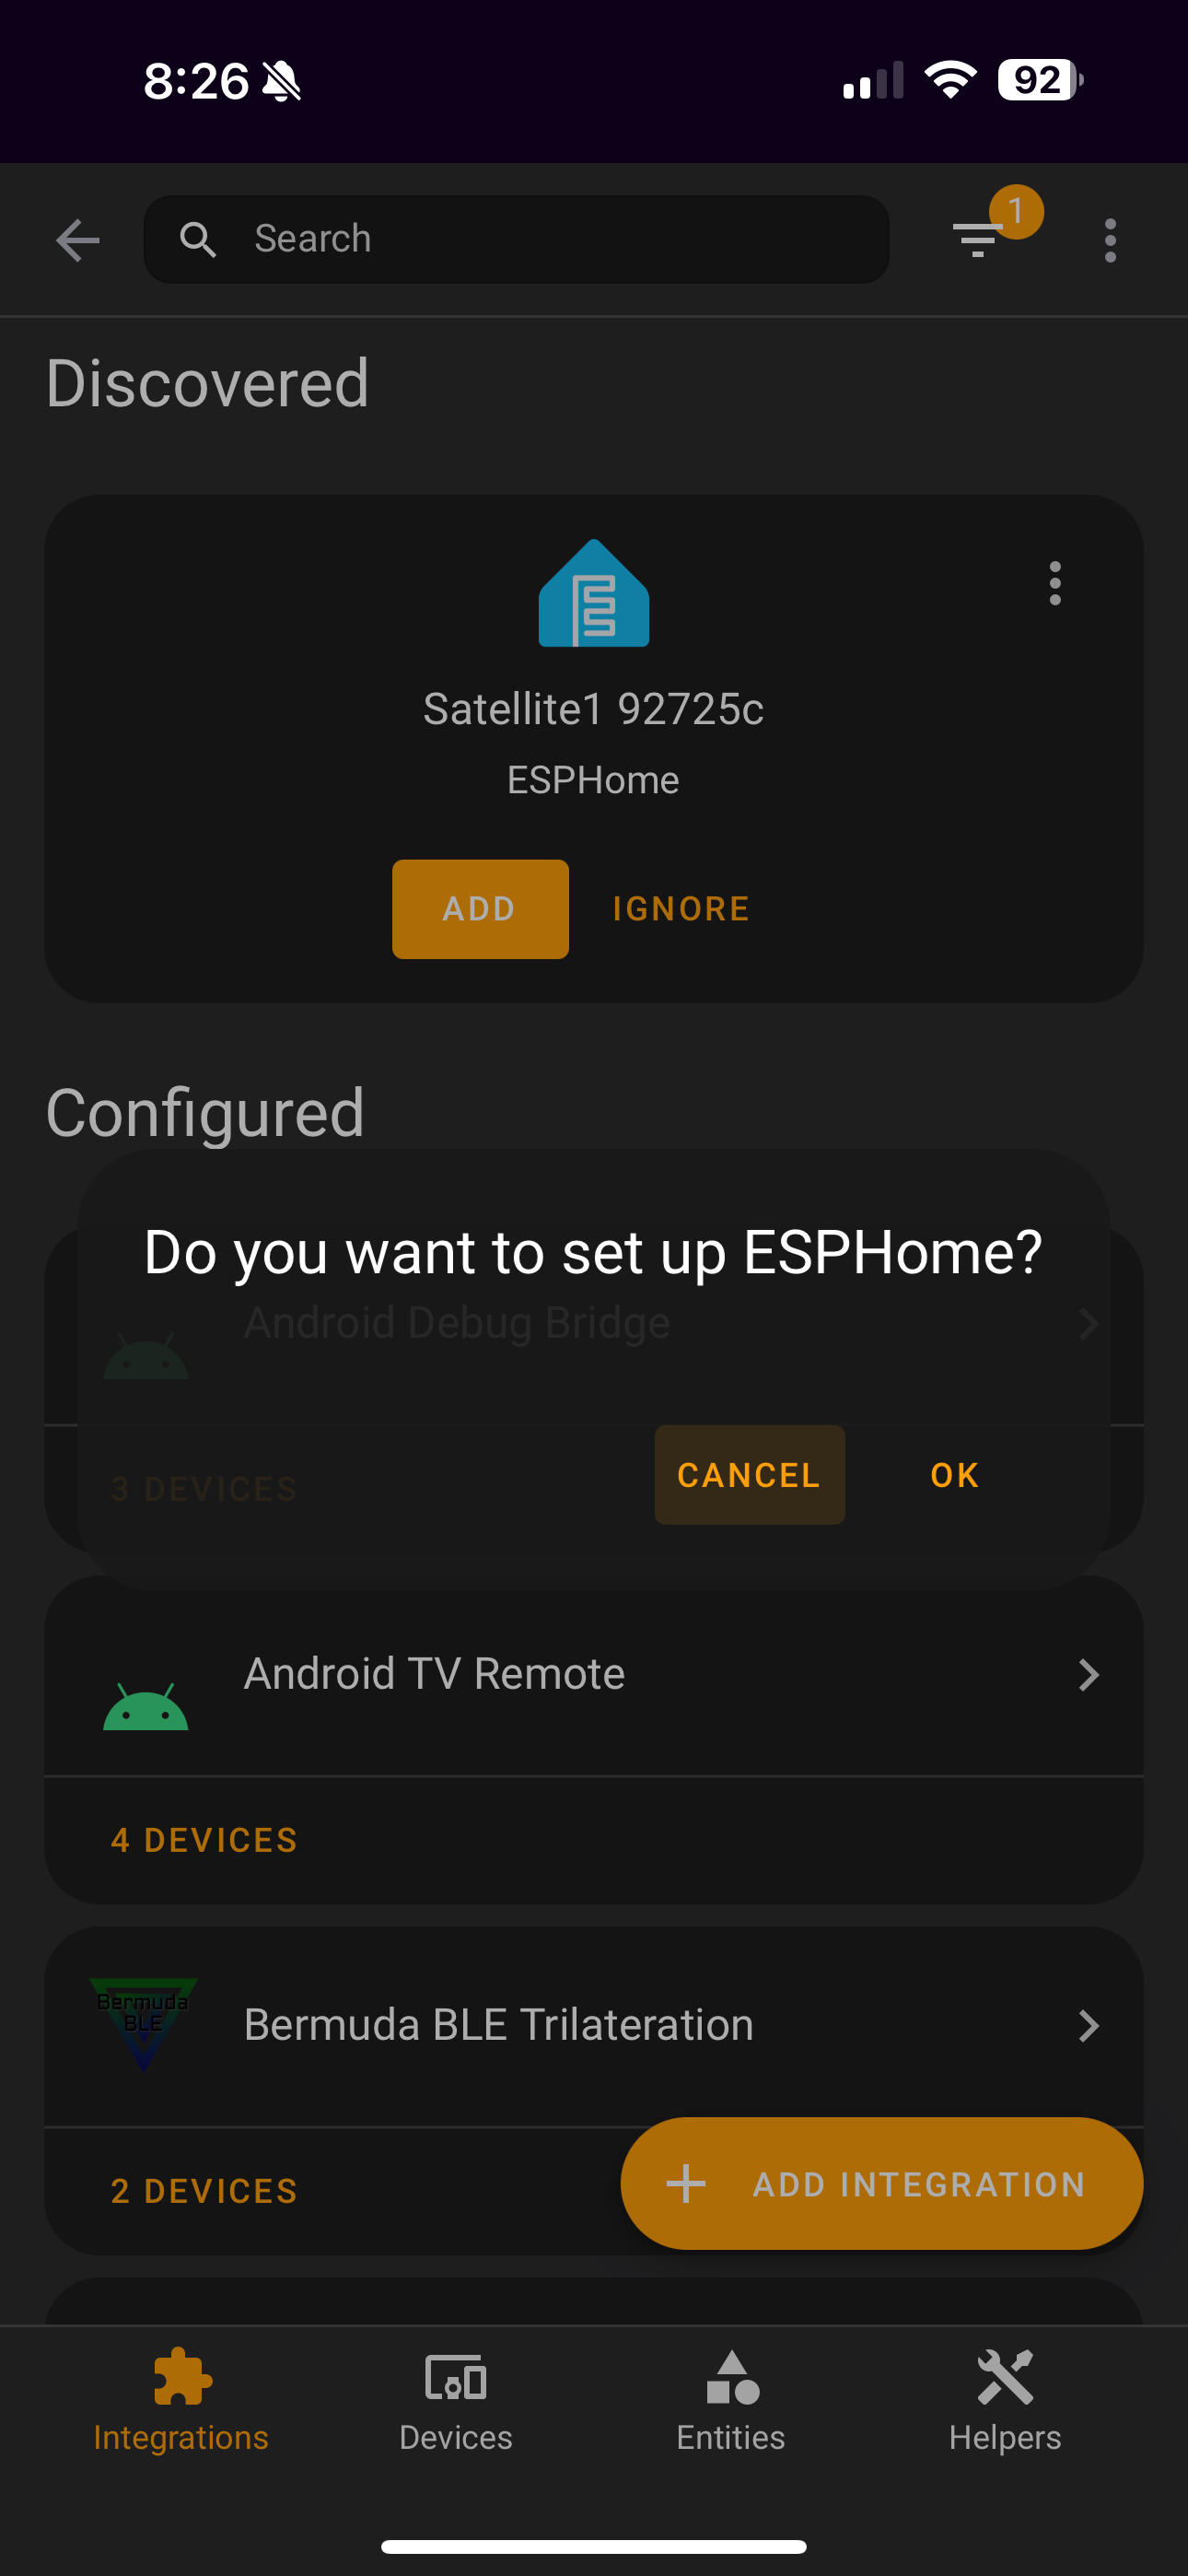 Tap "Ok" to begin setting up ESPHome.
 -
Select Sat1 device to add
 Tap the name of your Sat1 device and then tap the "Submit" button.
 -
Checking updates
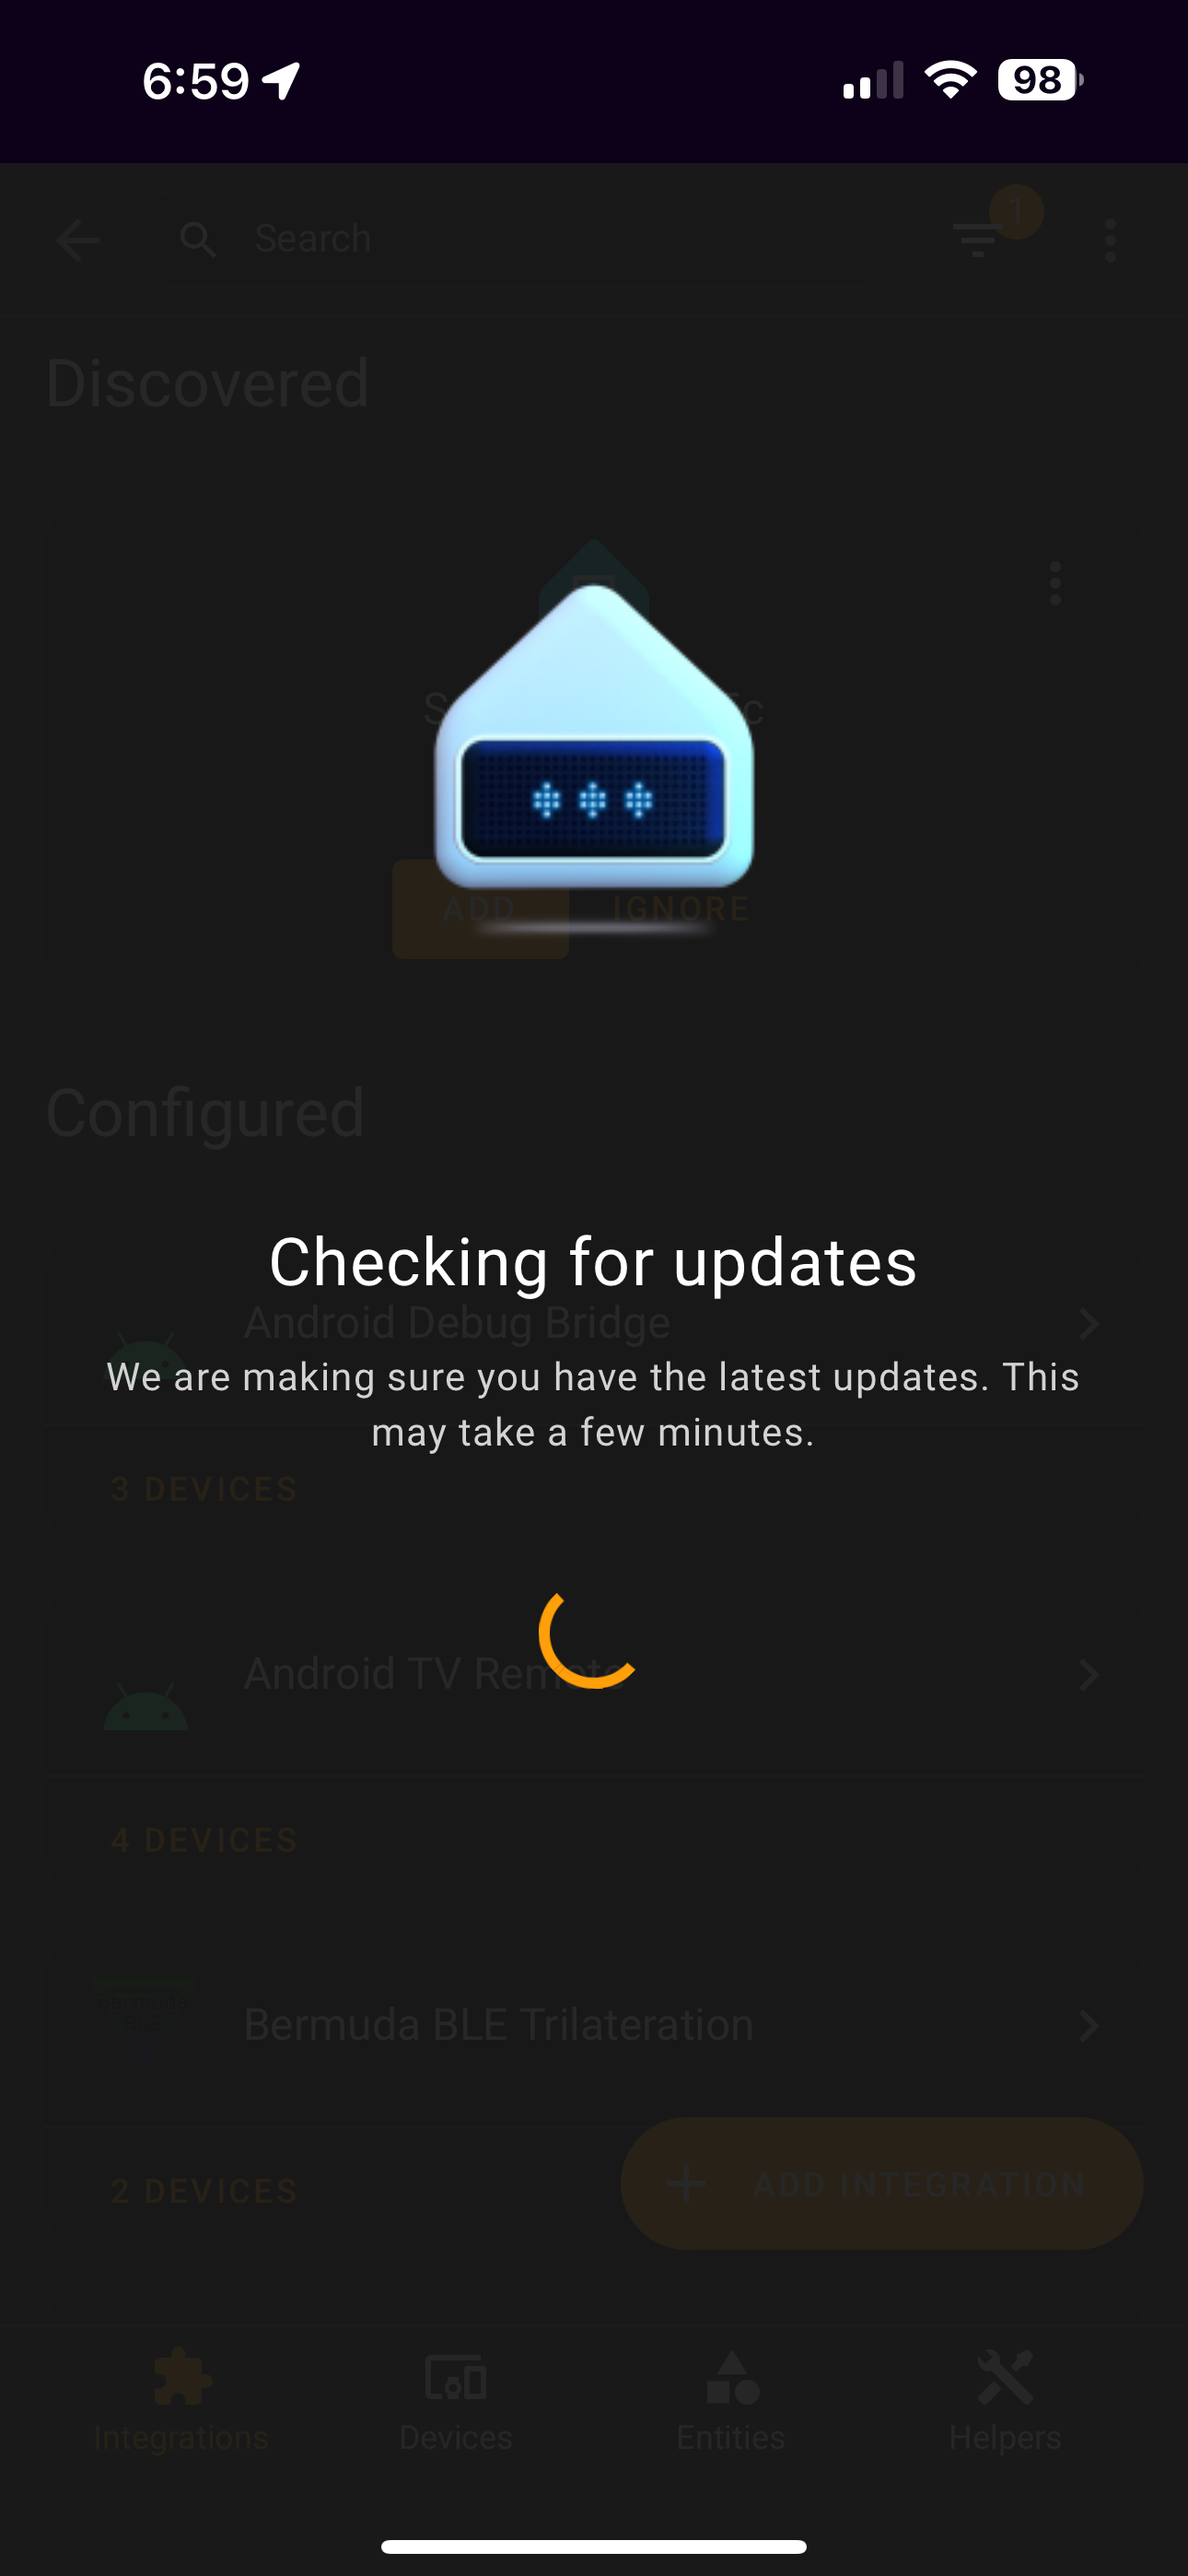 The Wizard will pull down the most recent Sat1 Firmware.
 -
Test Wake Word detection
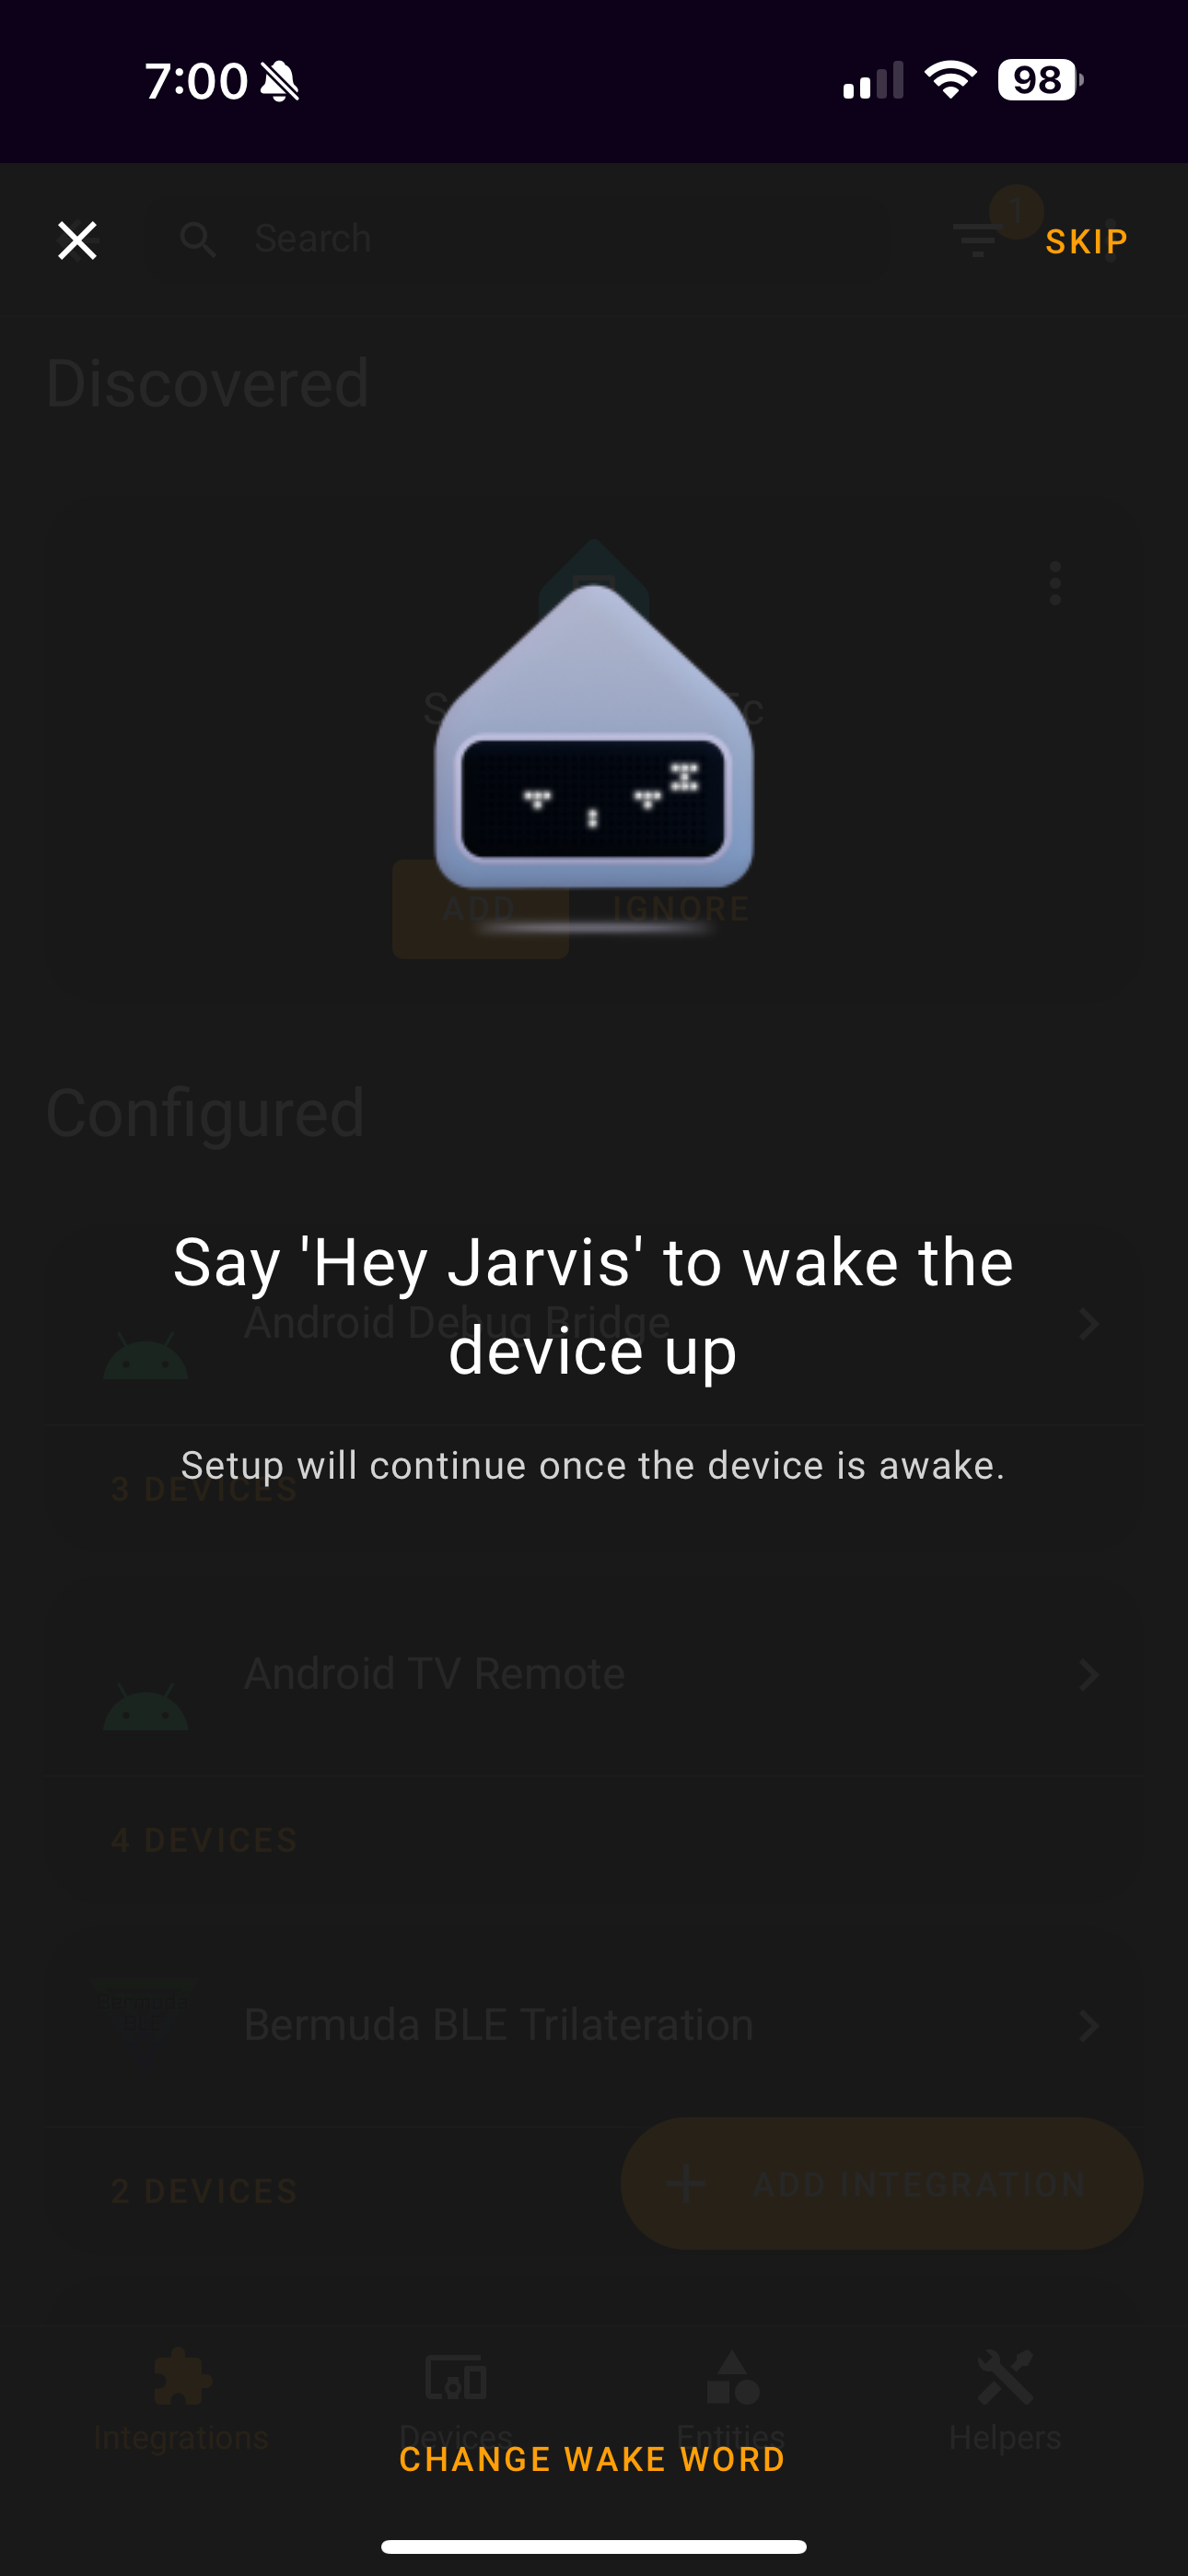 The Wizard will ask you to say the Wake Word twice.
 -
Select Area
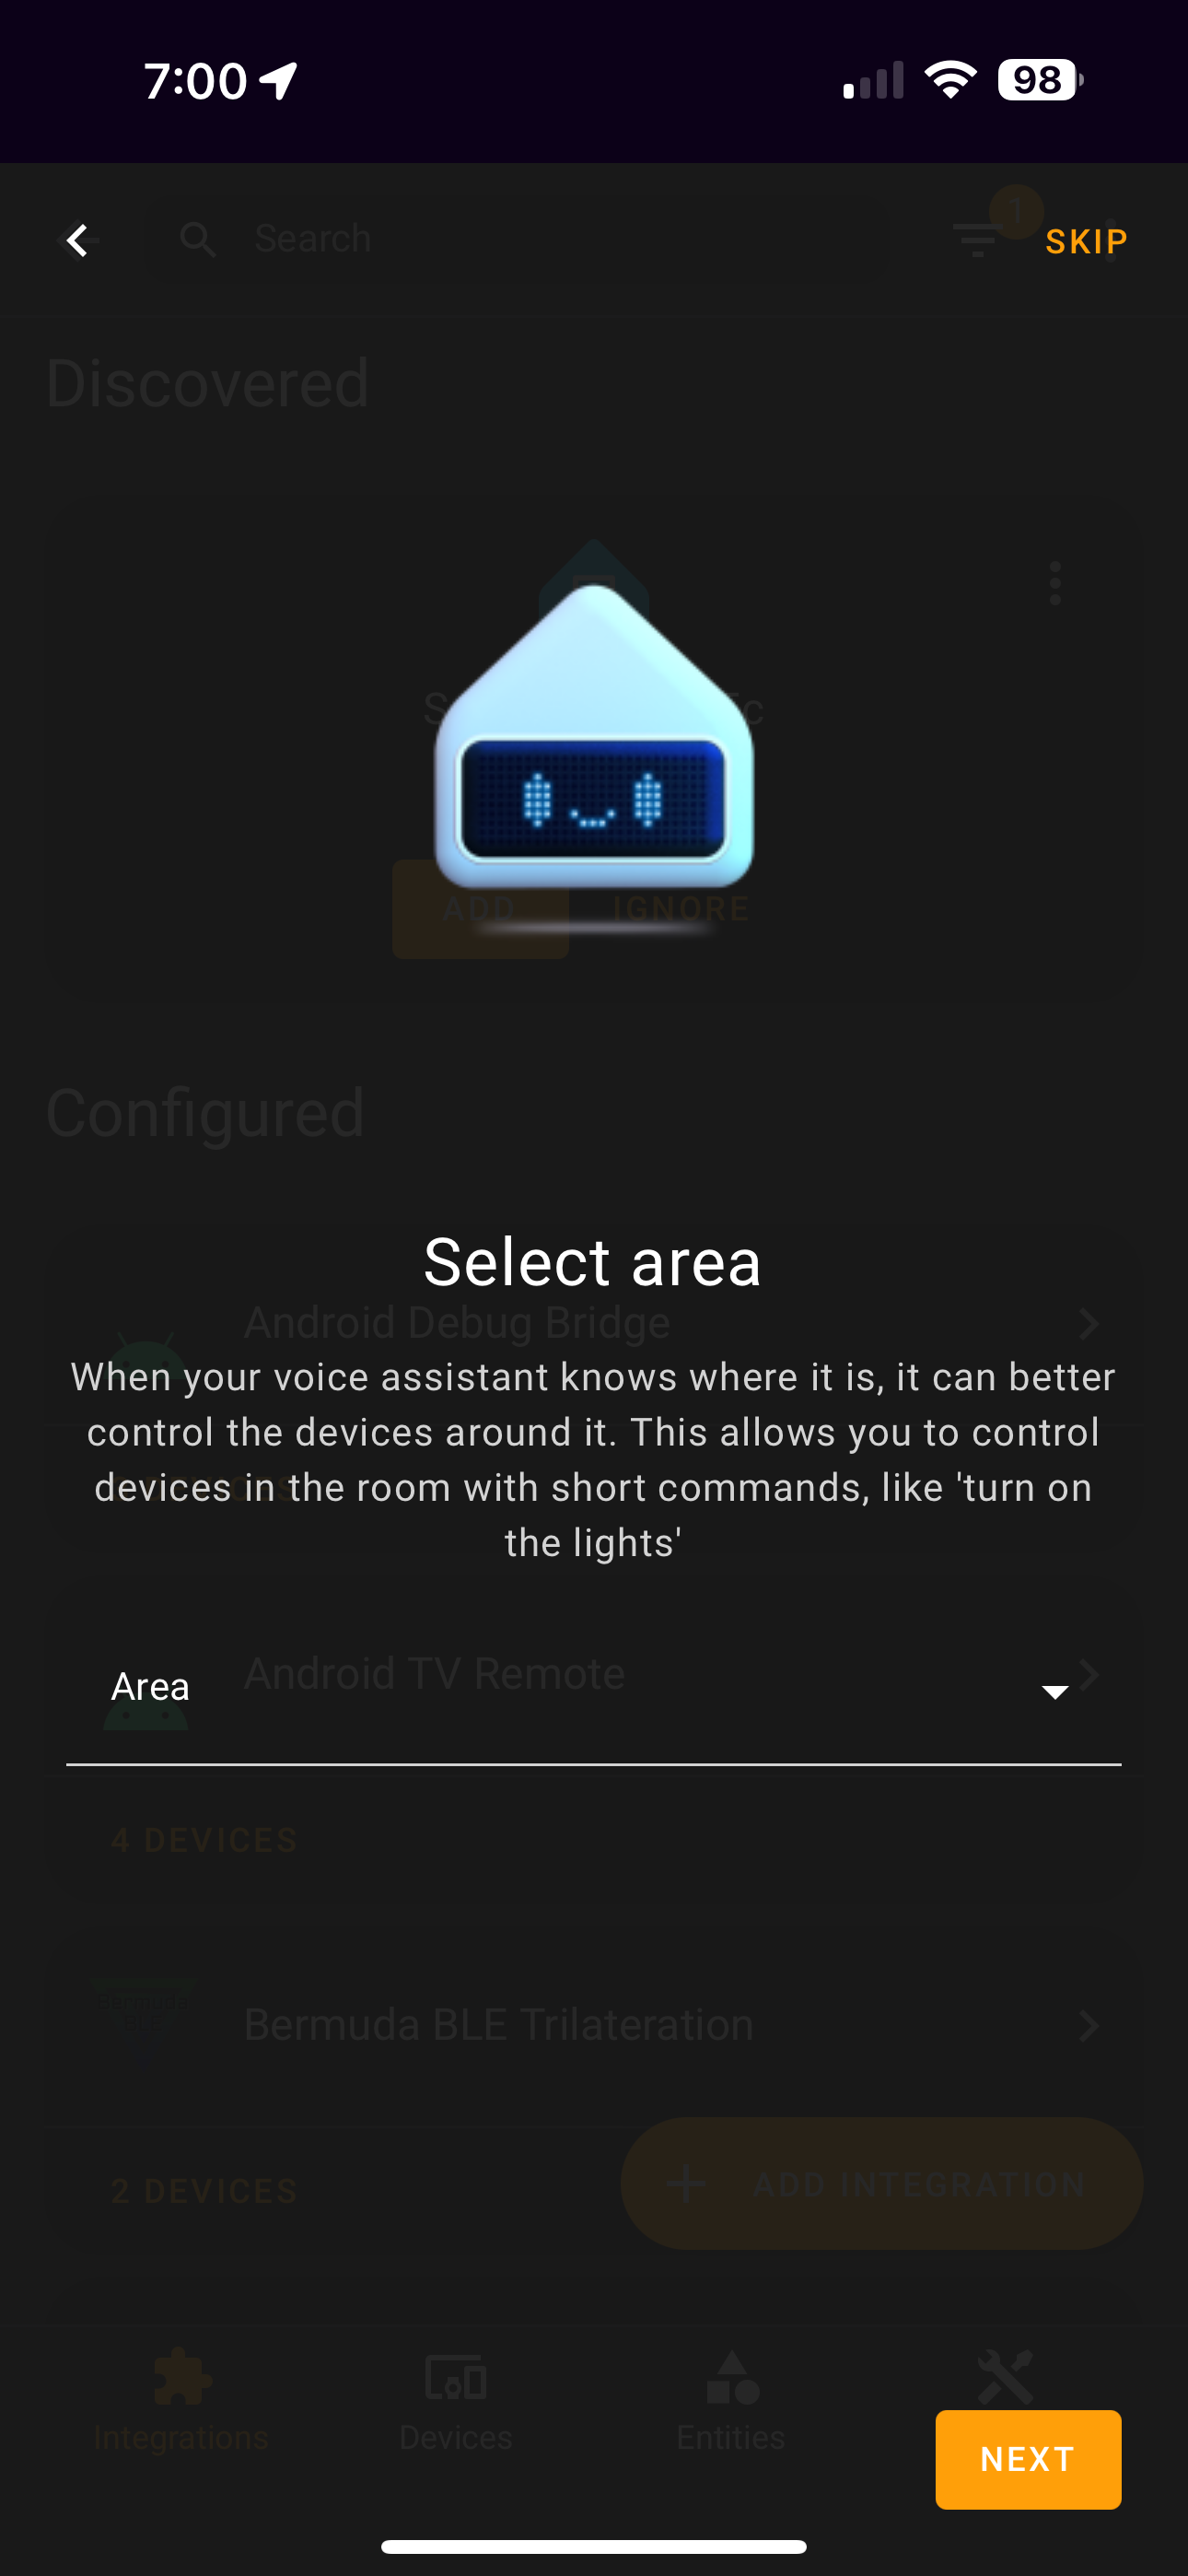 Select the Area that you Sat1 belongs in.
 -
Configure Sat1
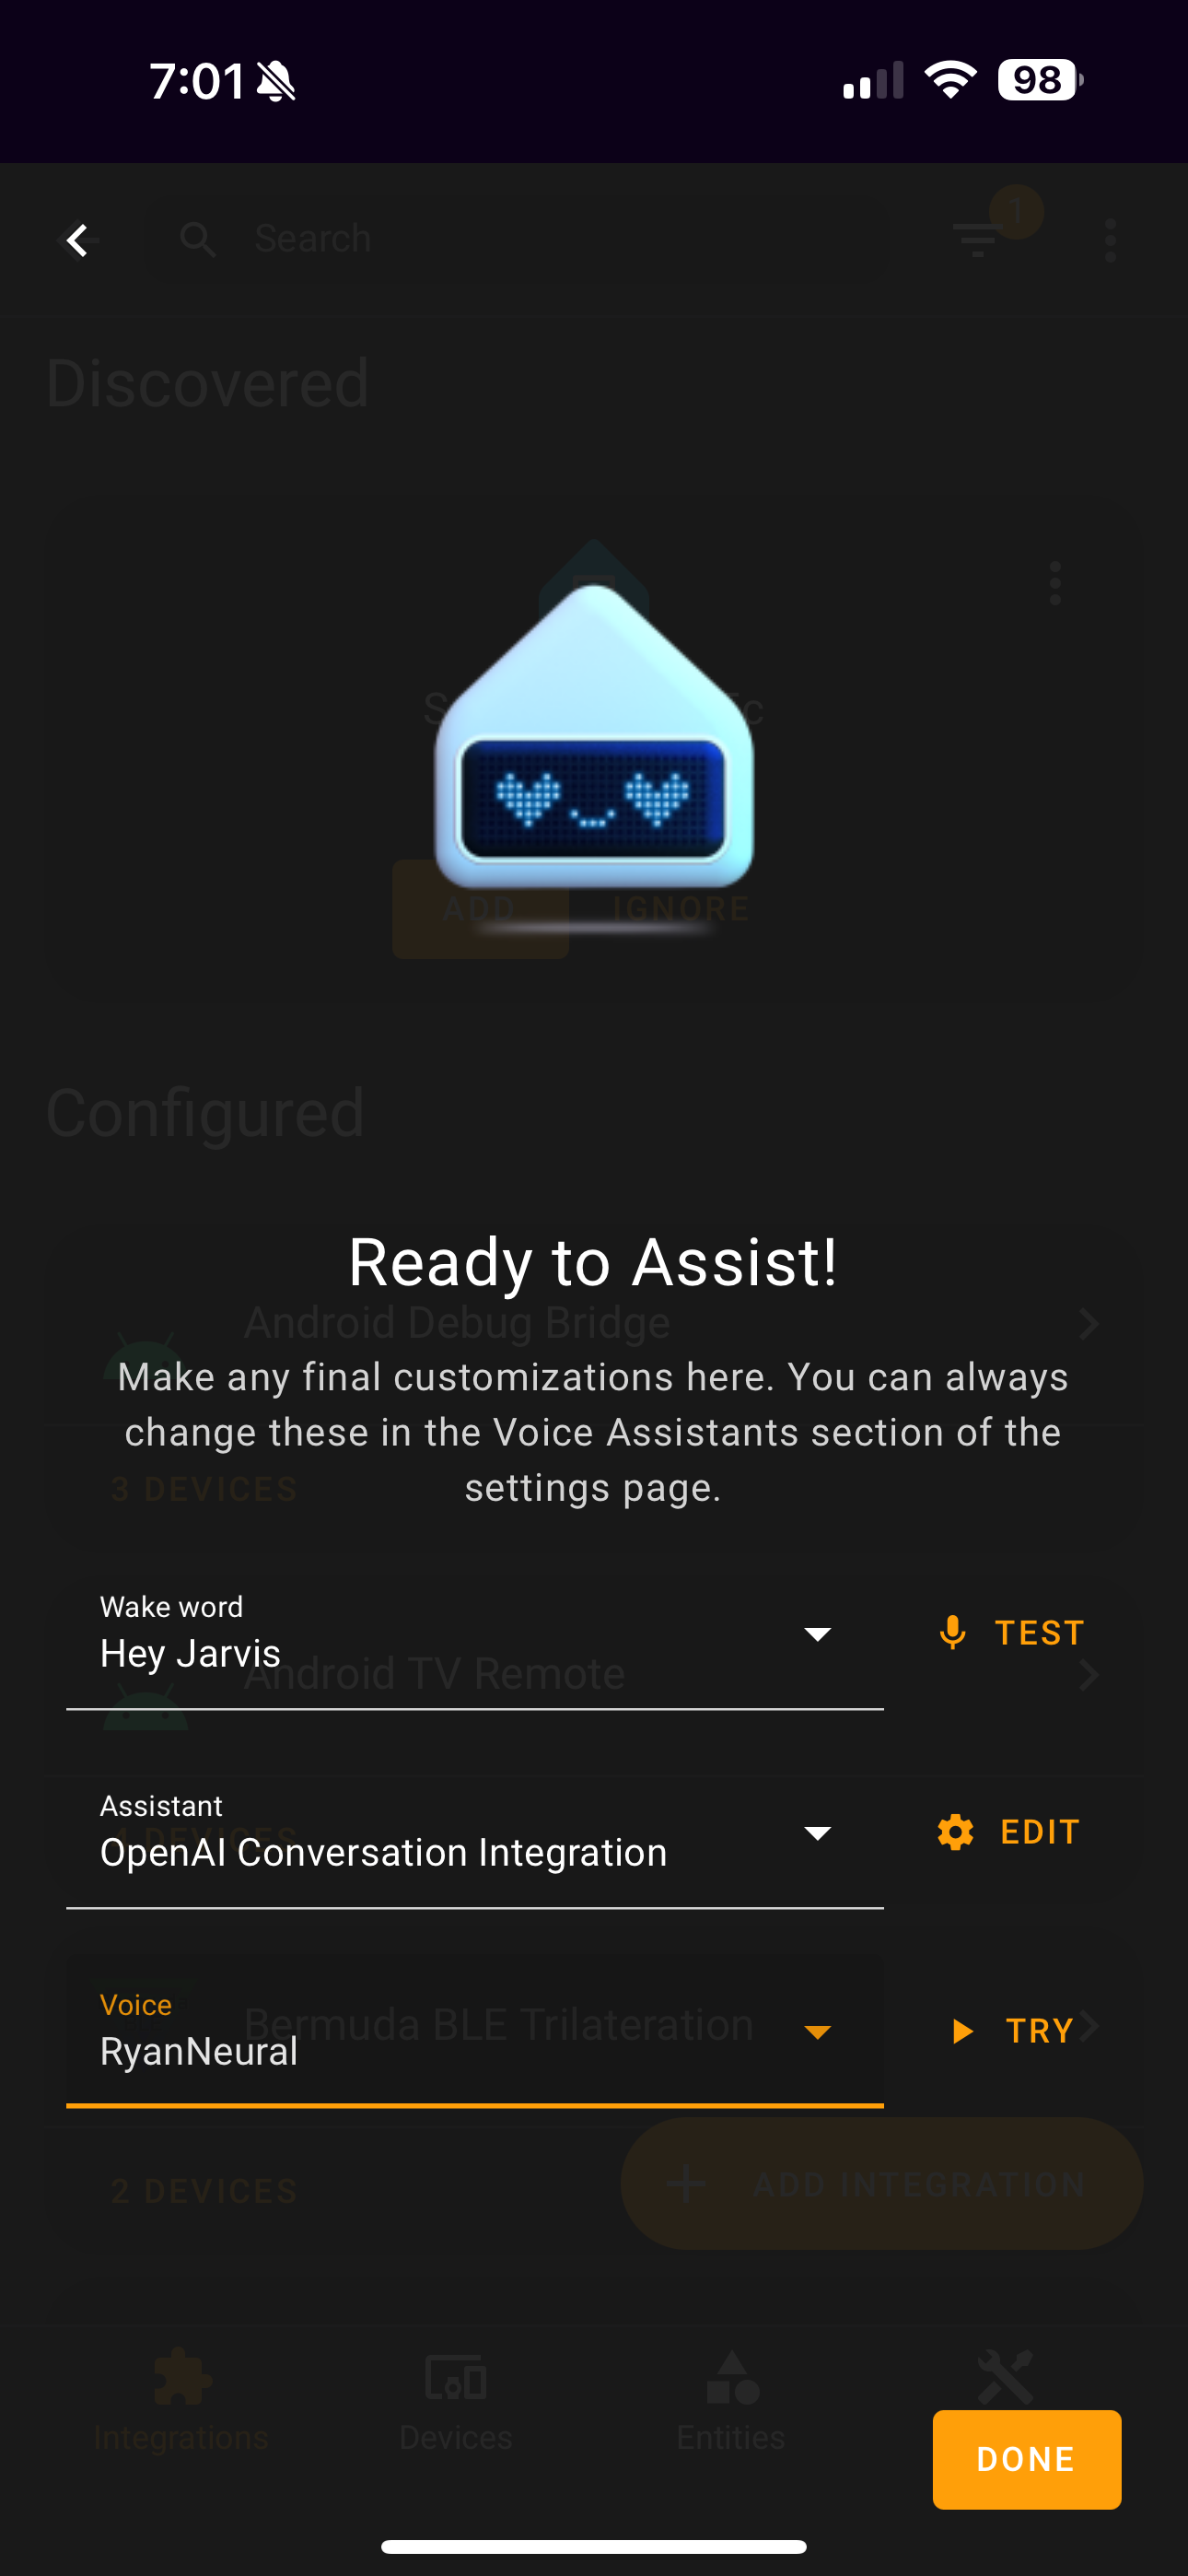 Stick with the default or change the Wake word, Assistant, and Voice.
Success
You have connected your Satellite1 to Home Assistant!
Warning
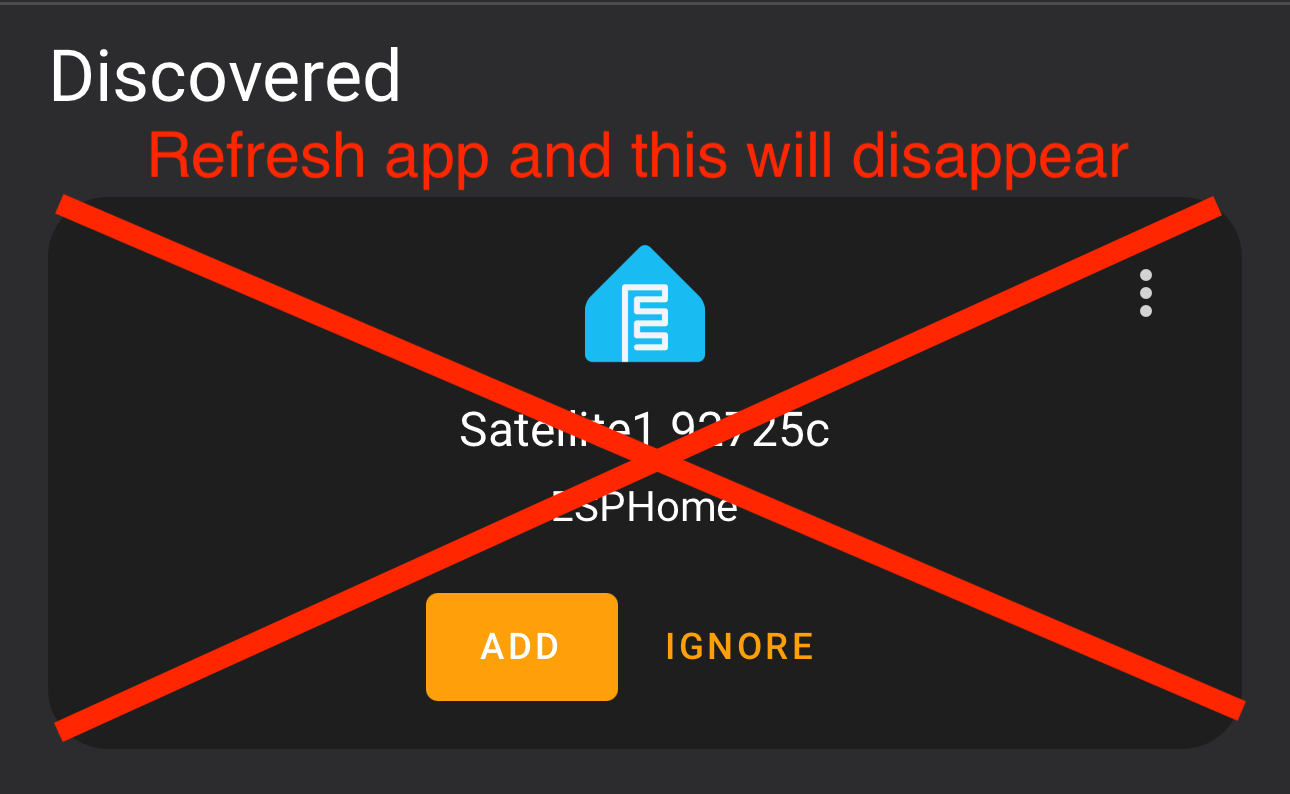 After completing the Wizard, do NOT click to add the Sat1 to ESPHome again. Simply refresh and this will go away.
Understanding the ESPHome User Interface
Once your Sat1 is connected to Home Assistant you should familiarize yourself with all the server-side settings you may want to change:
-
Select Sat1 device from list
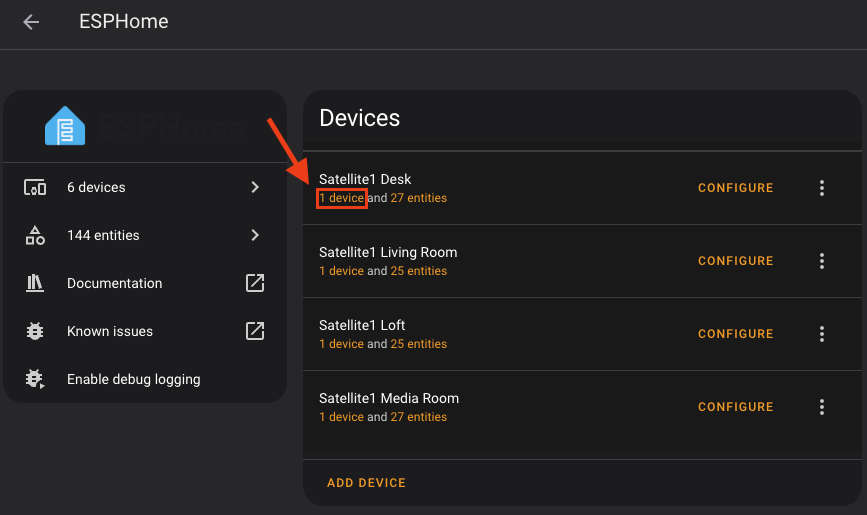 Inside your Home Assistant, head over to "Settings -> Devices & Services -> ESPHome" and click on your Sat1 device.
-
Explore Satellite1 settings
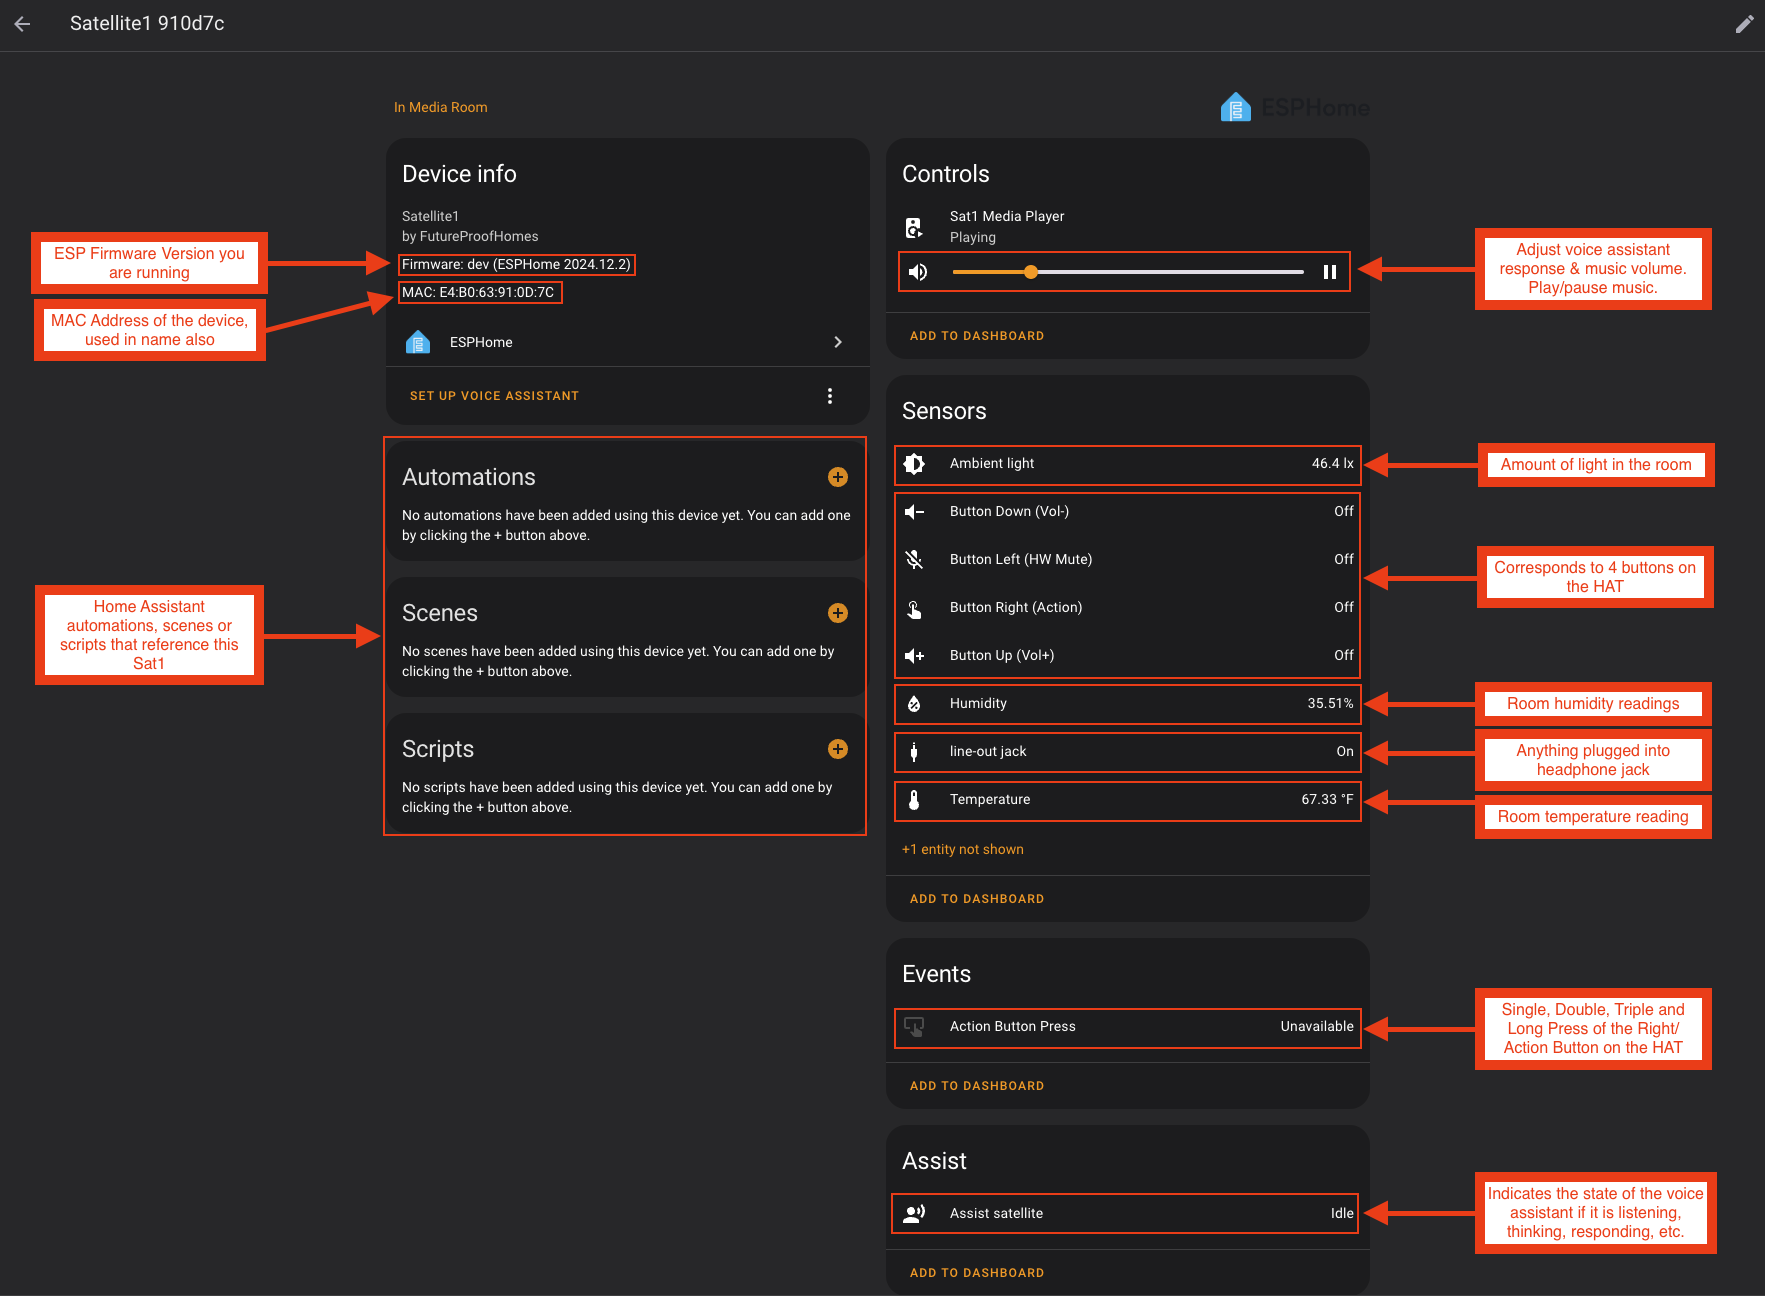
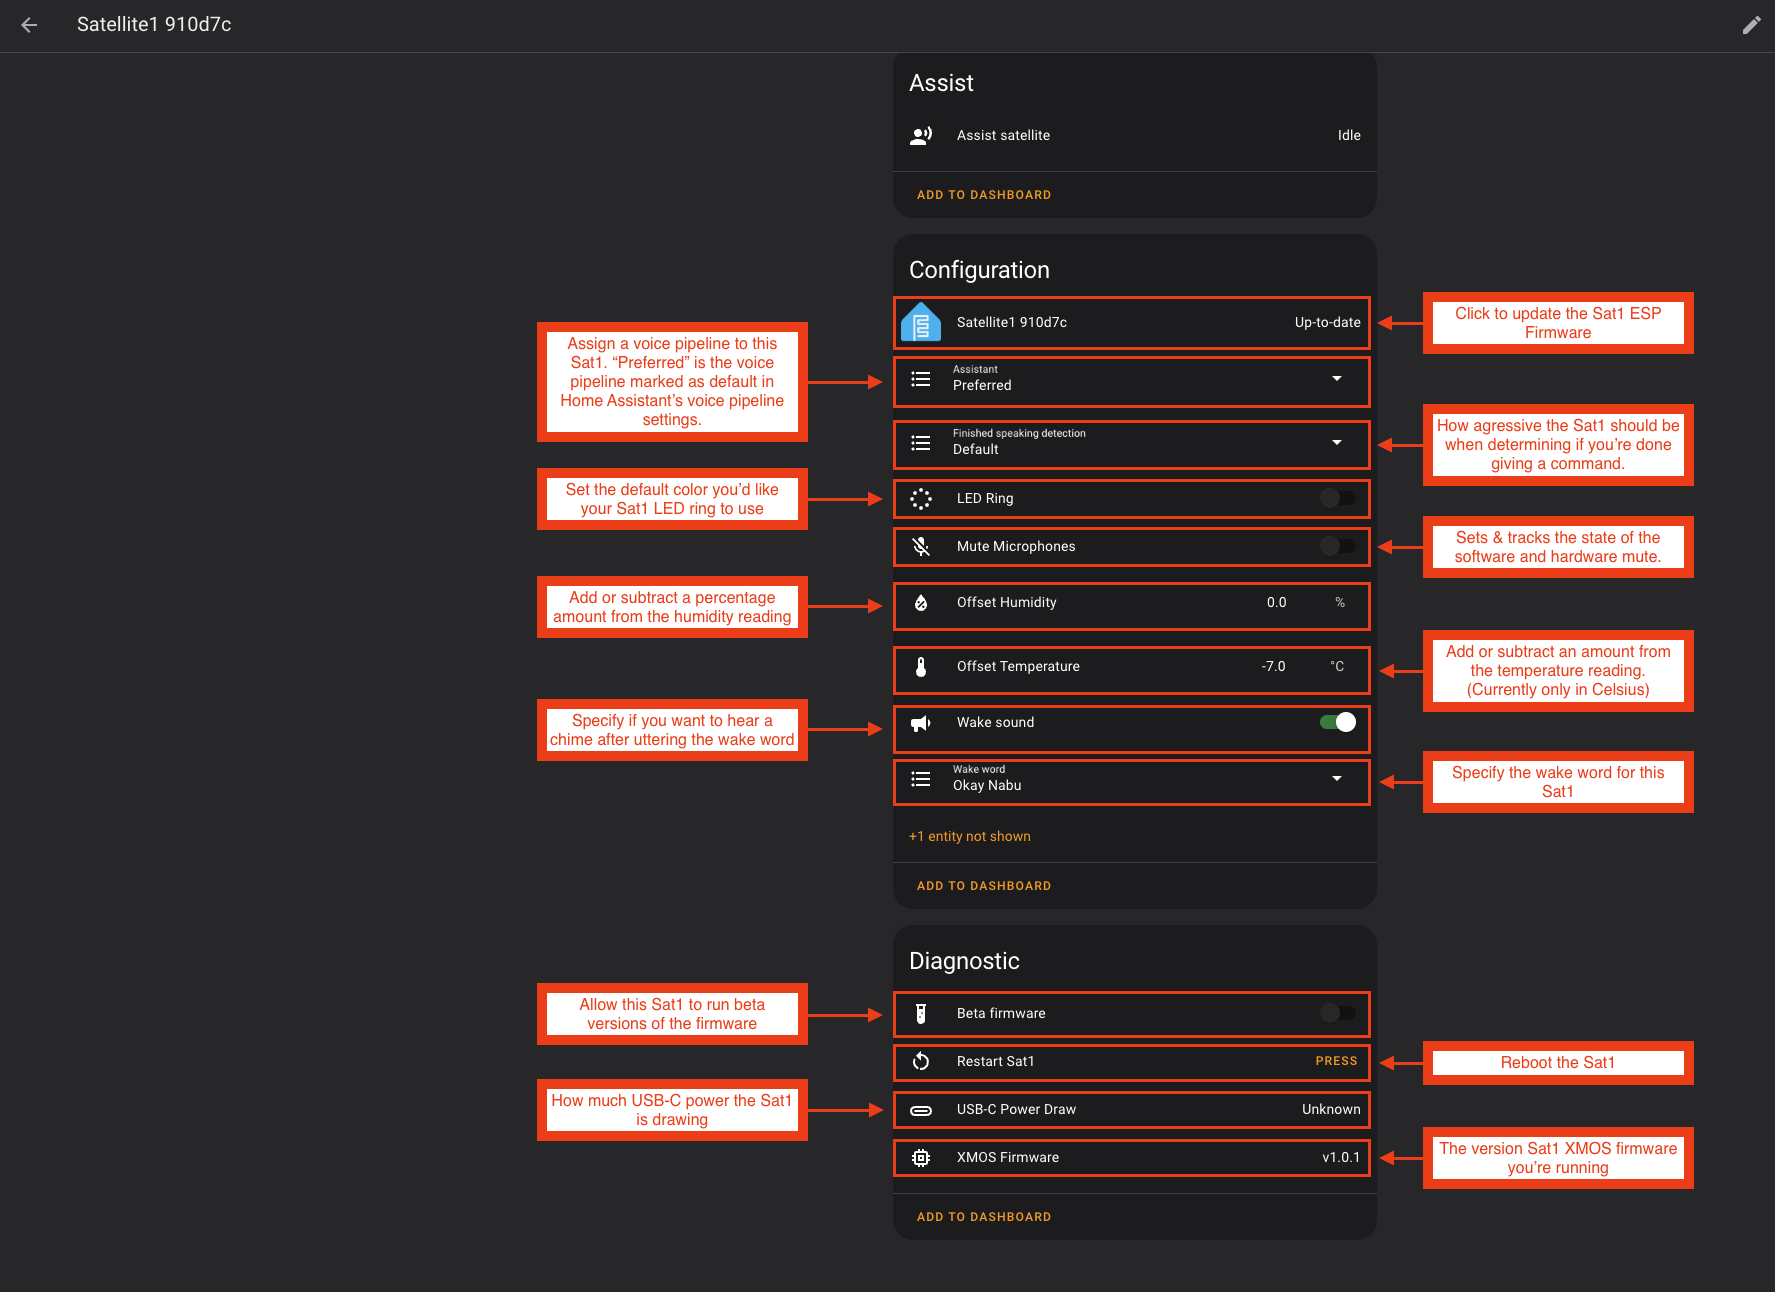 Understand all the features of your Sat1 device.