Troubleshooting
Inspecting Sat1 ESP32 Logs
- Connect the Sat1 to your computer using a USB-C cable.
- Click the connect button below and select the correct JTAG device.
- Choose Logs & Console:
Debugging your Voice Pipeline
Curious why your Sat1 is doing something different than what you'd expect? Use Home Assistant pipeline debugging tools.
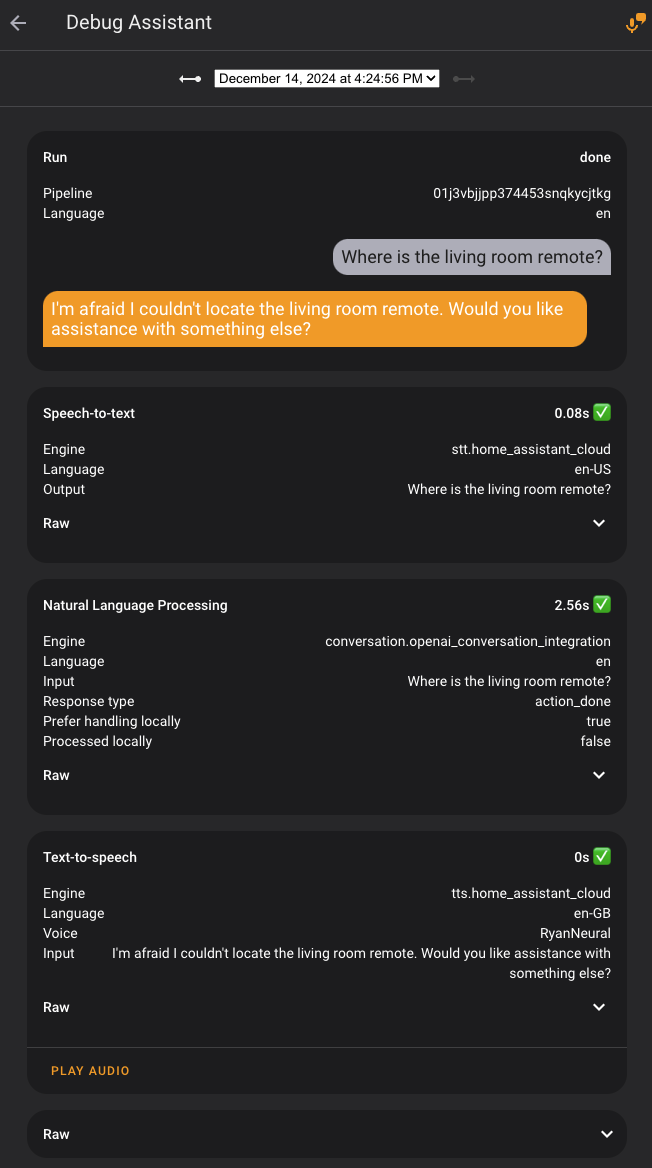
- Determine what pipeline your Sat1 is using by retracing these steps: Assign a Voice Pipeline & Wake Word to your Satellite1
- In Home Assistant, go to Settings -> Voice Assistants and select the 3 dots next to that pipeline.
- Read here: Debugging a Voice Pipeline
Inspect Sat1 Audio Recording Files
Follow these steps to store a copy of your audio recordings in your Home Assistant server for inspection.
- Modify your
configuration.yamlfile and add the following:
- Now go to that path in your Home Assistant (recommend using Studio Code Server) and listen to the files there.
- Don't leave this on forever, it will clog up your server with audio recordings.
Clear WiFi Credentials to Restart BLE Improv
-
Press and hold the RIGHT (Action) button for approximately 22 seconds until the red LEDs complete their clockwise circle. When the LEDs glow blue you can release the action button and wait as the XMOS chip is erased. This process may take a few minutes before the Satelllite1 finally reboots to the factory firmware. Upon first boot you will see the blue LEDs complete another clockwise circle indicating the XMOS is being flashed with the facory embedded firmware.
-
Follow the steps to Add your Satellite1 to Home Assistant
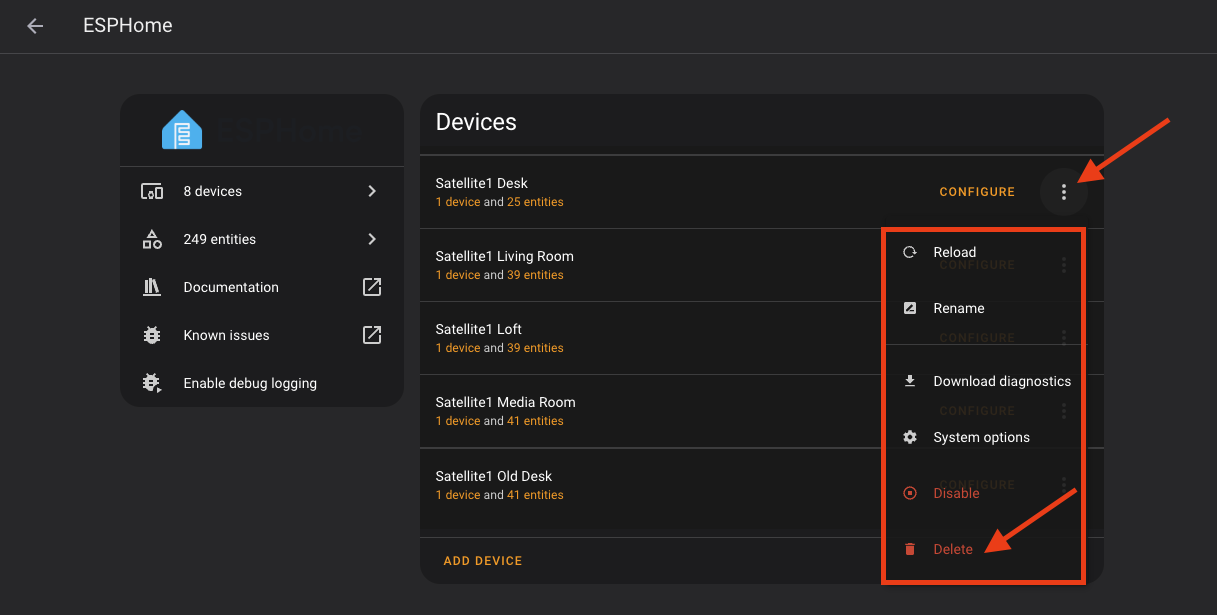
Removing the Sat1from ESPHome
- In your Home Assistant, go to Settings -> Devices and Services -> ESPHome and click the 3 dots next to the Satellite1 and select "Delete".
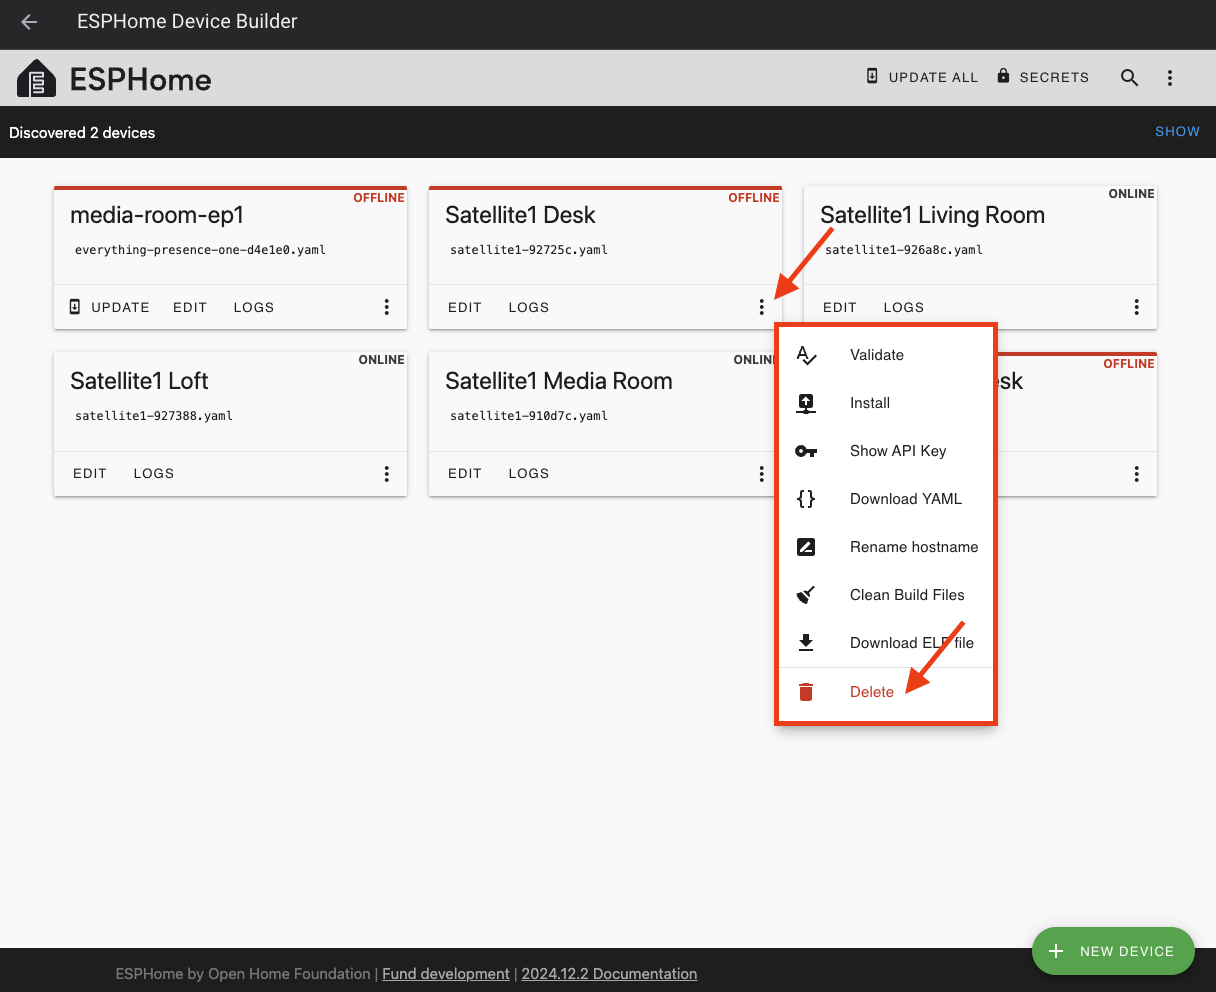
- If you "Took Control" of the Sat1 in your ESP Home Device Builder then go to Settings -> Add-Ons -> ESPHome Device Builder and open the Web UI to click the 3 dots next to the Satellite1 and select "Delete".
Force the CORE Board into Boot Mode:
- Unplug the Sat1 from power.
- If the CORE is mounted to the HAT, press and hold the Right/Action button on the HAT, then apply power to the HAT's "ESP32/CORE" USB-C port. Let go of the Right/Action button after 3 seconds.

- If the CORE is NOT mounted to the HAT, press and hold the "Boot" botton on the CORE, then apply power to the CORE's USB-C port. Let go of the "Boot" button after 3 seconds.
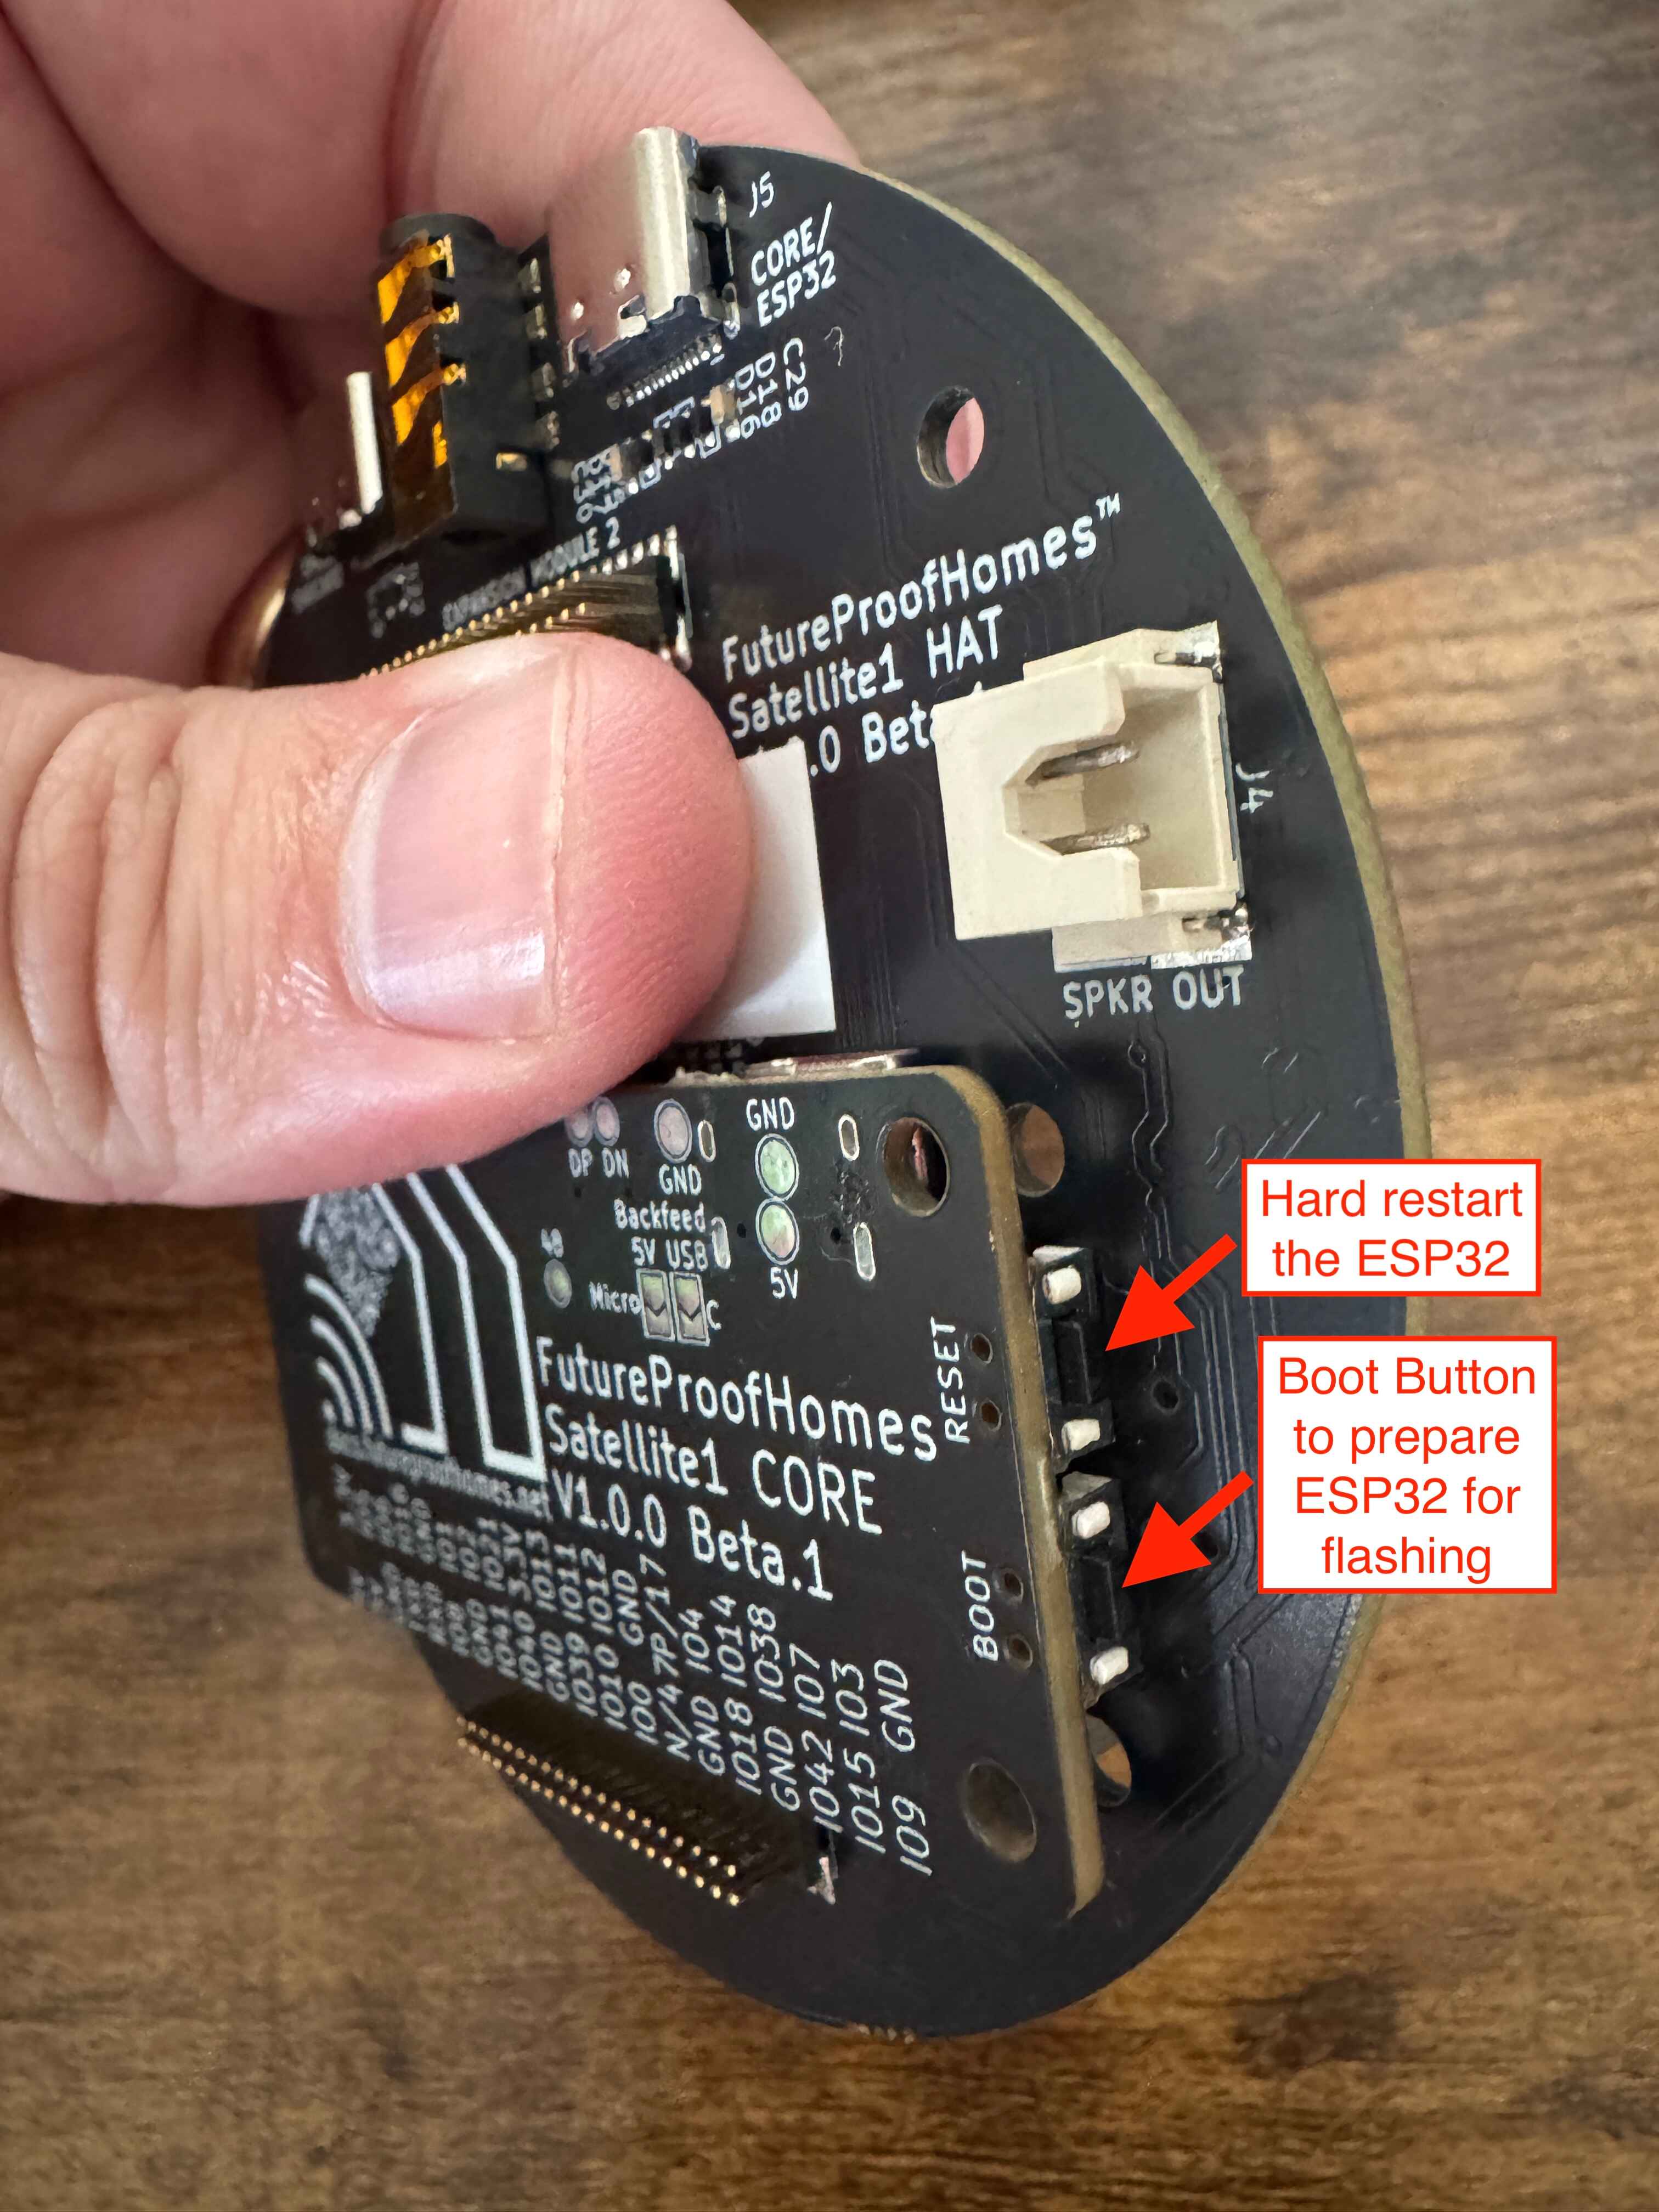
- From here you can Flash the Sat1 via a USB-C cable
Need More Help?
While we hope this documentation will answer all your questions, but we realize support is sometimes needed. The FutureProofHomes team will do their best to keep up with support requests, but we also lean on our community to help all of us. See the links below and decide which method of support is best for your needs.
Have a general question and need quick help from the community?
Do you have a feature request you'd love to see?
Look through our existing Feature Requests first, then open a new request if necessary:
Request a New Feature on Github
Have you found a reproducible issue with the hardware or software?